
When it comes to managing a business, organization is key. From tracking expenses to managing payroll, having the right tools in place can make all the difference. In today’s digital landscape, businesses rely on software solutions to simplify these processes, allowing them to focus on growth and customer satisfaction. QuickBooks Online is one such powerful tool designed to streamline financial management. Among its many features, adding products and services is an essential task for any business selling goods or offering services. This means that you can easily add products and service items to QuickBooks Online to streamline the entire process.
Whether you sell products or deliver services, this feature ensures that you’re always on top of your game, allowing you to focus on growth rather than getting bogged down in details. Moving further in this blog, we will help you with the process of setting up products and services in QuickBooks Online to manage inventory effectively.
This blog is intentionally written for users that use:
- QuickBooks Online (Simple Start, Essentials, Plus, and Advanced Versions)
- QuickBooks Sole Trader.
Note: If you need to track product quantities, make sure that they are added as inventory items.
QuickBooks Online: Product & Service Categories
There are four types of products and services that a user can add in his/her QuickBooks Online accounts for seamless tracking and top-notch operations. Before revealing the process to add and setup products and services in QuickBooks Online, let’s first understand the types of products and services that you can add, track, and manage in QuickBooks Online.
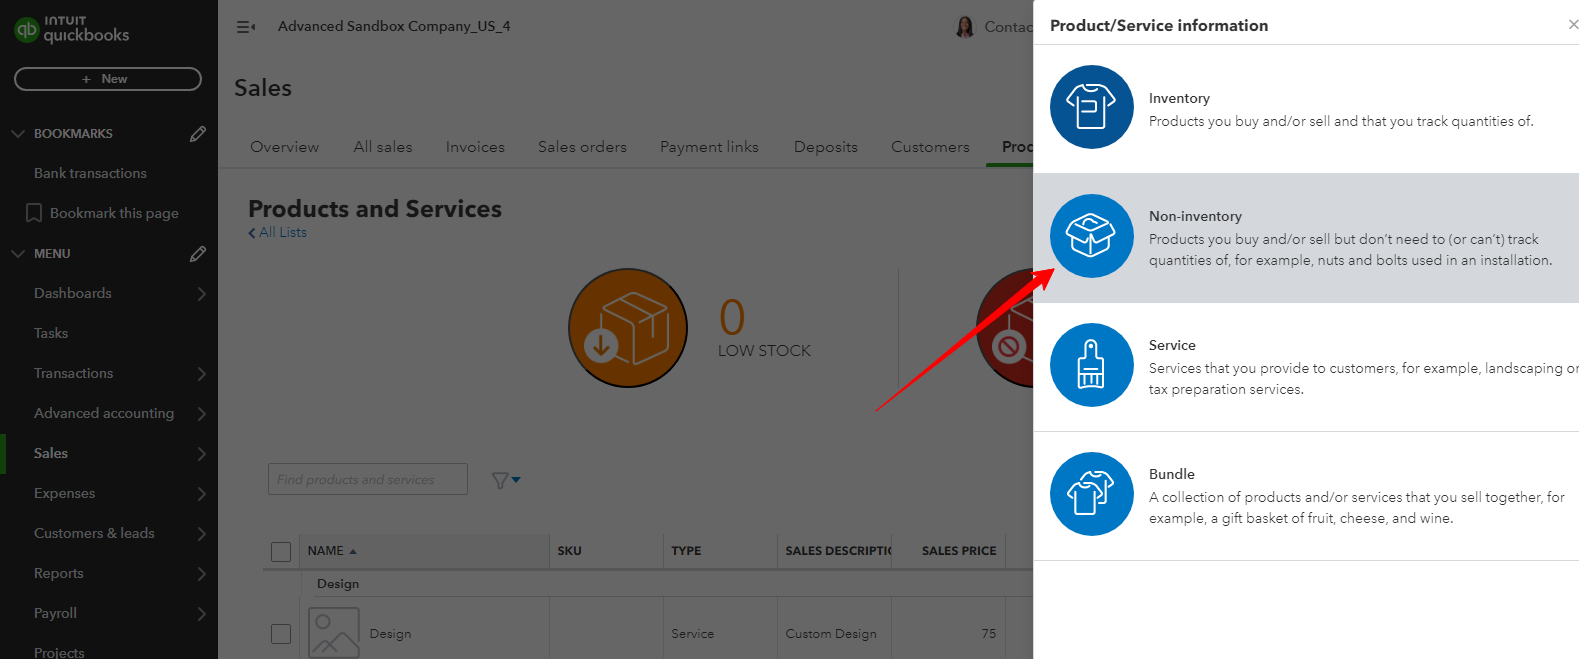
- Inventory: These are physical products you buy, track, and sell. QuickBooks tracks quantities and costs for inventory items, helping you monitor stock levels.
- Non-Inventory: Products or items you purchase or sell but don’t want to track the quantities of them. For example, the bolts and nuts that you use for installations but don’t sell directly.
- Services: These are tasks or labor you provide to customers, like consulting or repair services.
- Bundle: It is a combination of multiple products or services that you offer as a single unit. For example, a product and installation service are sold as a bundle.
So, these are the four different types of products and services that a user can easily add in QuickBooks Online to further strengthen their operations. Coming back to the focal point of the blog, let’s take a look at the 3 simple yet time-consuming steps to add products and services to QuickBooks Online.
Also Read: How to Enter and Manage Expenses in QuickBooks Online and Desktop
3 Steps to Add, Track, and Manage Product or Service in QuickBooks Online
QuickBooks Online makes it easy for users to keep track of earnings and expenses. By entering your products and services as items, users can then add them to sales forms, speeding up transactions and providing more detailed financial statements. Described below are the 3 steps that help users to setup products and services in QuickBooks Online.
Step 1: Add a New Product or Service
A product or service only needs to be created once. You can add them to sales forms as often as necessary once you’ve created them.
Tip: Importing all of your products and services at once can save you time if you already track them in a spreadsheet.
- Choose Products & Services in the Sales section.
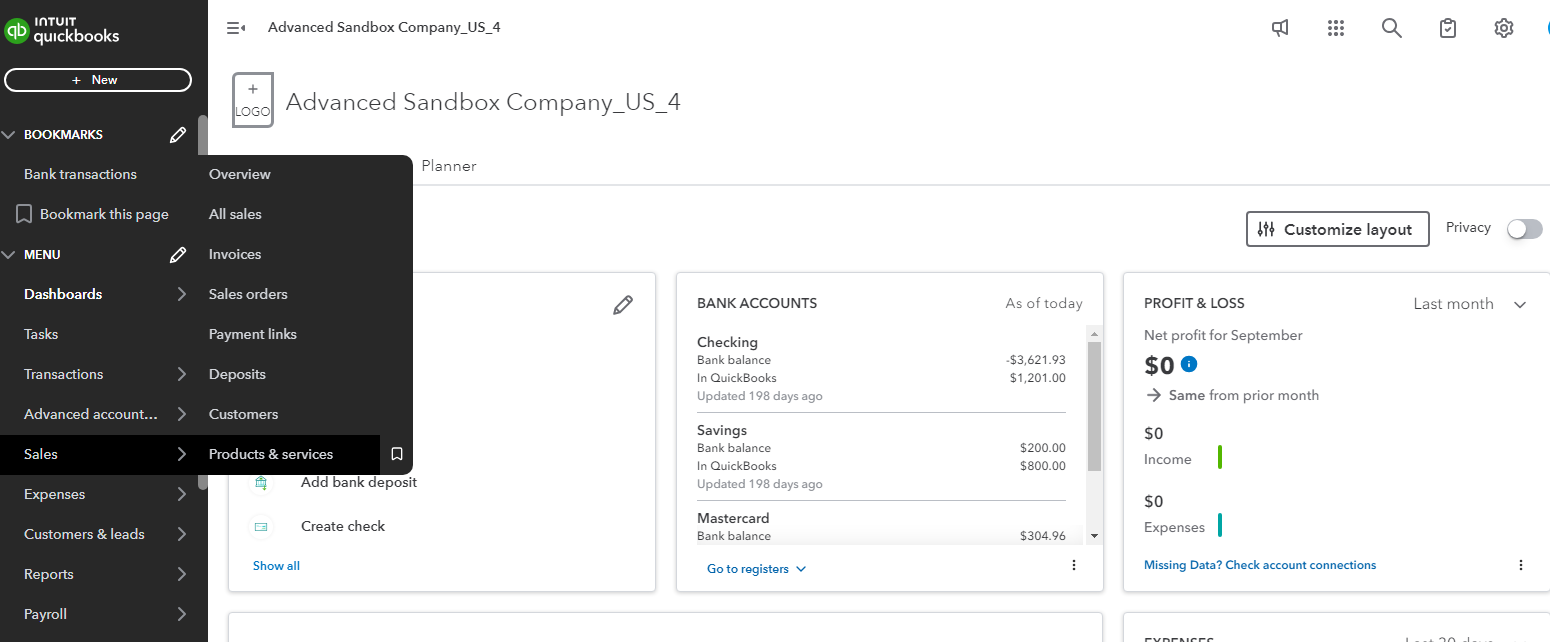
- Select New.
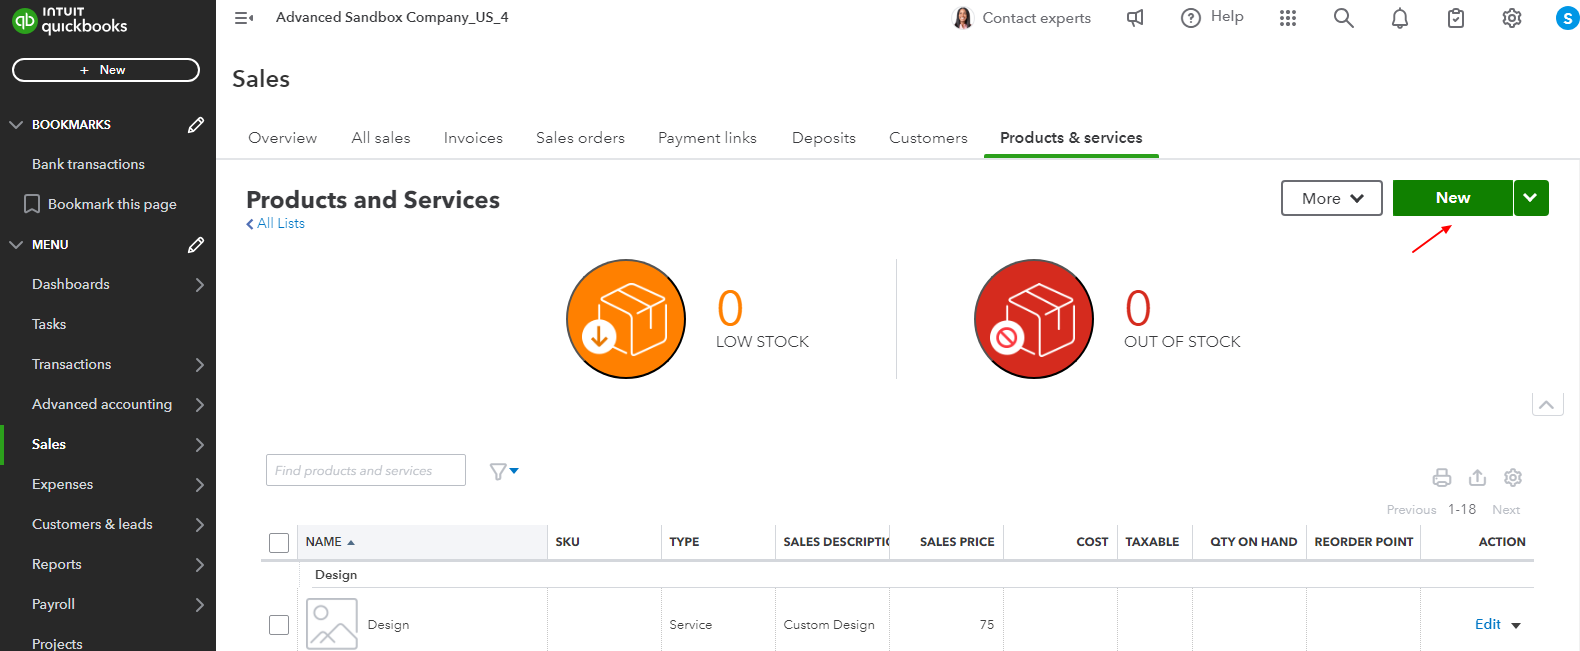
- Click on either Service or Non-Inventory.
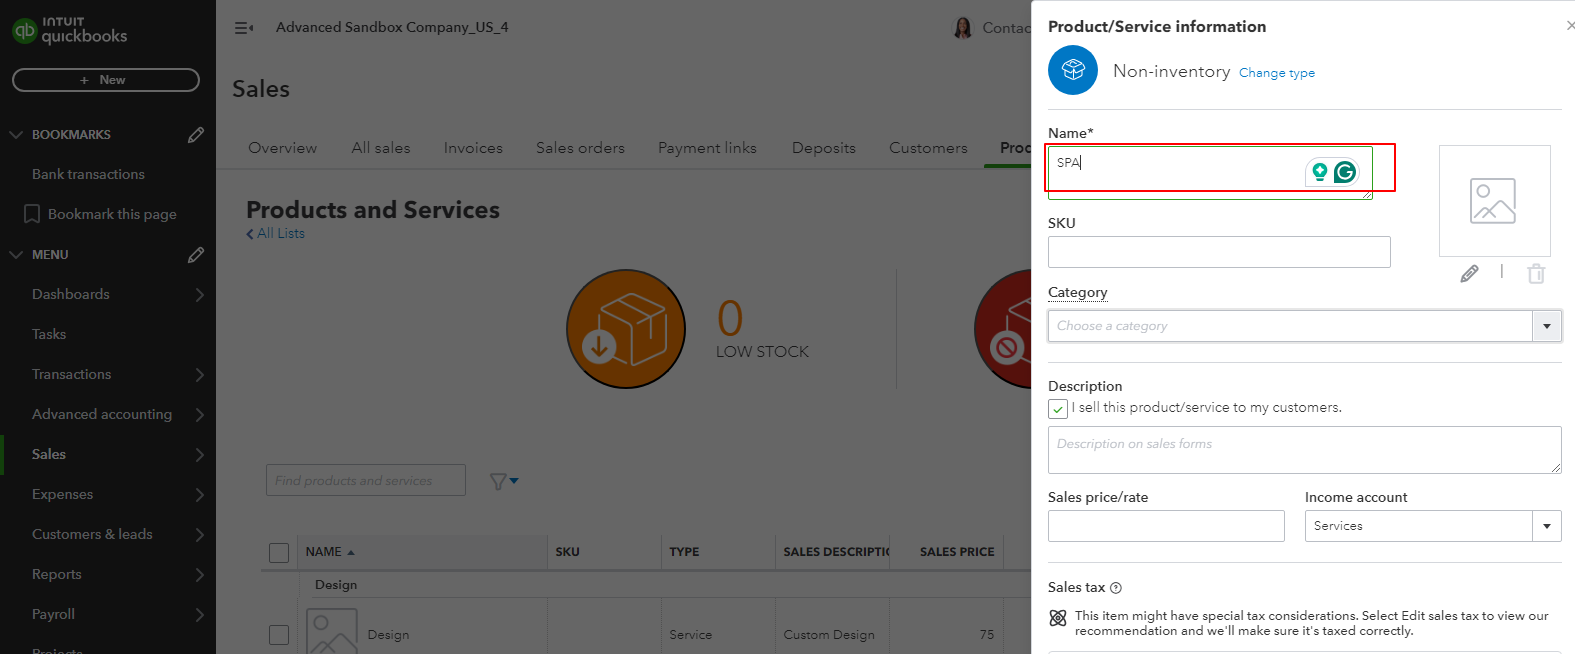
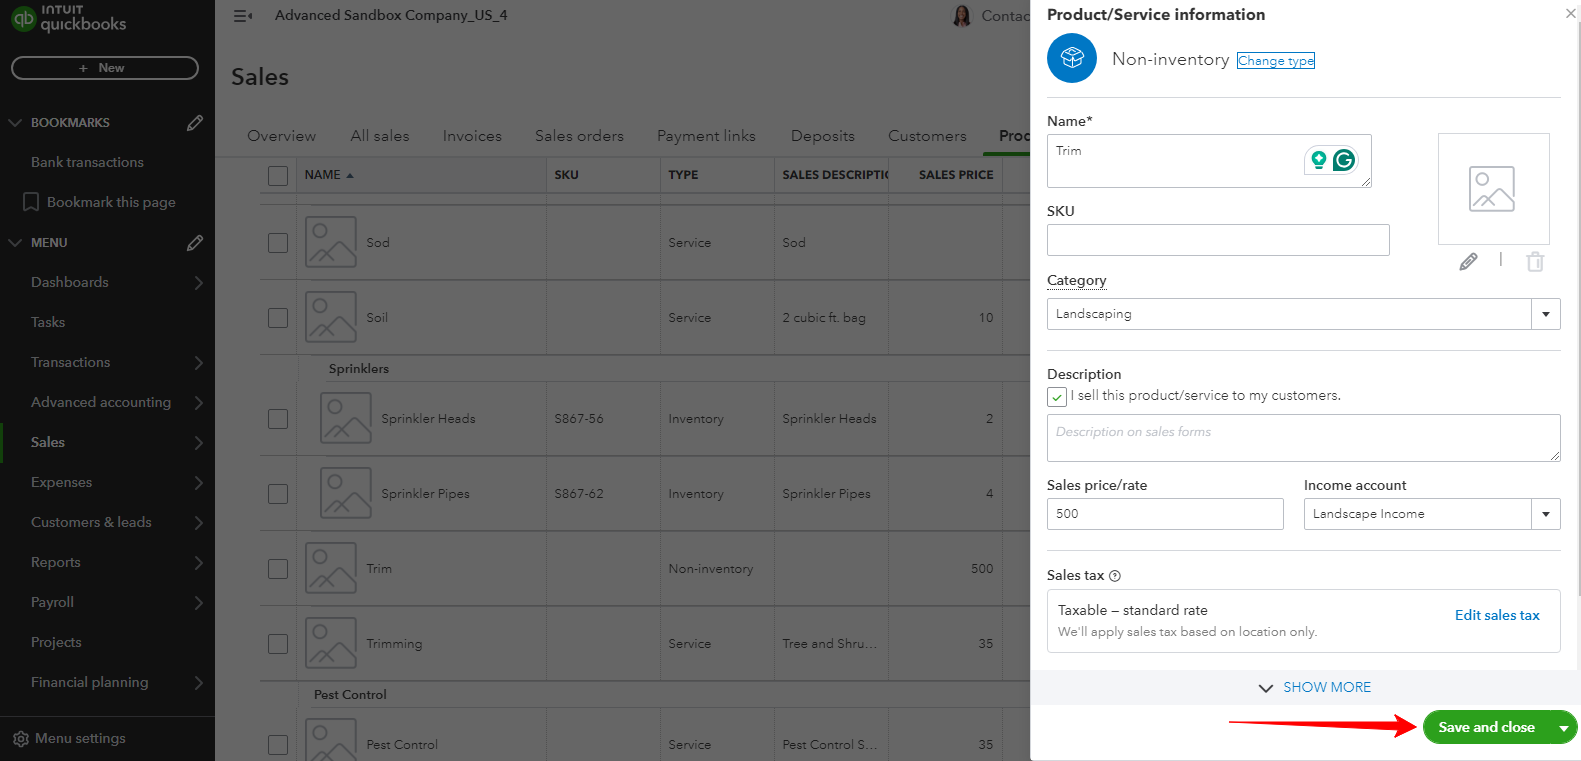
- Enter a Name for the product or service, and add an SKU if you use them to track items.
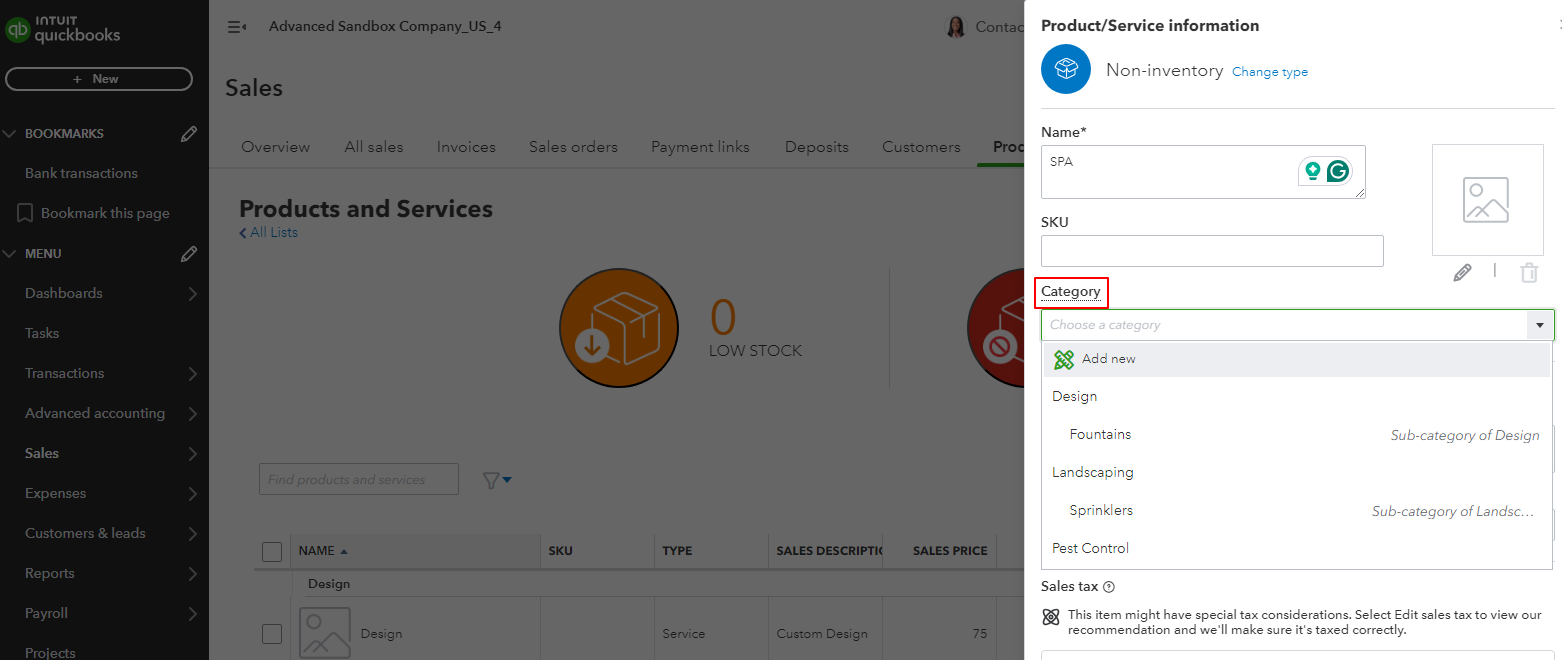
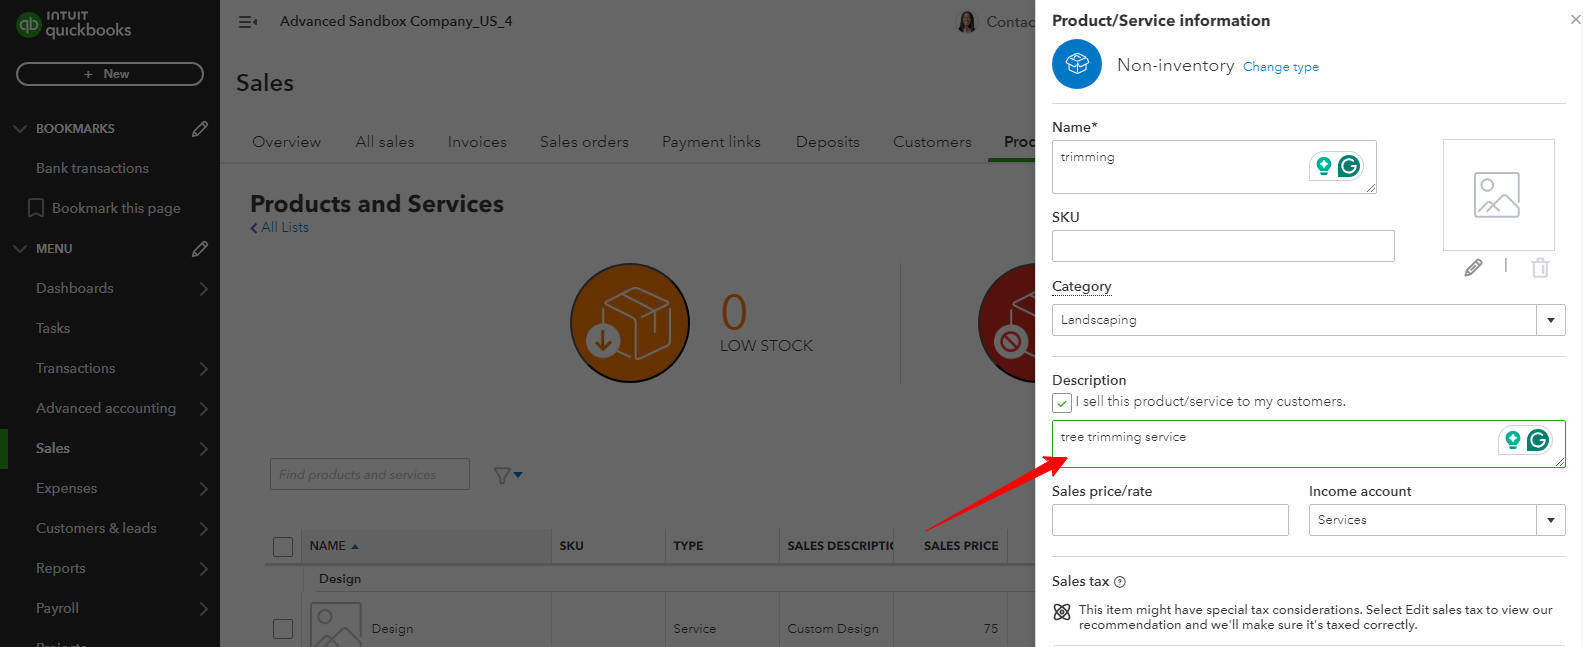
- Choose a Category from the dropdown that best fits your product or service.
- If you sell the item, make sure the box for “I sell this product/service” is checked.

- Write a description in the “Description on sales forms” box. This will appear on your customers’ sales forms.
- Set the Price or Rate for the item. If the price varies, you can leave this blank and add it when creating invoices or sales receipts.
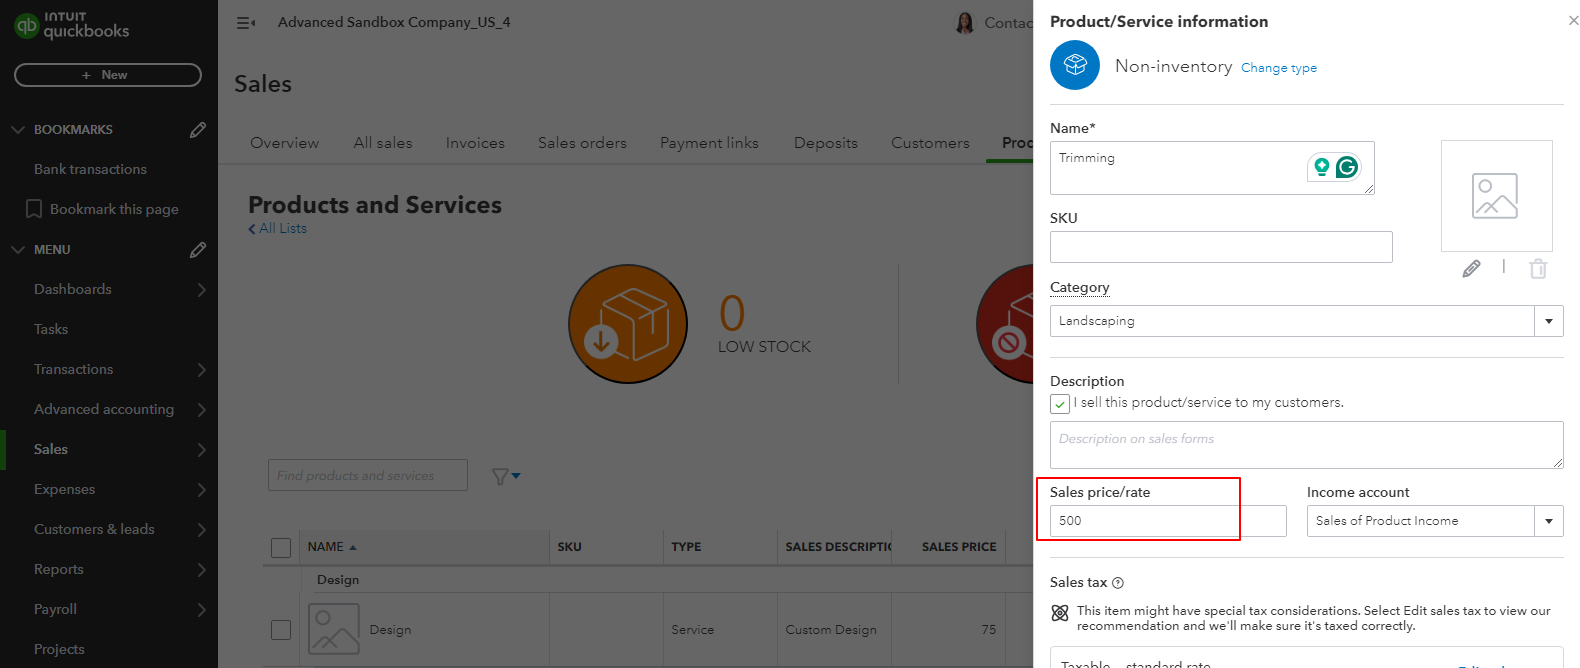
- Pick an Income Account from the dropdown to track sales.
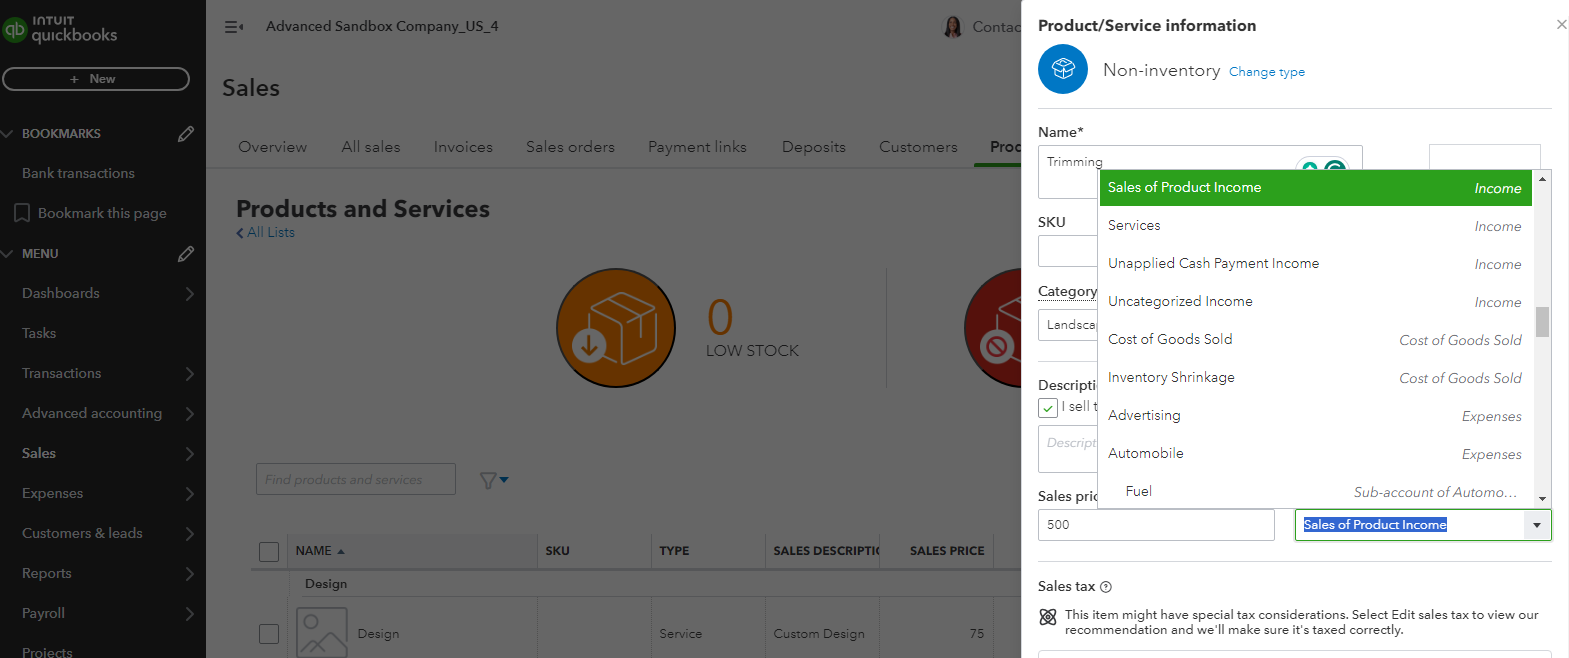
- Tip: You can either use a default account that QuickBooks has set up or create a new one.
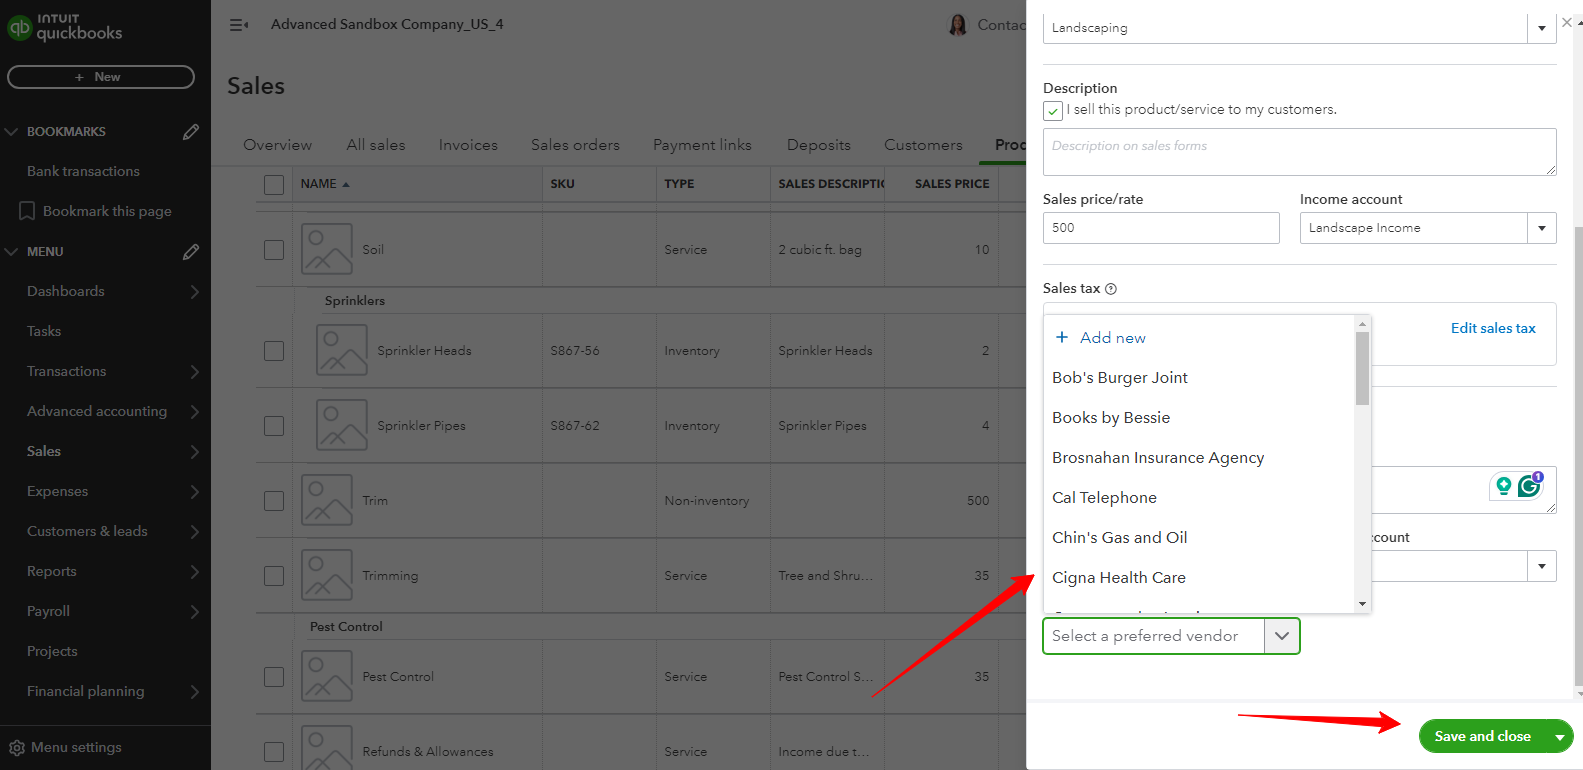
- In the Sales tax section, QuickBooks automatically applies tax based on your location.
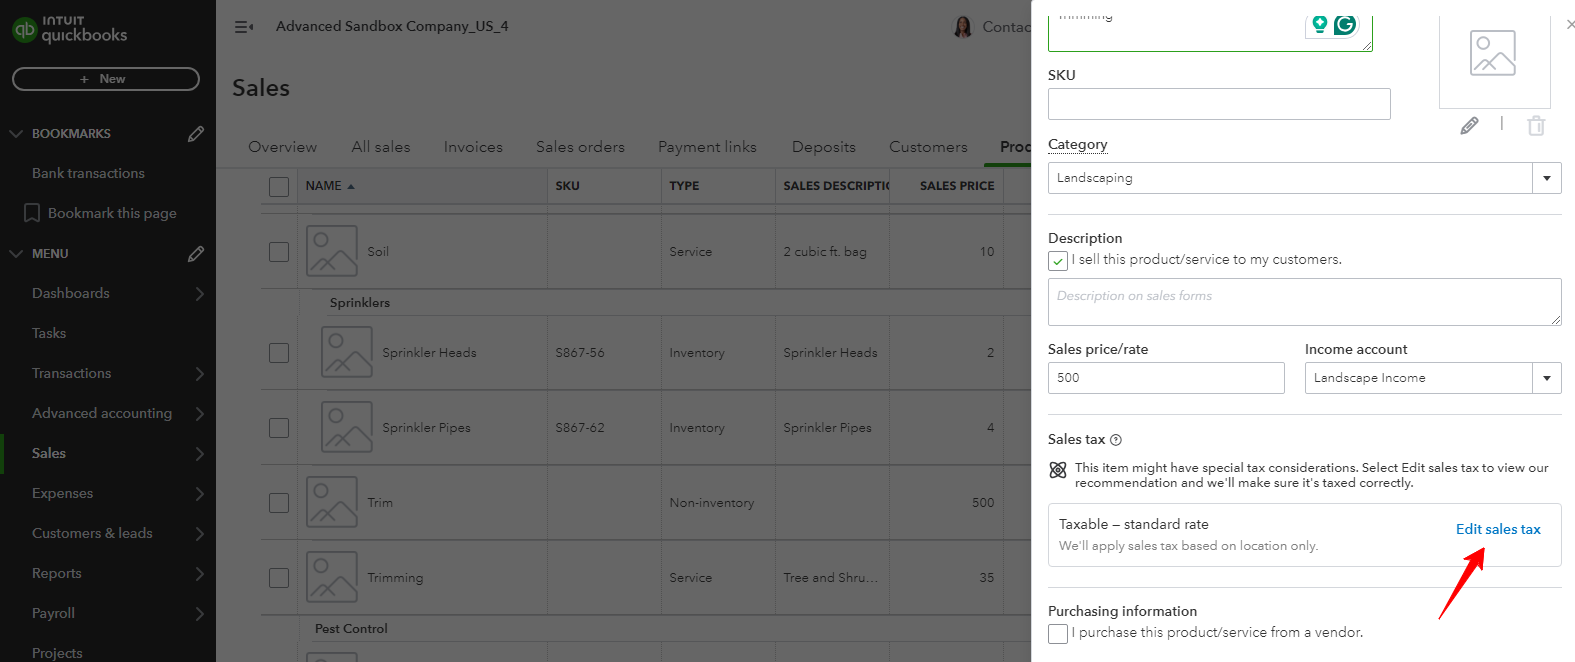
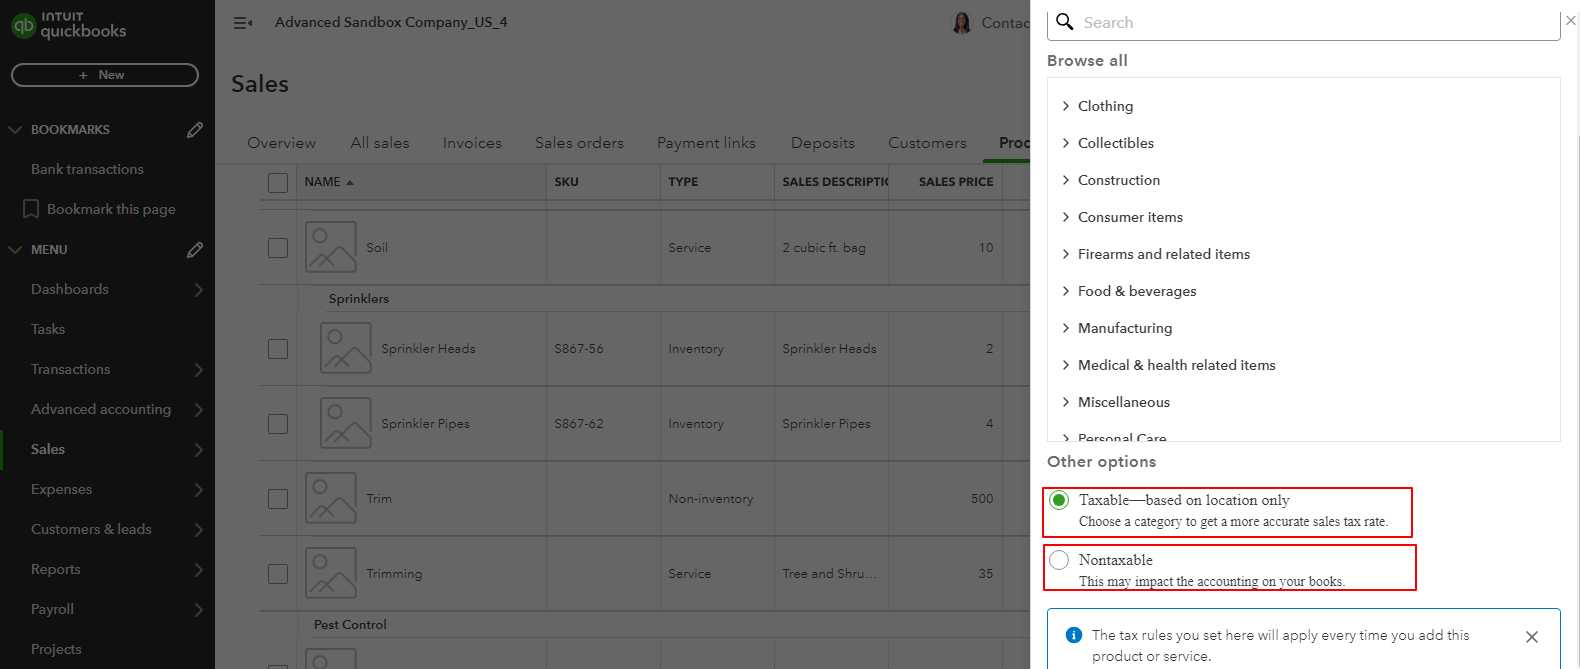
- To customize it or make the item tax-free, click Edit sales tax. Then:
- If the item is tax-exempt, choose Nontaxable, and click Done.
- If it has a special tax rate, use the search or browse options to find and select the correct type. Then click Done.
- Save your changes by clicking “Save and Close.”
After these 12 steps, you can now add the product and service to your invoices, sales receipts, expenses, and other sales forms. Now, let’s head towards the second step.
Step 2: Add Purchasing Information about the Products or Services
To keep track of the amount you spend on a product or service follow the steps mentioned below:
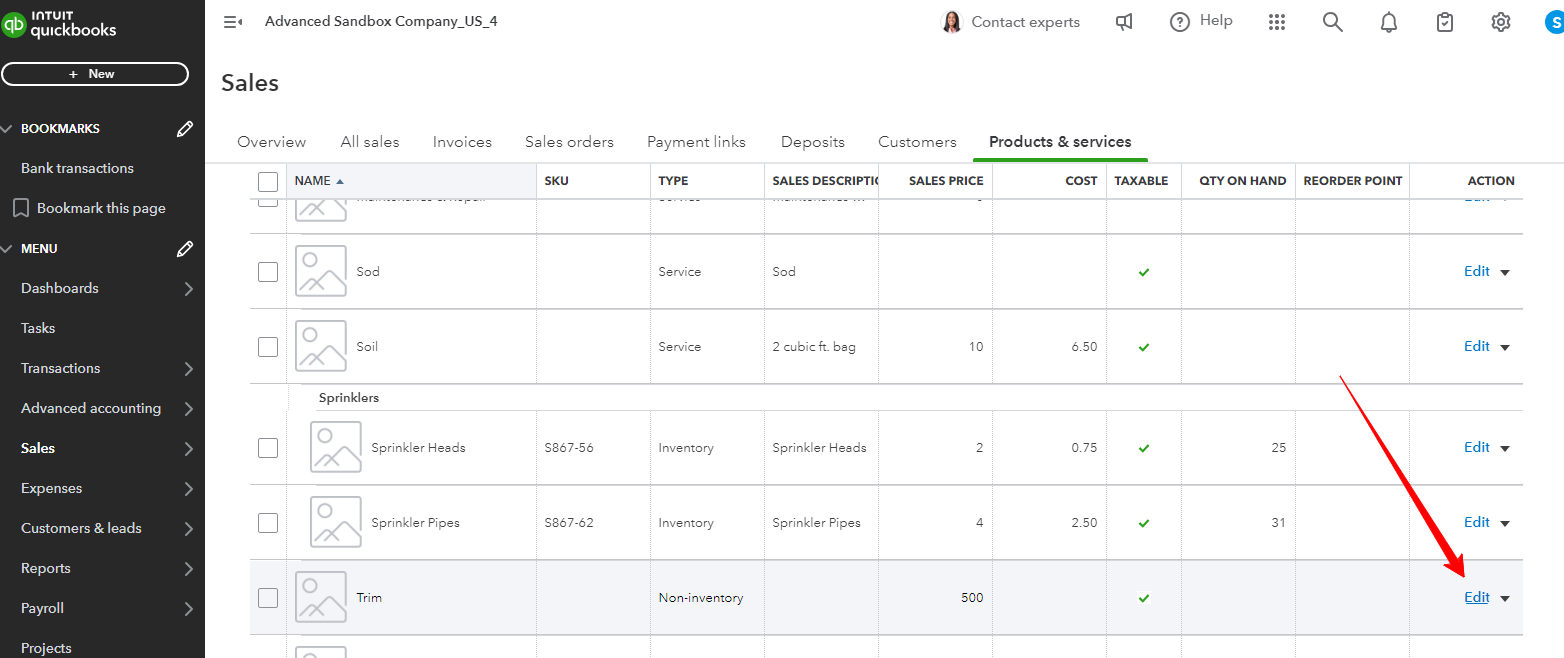
- Click on Sales and Select Products & services.
- Select Edit in the Action column after finding the product or service on the list.
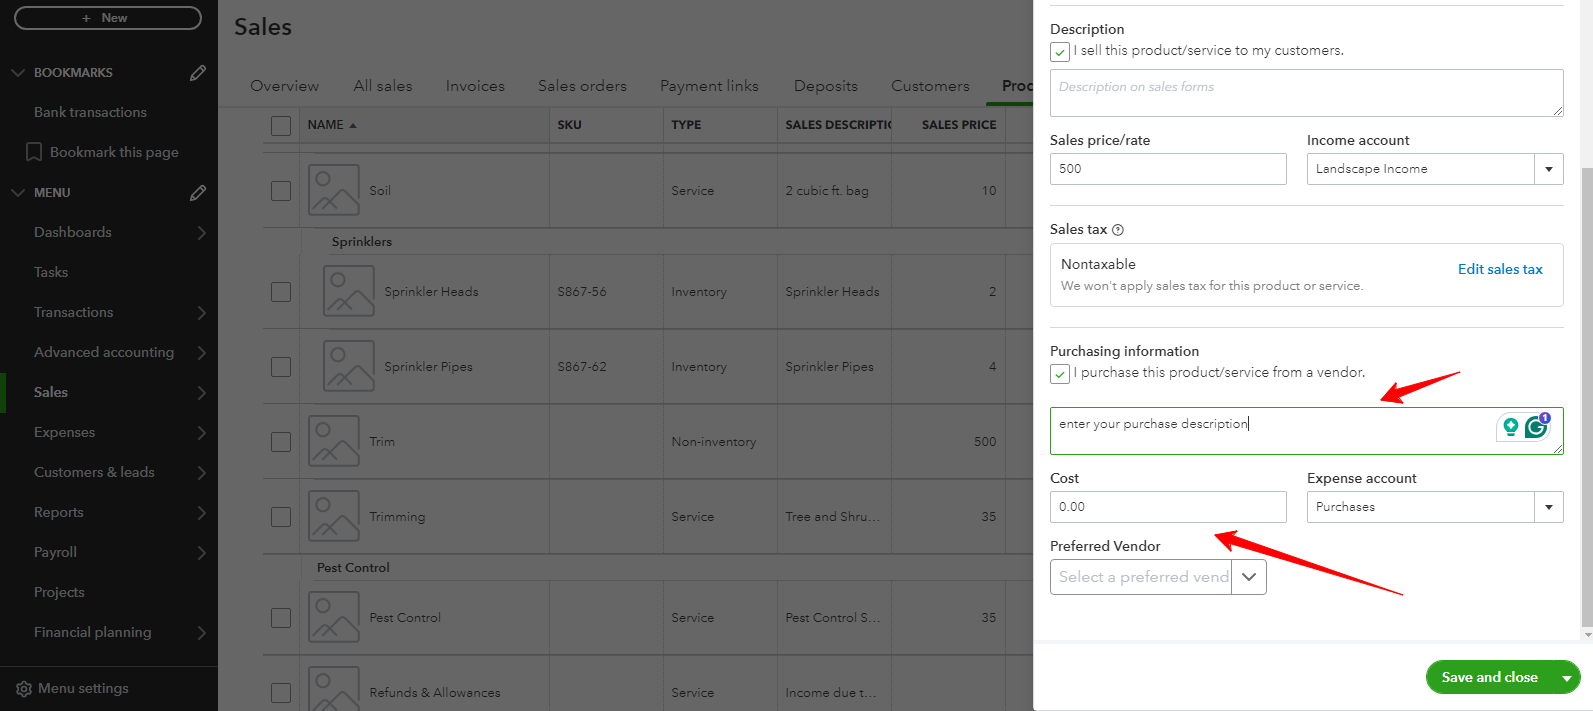
- Click on “I purchase this product/service from a vendor.”
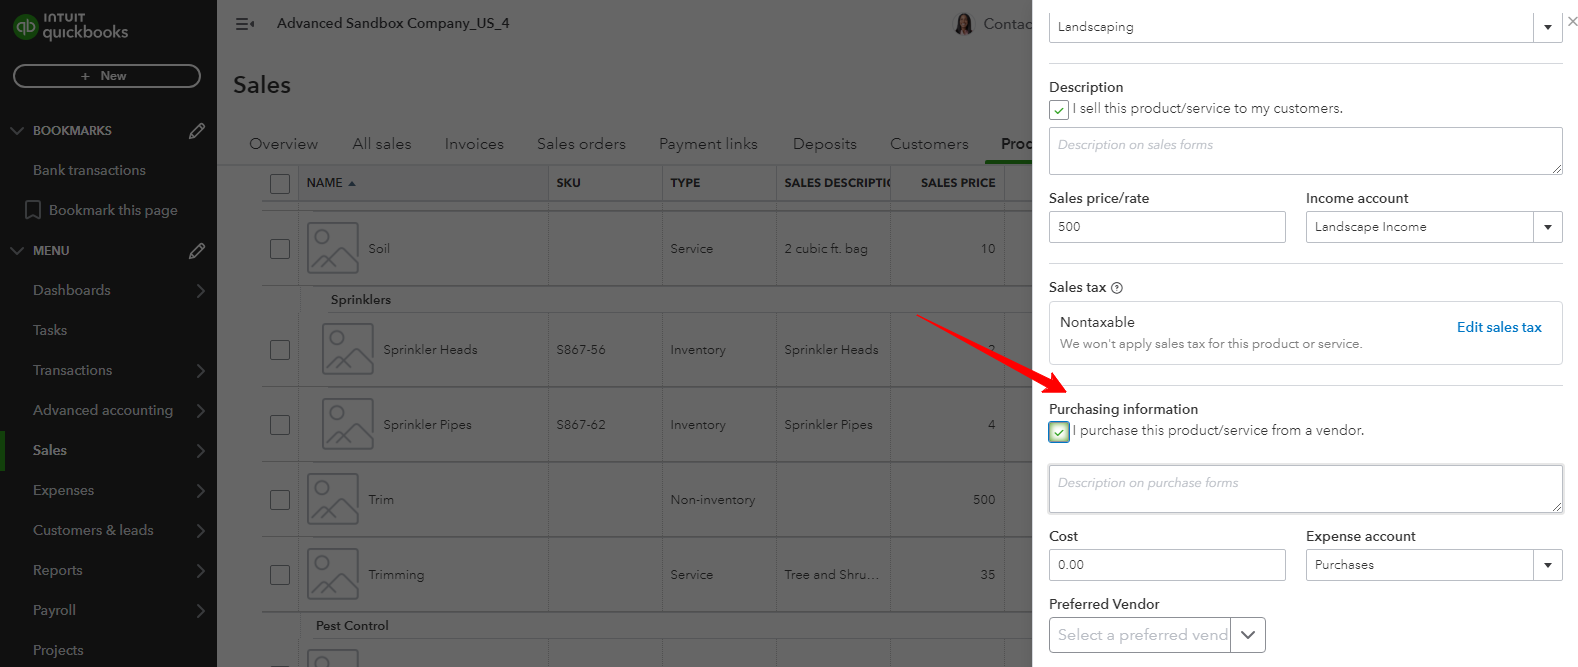
- Include a description. This will appear on purchase orders, bills, and other forms that you send to vendors.
- Add the Cost.
- Note: If the price changes, you can still input the revised price when it’s time to buy supplies.
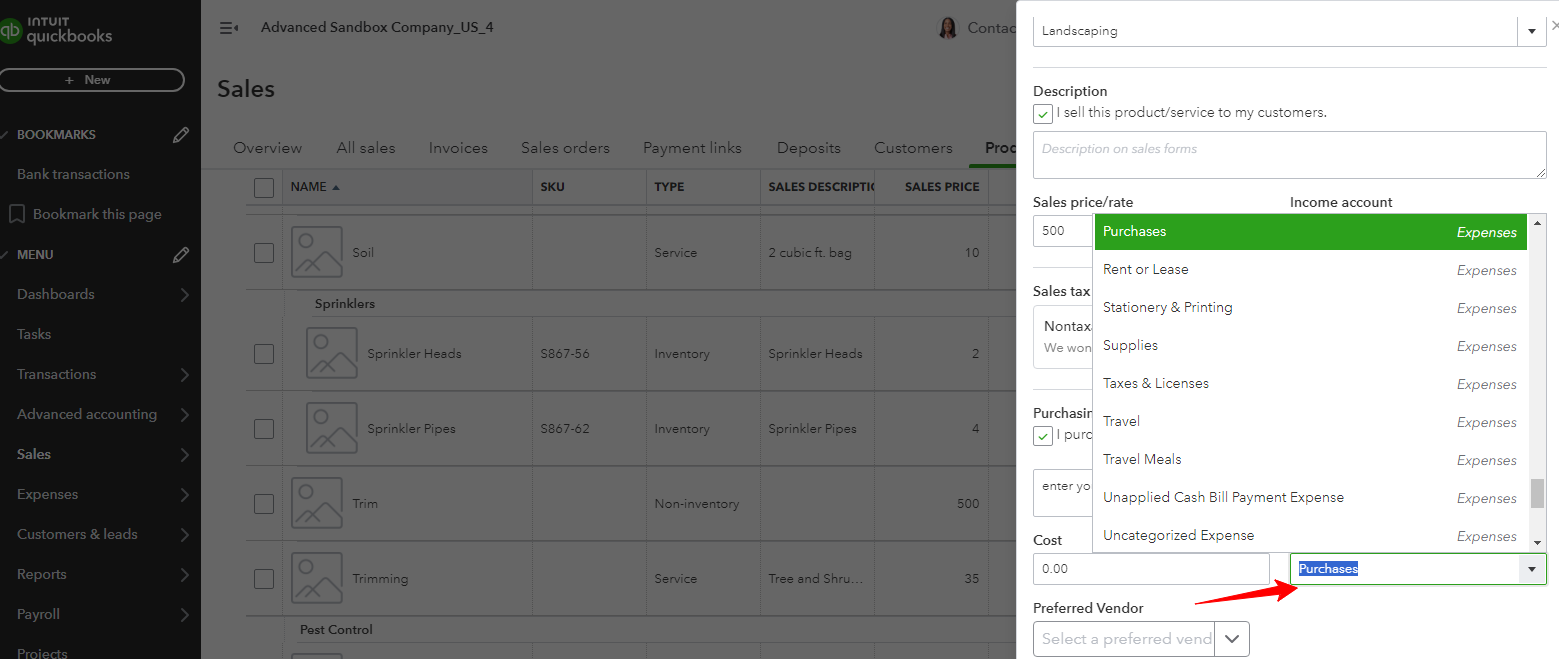
- From the Expense account ▼ dropdown, choose the account you use to monitor the price of the goods you sell.
- Select the Vendor of your choice.
- After finishing, select Save and Close.
Also Read: Manage and Track Inventory in QuickBooks Online
Step 3: Track and Manage the Products and Services You Sell
Here comes the final step to setup products and services in QuickBooks Online. When you’re all set up, you’ll be able to easily track what you buy and sell. To get started, follow these steps:
A. Edit a Product or Service in QuickBooks Online
From the Products and Services menu, you can review and modify any of your product or service items. To do that:
- Go to Sales and then select Products & services.
- Find the product or service that you wish to change.
- In the Action column, choose Edit.
- Make required changes.
- Once you’re done, choose Save and Close.
B. Change a Product or Service Item Type
Follow the steps given below if you have accidentally added an inventory item as a non-inventory item or a service item as an inventory item:
- Find the Settings icon and choose Products & services.
- Locate the non-inventory or service item that needs to be modified.
- In the Action column, choose Edit.
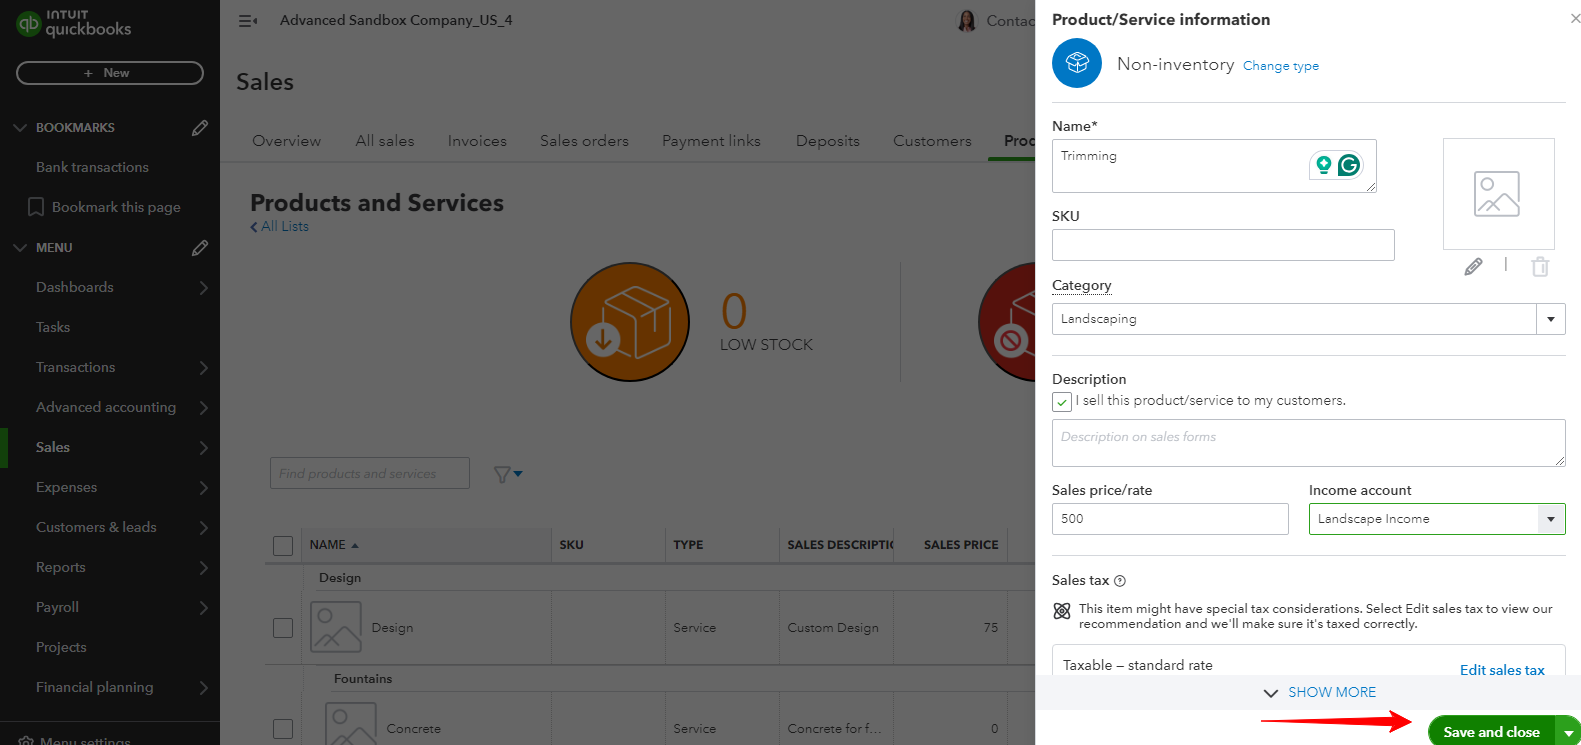
- Click on Change type.

- Choose between Inventory, Service, or Non-inventory.

- To set the item as either an inventory item or a non-inventory or service item, follow the prompts.
- Upon completion, select Save and Close.
C. Delete a Product or Service Item
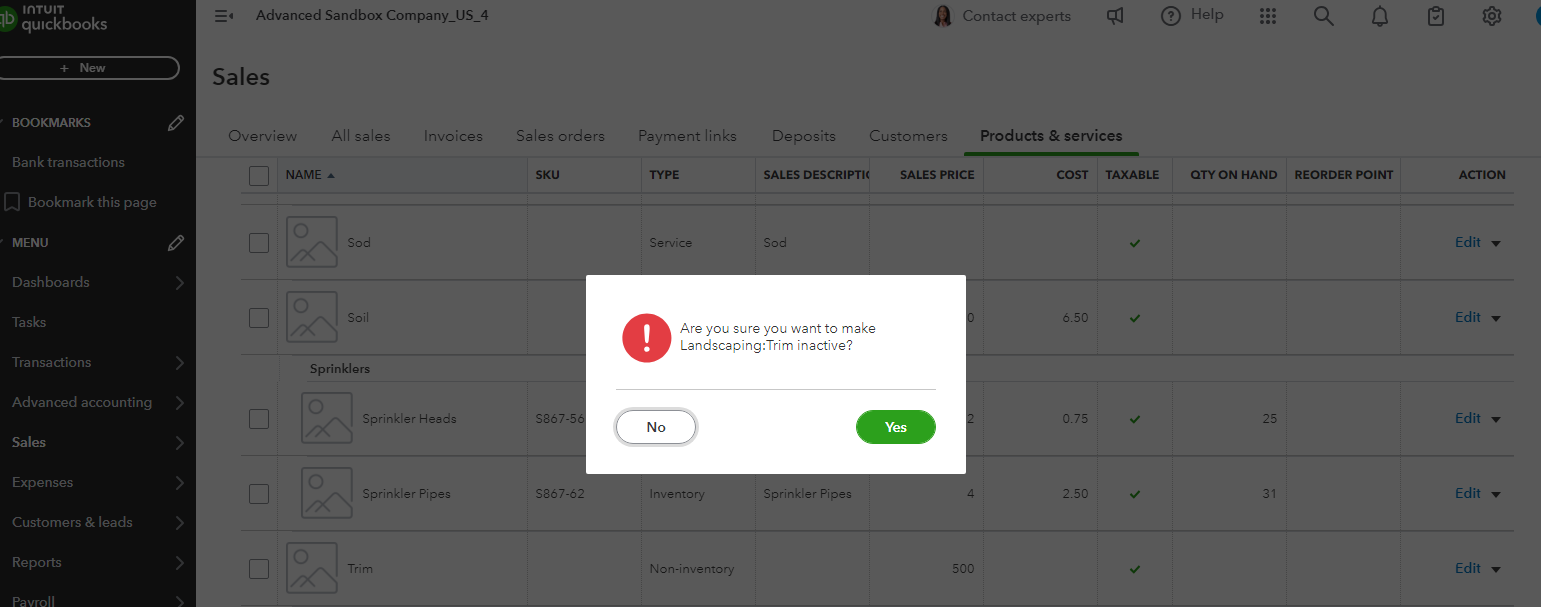
You can also mark an item as inactive and they will no longer don’t show up on sales forms, financial reports, or lists. The given below steps will not delete a particular item but hide it.
- Select Products & services under Sales.
- Locate the products or services that you wish to modify.
- Choose “Make inactive” from the Action column’s ▼ dropdown menu.

- Finally, click “Yes” to confirm.
To Reactivate an Item Later in QuickBooks Online
- Select Products & services under Sales.
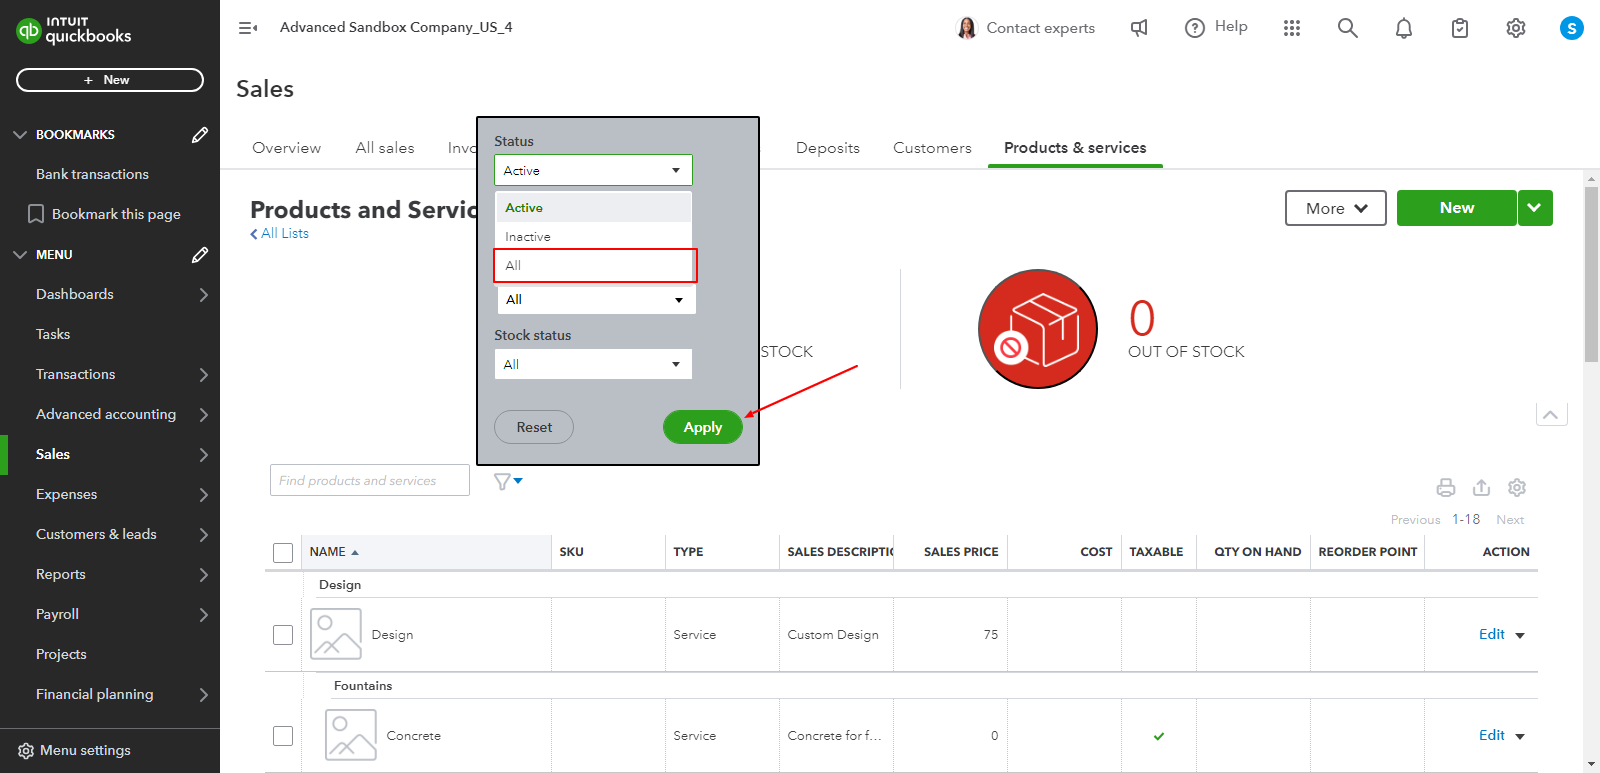
- Click the Filter icon.
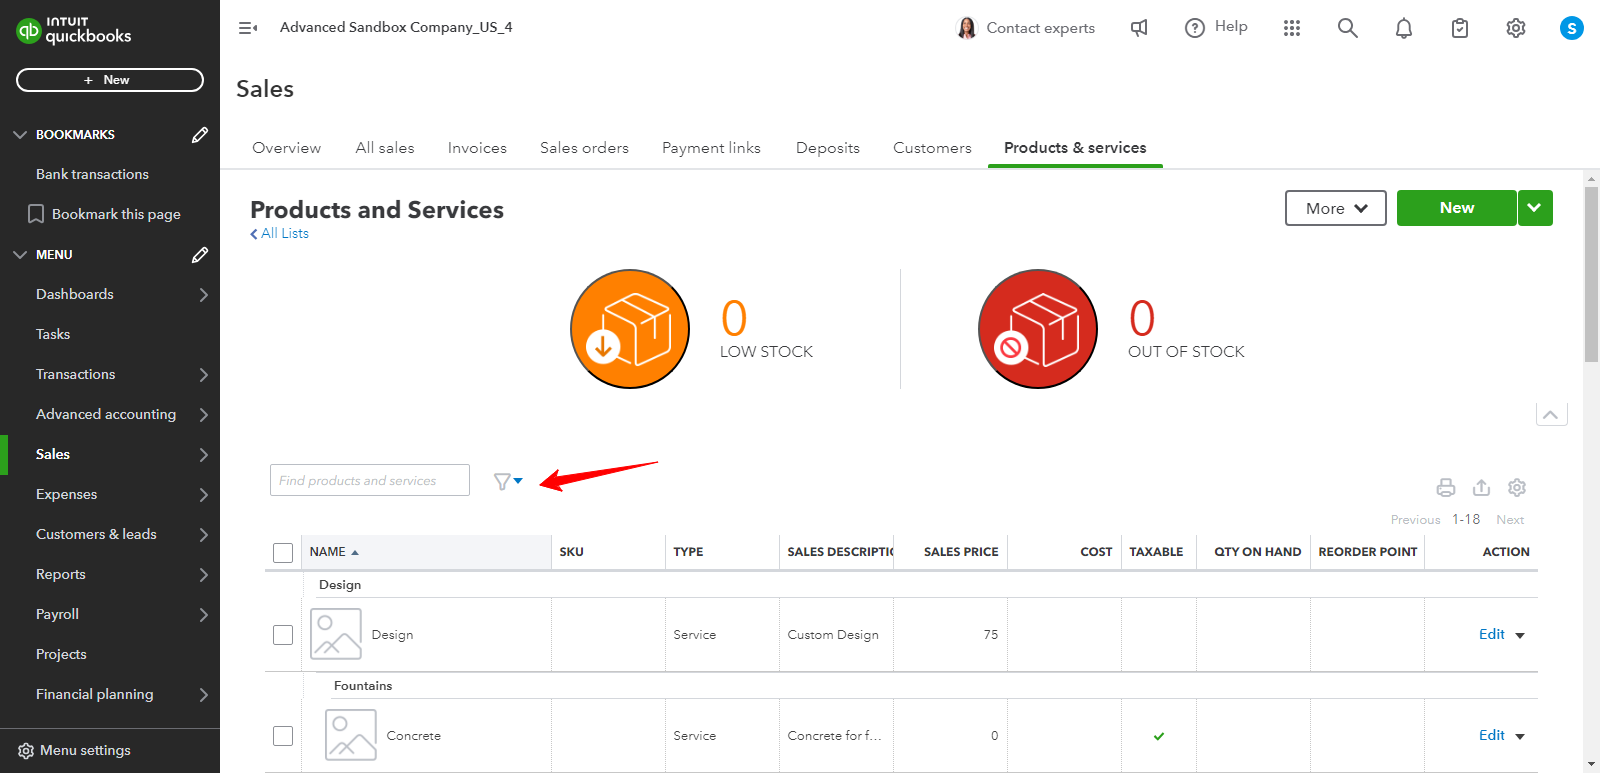
- Choose All from the Status ▼ dropdown menu, then click Apply. All of your items, both active and inactive, will be displayed there.
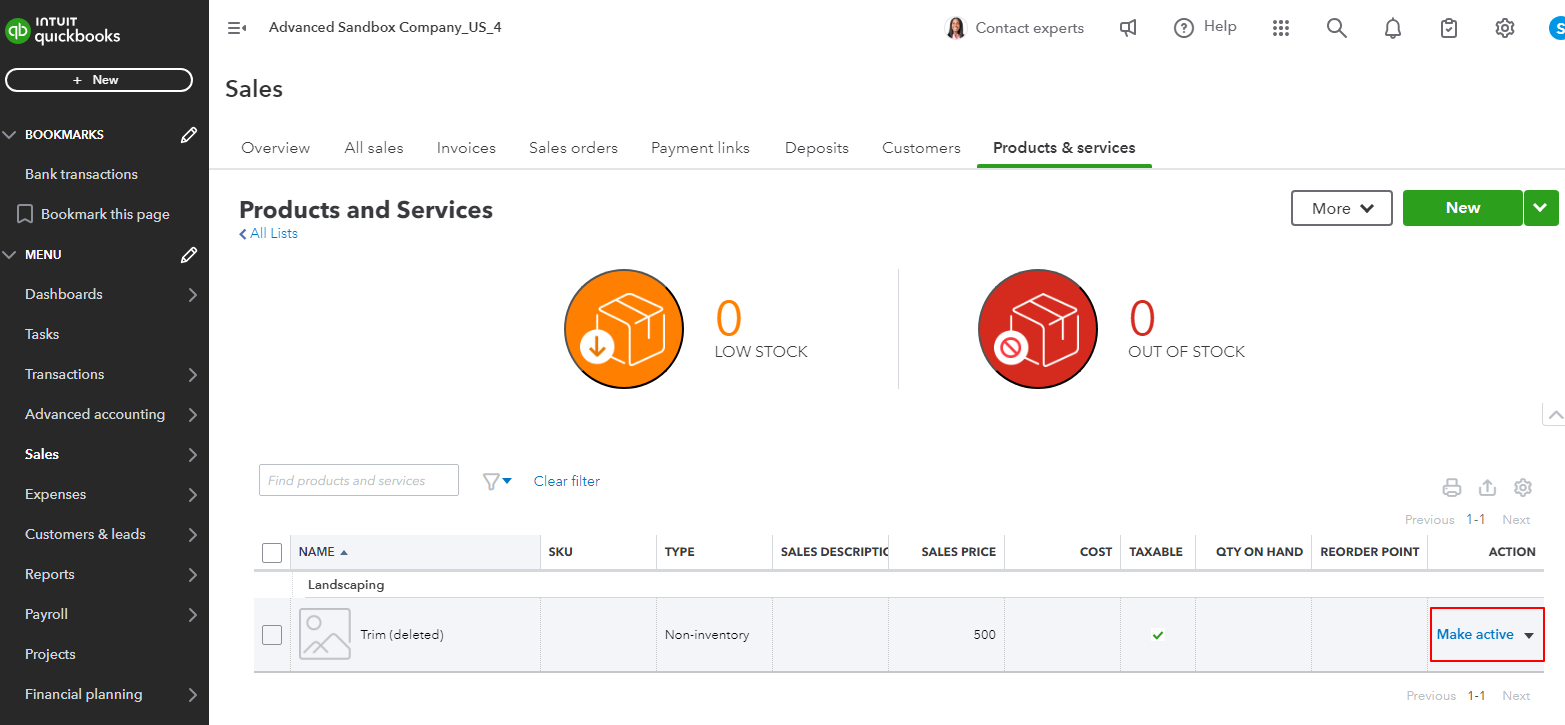
- Locate the service or product you wish to reactivate.
- Choose Make Active from the Action column.
So, these are some of the steps that can help you setup and add products and services in QuickBooks Online. By following these simple instructions, you’ll ensure that your items are properly categorized, priced, and taxed, making it easier to manage your sales and expenses. Keeping your product and service list organized will not only streamline your invoicing but also provide accurate financial data when you need it most. Whether you’re selling physical goods or offering services, QuickBooks Online makes the process quick and efficient.
Conclusion
QuickBooks Online simplifies your financial management by allowing you to organize and track every aspect of your sales and expenses. Besides simplifying invoicing and inventory management, this feature offers you detailed financial reports that provide valuable insights into your business. Updating your product and service catalog will ensure smoother transactions, more accurate financial records, and ultimately, more efficient business operations.
For additional assistance or integration support, feel free to contact QAsolved experts. You can connect with us directly via our: Toll-Free Number: +1-888-245-6075, E-mail: [email protected].
Frequently Asked Questions
Choose “Import” from the Products and Services menu and follow the instructions provided to upload a CSV file with your data to import goods and services into QuickBooks Online. Allow the easy addition of your products and services to your account by mapping the fields to QuickBooks Online, reviewing the import summary, and confirming it in the end.
Classifying goods and services in QuickBooks Online involves allocating them to the proper expense and income accounts. Click on the Products and Services menu, choose “New,” and enter the item’s name, description, and cost. Then, select the expense account for purchases and the income account for sales. Categorization helps track revenue and expenses related to each product or service and guarantees accurate financial reporting.
To view the Products and Services list in QuickBooks Online, click the “Sales” or “Purchases” tab in the left navigation menu, then choose “Products and Services.” As an alternative, you can quickly find it by typing “Products and Services” into the top search bar. You can manage, add, edit, and categorize your business’s products and services on this list to provide easy tracking and reporting.
To make updates to QuickBooks Online’s products and services, go to the “Sales” tab and choose “Products and Services.” Find and click on the item you want to update. Update any relevant information, like the price or description, and click “Save” to make the changes you made. For precise tracking and reporting, QuickBooks Online automatically updates your financial records to reflect these changes.
Open QuickBooks Desktop and select the “Lists” menu to choose products and services. Once “Item List” is selected, click the “Item” drop-down menu and select “New.” Add information about the item, including its name, description, and price. Give the right accounts for earnings and outlays. The item will be added to your list of goods and services when you click “OK” to save it.
In QuickBooks Online, go to the “Sales” tab and choose “Products and Services” to add inventory items. After selecting “Inventory” as the type, click “New“. Enter the item’s name, description, and available quantity in the fields provided. After designating accounts for income and expenses, save the item. QuickBooks Online will track inventory levels and automatically update them as transactions occur.
