
The QuickBooks Enterprise Open Database Connectivity (ODBC) driver is an effective tool that allows you to integrate your QuickBooks data with various third-party applications, enhancing your ability to generate detailed reports, custom queries, and complex data analyses. Whether you’re looking to create advanced spreadsheets in Microsoft Excel, build comprehensive tables in Microsoft Access, or design intricate reports in Crystal Reports, the ODBC driver provides the connectivity and flexibility you need.
This article will guide you on how to download, install, and set up the QuickBooks Enterprise ODBC Driver.
Advantages of QuickBooks ODBC Driver
- Direct Data Access: Provides direct access to your QuickBooks data, allowing seamless integration with other applications.
- Real-Time Data: Access real-time data, ensuring that your reports and analyses are always up-to-date.
- Enhanced Reporting: Connects QuickBooks data with tools such as Excel, Crystal Reports, and more to facilitate advanced reporting capabilities.
- Custom Query Capability: Ability to use custom SQL queries to get specific data tailored to business requirements.
- Improved Data Management: Reduces the need for manual data entry and updates, enhancing data accuracy.
- Automation: Enables automation of repetitive tasks, saving time and reducing the risk of errors.
- Security: Maintains the security and integrity of your QuickBooks data by providing controlled access through the ODBC driver.
Requirements of QuickBooks ODBC Driver
To use the QuickBooks Enterprise ODBC Driver, you’ll need to meet the following requirements:
- QuickBooks Version: The read-only ODBC driver is available for QuickBooks Desktop Enterprise 8.0 and later
- ODBC Driver Installation: Download and install the QuickBooks Enterprise ODBC driver from a trusted provider. Ensure that you have the correct version compatible with your QuickBooks Enterprise installation.
- Operating System: Ensure your operating system is compatible with both QuickBooks Enterprise and the ODBC driver. Typically, this includes Windows 10 or newer versions.
- Administrator Access: You need administrative privileges to install and configure the ODBC driver on your system.
- Data Connectivity: Stable internet connection if your data needs to be accessed remotely or integrated with cloud-based applications.
- Integration Software: When planning to integrate QuickBooks data with other software, confirm that these applications are also installed and compatible with the ODBC driver.
- Backup: Backup your QuickBooks data on a regular basis before making any changes or integrations to prevent data loss.
What is an ODBC Driver?
In third-party applications such as Microsoft Excel, Microsoft Access, and Crystal Reports, the Open Database Connectivity (ODBC) driver grants admin access to company files.
Microsoft Excel spreadsheets, Microsoft Access databases, and Crystal Reports reports can be created with ODBC. It is a mirror image of the file in your company. Besides creating custom reports, you can customize invoices, create mail merges, and more by combining data from multiple company files. You can also use Structured Query Language (SQL).
Download, Install, and Setup the ODBC Driver in QuickBooks Enterprise
Exporting data from your QuickBooks company file with FLEXQuarters’ ODBC driver allows you to create custom reports. Once a report has been exported, it can be viewed in programs like Microsoft Excel, Crystal Reports, QlikView, Python, or .Net.
Follow these steps:
Step 1 – Download QODBC
- Download QODBC.
- Go through the “Readme” file during installation for setup details, new features, and driver information.
- Extract the installation files by saving “QODBC.exe” in your “My Documents” folder.
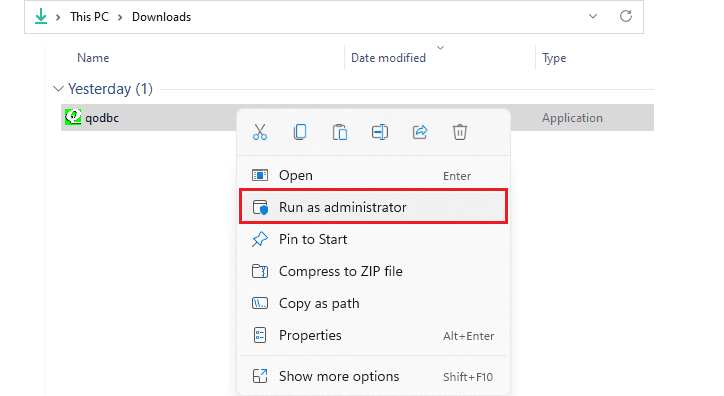
Step 2 – Run the application
- Close the Microsoft Office toolbar and any other Windows applications that might interfere with the installation. Then, click on the Install program within Windows to install the driver.
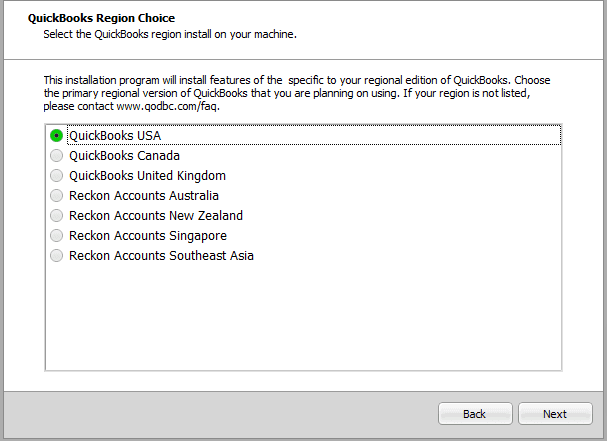
2. Opt for the QuickBooks region that matches your purchased driver.
3. You can skip the Activation Key to assess the product before purchase. Select Next to continue.

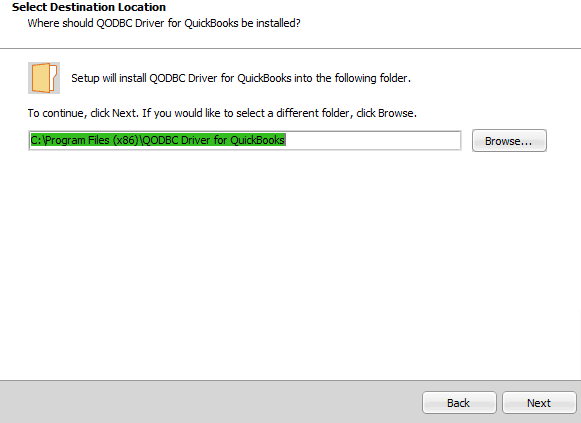
4. Select the location for installing the QODBC files. Enter Next to continue.
5. FLEXquarters QuickBooks QODBC Driver has been successfully installed. You can start using it right away for a 30-day trial period.
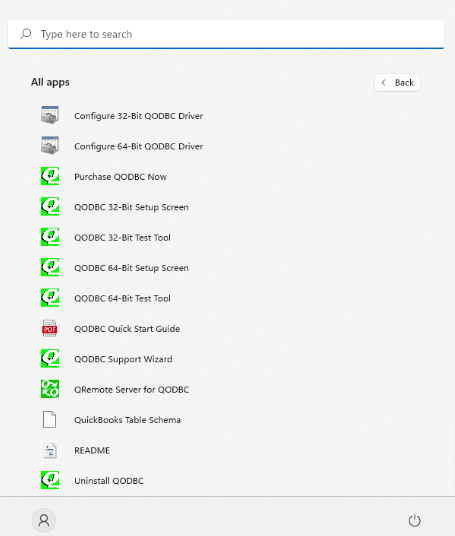
6. To install or evaluate the QODBC registration code, check the Start Menu under QODBC Driver for QuickBooks.
7. Click the ODBC Setup Screen icon to begin configuration.
QODBC General Setup Screen
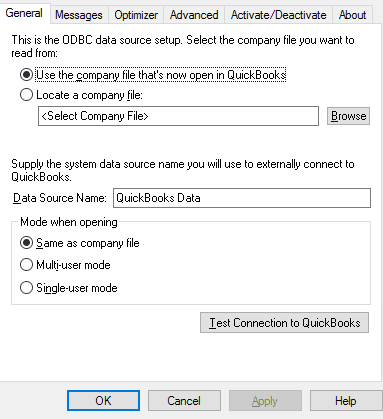
Use Open Company File:
QODBC uses the currently open QuickBooks company file, allowing you to switch between files without creating separate DSNs.
Locate Company File:
Find the path to your QuickBooks data file (e.g., “C:\Program Files\Intuit\QuickBooks Pro\Myapp.qbw”). To select your file, click the browse button (…)
Data Source Name:
Enter a display name for your QuickBooks data (e.g., QuickBooks Data, QBPRO, My QB Data).
Mode When Opening:
Choose how QODBC should open the file:
- Follow Company File: Use the current mode set on the company file.
- Multi-user Mode: Allow multiple users to update the file at the same time.
- Single-user Mode: Require exclusive write access.
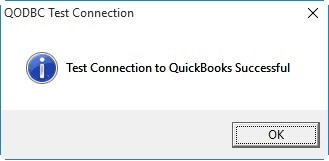
Test Connection:
This will confirm proper installation and settings. A confirmation popup should appear.
Messages Tab
- Head to the Messages Tab.
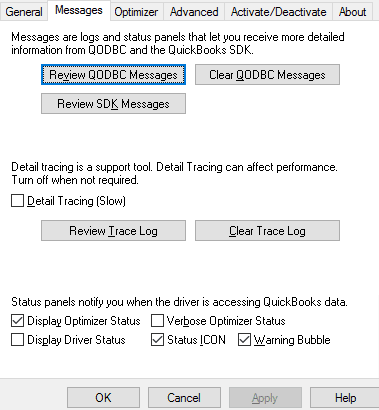
2. Uncheck the Detail Tracing (Slow) checkbox.
3. Check the Display Optimizer Status Panel checkbox.
4. (Optional) To see detailed ODBC activities, check the Display Driver Status Panel checkbox. You can use this to troubleshoot your software performance if needed by viewing the number of records processed, the current activities, and speed assessments using optimized and non-optimized data.
5. Click Apply.
Optimizer Tab
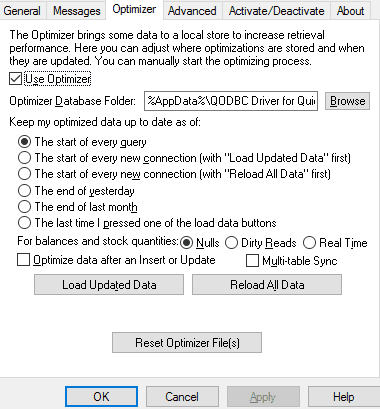
- Access the Optimizer tab.
- Check the Use Optimizer checkbox.
- The default Optimizer file path is (%AppData%\ODBC Driver for QuickBooks\Optimizer), which is recommended.
- Pick The start of every query, then hit Apply.
- Note: The time required for initial optimization may differ based on the size of the file. It typically takes around 24 hours. The duration of completion for initial optimization will extend in proportion to the volume of transactions. Upon completion, data connections with QuickBooks will exhibit improved speed.
- When you are finished configuring the ODBC driver, click OK.
Activate/Deactivate Tab
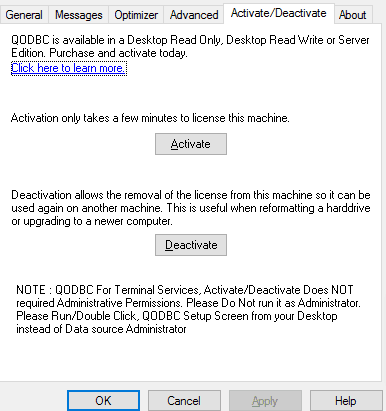
Use this tab to buy a CD Key, activate a license with a CD Key, or deactivate an active license and move it to a new computer.
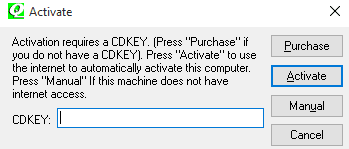
To fully activate QODBC from the evaluation version, enter your CD Key using the online option. This will switch to the full Read Only, Read/Write, or Web Edition you purchased. In case of internet inaccessibility, you can use the phone option to provide your reseller or distributor with the necessary information to activate the product.
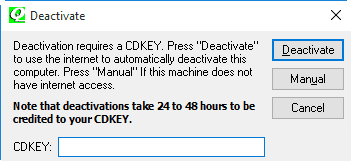
Deactivating QODBC online allows you to transfer your currently registered version to another machine. It typically takes 24 to 48 hours for your CD Key account to be credited with the deactivated license, enabling you to reactivate it on a different machine. The phone option is also available if the registered machine does not have internet access. This entails providing your reseller or distributor with the necessary information to deactivate the product CD Key on your behalf.
About Tab
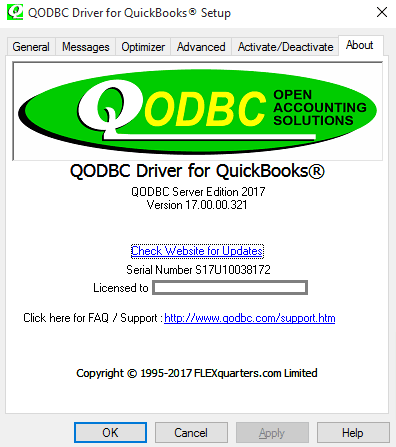
The About screen displays the installed QODBC version and indicates if it’s an evaluation or fully registered copy. A serial number’s first letter indicates the type of license, the 2nd and 3rd digits show the QODBC version and the fourth letter indicates the compatible QuickBooks version (US, CA, UK, AU).
Conclusion
For businesses looking to manage and analyze their financial data, installing and configuring the QuickBooks Enterprise ODBC Driver is a crucial step. Connecting QuickBooks to other software makes it easier to pull data for reports and analysis.
The process involves three main steps:
- Download: Choose a trusted source for the ODBC driver.
- Install: Simply follow the instructions for installation.
- Configure: Connect QuickBooks to your other applications.
These steps allow you to access and analyze financial data, resulting in better decisions and improved efficiency. With this setup, you can get real-time insights and ensure your financial data is always accurate and up-to-date.
Frequently Asked Questions
The Open Database Connectivity (ODBC) driver lets you access your company file with third-party apps like Microsoft Excel, Microsoft Access, or Crystal Reports. It allows you to create spreadsheets, tables, and reports based on your company file.
The QuickBooks Database Manager is installed on a central server with the company file. Enterprise is installed on each workstation, and these workstations access the company file over the network.
1. Visit the Website: Go to the QuickBooks website or the website of the provider of the QuickBooks ODBC driver.
2. Locate the Driver: Search for the QuickBooks ODBC driver download page.
3. Select the Version: Choose the version that matches your QuickBooks edition (e.g., US, CA, UK, AU) and your operating system (32-bit or 64-bit).
4. Download the Installer: Click on the download link to get the installer file.
5. Save the File: Save the installer file to a convenient location on your computer, such as your Downloads folder.
6. Run the Installer: Once the download is complete, run the installer and follow the on-screen instructions to install the driver.
1. Create Directory: Create the directory %OMNIHOME%\platform\win32\DataDirect.
2. Copy Files: Copy the ODBC32v53 directory to %OMNIHOME%\platform\win32\DataDirect\ODBC32v53.
3. Register Drivers: Run the nco_install_drivers.exe utility to register the drivers in HKLM\SOFTWARE\Wow6432Node\ODBC\ODBCINST.INI\.
4. Open ODBC Manager: Run the 32-bit ODBC manager program located at C:\Windows\SysWOW64\odbcad32.exe.
5. Configure DSN: Follow the ODBC Gateway guide to configure the Data Source Name (DSN).