
Creating and managing company files, along with regularly backing them up, is a crucial part of utilizing QuickBooks Desktop. Additionally, creating backups safeguards against data loss due to unforeseen circumstances such as hardware failure, software issues, or human error.
In this post will talk about the steps to setup a company file in QuickBooks Desktop, backing it up and how to fix any issues if you encounter error in recovering the backup files.
What is a Company File in QuickBooks Desktop?
The company file in QuickBooks acts as a repository for financial data and information about an organization. This vital data must be protected, and making backups in QuickBooks is a simple procedure. You may customize your backup plan by scheduling backups at predetermined intervals, guaranteeing data integrity verification, formatting every storage medium during backup, and setting reminder frequencies. You can also choose to start a new company file or upgrade the current one, giving you more control over how your financial data is managed.
Create a New QuickBooks Desktop Company File
Note: If you are creating a new company file, give it a different name than the ones that are already there. It will replace the current company file if the same is used.
Through the “Express Start” Approach:
- Generate a new company file.
- Choose “Express Start” as your option.
- Enter the required information in the “QuickBooks Setup.”
- Select “Help me choose” to view a pre-made industry-specific chart of accounts and descriptions of business types.
- Then select “Create Company.”
- After the company file is created, establish the customers, services, and Chart of Accounts.
- As an alternative, you can choose to “Start Working” and complete this step at a later time.
Through the “Detailed Start” Method:
- Now open QuickBooks Desktop.
- Go to the “No Company Open” window.
- Select “Start a new business.“
- Proceed with “Detailed Start.”
- Finish filling out the Easy Step Interview form.
- Press “Next.”
- Once you have selected your Industry, click “Next.”
- Enter your “Business Entity.”
- Choose “Next.”
- Decide on your fiscal year, which is the year the company file is created.
- Press “Next.”
- Choose a password for QuickBooks Administrator.
- Choose “Next.”
- Decide where you want to store the company file.
- Press “Save.”
- To add your touch to QuickBooks, click “Next,” or “Leave” to finish this step later.
How to Create a Backup in QuickBooks Desktop?
Our company file stores all your financial information and expands alongside your business. In QuickBooks, you can create and save multiple company files for various businesses. Each business should maintain its dedicated company file.
Utilize your business information to establish your company file. The in-product guide will lead you through the setup process step by step.
- Launch QuickBooks Desktop.
- In the No Company Open window, choose the option to Create a new company.
- At this juncture, you have two setup choices:
- Opt for Express Start or Start Setup if you wish to begin promptly. You only need to input your business name, industry, and business type. Click on Create Company File to generate your company. You can enter additional information later.
- Choose Detailed Start if you prefer a comprehensive setup, ensuring all your information is inputted from the beginning.
- Follow the onscreen instructions to complete the setup.
- Select Start Working.
Note: If you already have an existing company file in QuickBooks, assign a unique name to your new file to prevent accidental data overwriting.
Once finished, you can commence your work in QuickBooks Desktop.
Next Steps: Get Started in QuickBooks Desktop
After generating your company file, you can customize QuickBooks to suit your business needs. Here are our recommended steps to begin:
- Add your company info
- Create products and services
- Add vendors and customers
- Enter your employee’s info
- Create accounts on your chart of accounts
- Set up apps or subscriptions (Payments, Payroll, etc)
- Enter historical data as needed
Create a Backup of Company Files in QuickBooks Desktop
Do you wish to create a copy of your company file? Create a backup company files in QuickBooks Desktop. Consider it a way to store your accounting data. You can restore your data using your backup in case you encounter any issues.
Here’s how to manually back your files or schedule automatic backups.
Step 1: Generate a Backup of the Company File
Backup company files save everything currently in your company file. You can use QuickBooks Statement Writer, Cash Flow Projector, Business Planner, Loan Manager, and related files along with your accounting data, templates, letters, logos, and images. But your payroll forms are not backed up by it. That’s something we’ll demonstrate for you later.
You can accomplish data backup in two ways. It is possible to perform manual or automatic data backups.
A. Set Automated Backups
Alternatively, you can have QuickBooks automatically back up your company file:
- Go to the File menu in QuickBooks and choose Switch to Single-user Mode.
- Go back to the File menu and select Back up Company.
- Next, choose to Make a Local Backup.
- Choose Local Backup from the window, then click Next.
- Choose Browse in the Local Backup Only section, then choose the location to store your backup company file.
- Decide how many backups you wish to retain. (This is optional.)
- In the Online and Local Backup section, select Complete verification. This runs a test to make sure your backup file is in good shape before you save.
- When you’re ready, select OK.
- Select save it now schedule future backups and then Next. Or if you don’t want to save a backup now, select only schedule future backups.
- Select the Save backup copy automatically when I close my company file checkbox. Then select the number of times between backups.
- To create a schedule, select New. Fill out the data fields to create a backup schedule. You can set a specific time or day of the week.
- Click OK once your schedule has been created. You are prompted by QuickBooks to enter your Windows sign-in password. This permits QuickBooks to perform the planned backup.
- Click Finish when you’re ready to start creating your backup.
- QuickBooks schedules your future backups and makes a backup at the same time. You receive a confirmation message once it’s finished.
B. Manually Back up your Company File
You have the option to periodically backup company files in QuickBooks Desktop on your own.
- Go to the File menu in QuickBooks and choose Switch to Single-user Mode.
- Go back to the File menu and select Back up Company. Next, choose to Make a Local Backup.
- Choose Local Backup from the window, then click Next.
- Choose Browse in the Local Backup Only section, then choose the location to store your backup company file.
- Decide how many backups you wish to retain. (This is not required.)
- Before you save, this tests to make sure your backup file is intact.
- Click OK when you’re ready.
- Choose Next and Save it now.
- QuickBooks generates a single backup file for the company. You receive a confirmation message once it’s finished.
Step 2: Customize your Backup Settings
- Want to know when your company file was last backed up? Access the File menu and select Back up Company. At the top of the menu, you’ll see the date and time.
- If you wish to modify your backup configurations:
- Toggle between the Backup Company and the File. Choose Create Local Backup after that.
- Pick your options.
- Make changes and click OK.
Also Read: How to Resolve QuickBooks Company File Issues?
Steps to Restore your Backed-up Company Files
It’s now possible for you to restore your company file using the backup file you have. In the file name of this file, there is a .qbb extension.
Note: Before restoring, you must transfer your backup company files to your local hard drive if you store them on an external drive or a hosting service like Box.
When restoring data in QuickBooks, you utilize a backup company file (.qbb) to generate a new company file (.qbw). Ensure your backup company file is accessible on your local hard drive, if it’s initially stored on an external device or hosting service.
Here’s how you can recover your backed-up data:
- In QuickBooks, access the File menu and choose Open or Restore Company.
- Select Restore a backup copy and proceed with Next.
- Choose Local Backup and then Next.
- Locate your backup company file on your computer, usually named [Your company name].qbb.
- Decide where to save your restored company file by browsing your folders, then select Open.
Note: To prevent accidentally overwriting data, avoid saving the backup in the same folder as your existing company file. If necessary, rename either your existing company file or the backup to ensure unique names, or save the backup in a separate folder. - Confirm your choices and select Save. If prompted about potential data overwriting, choose the option that aligns with your intentions, being cautious not to overwrite anything inadvertently.
- Your newly restored company file is now ready for use.
How to Fix the “QuickBooks Won’t Restore Backup File” Error?
If you face an issue while restoring the backup file and encounter error messages: “QuickBooks won’t restore backup”, “Restore failed, can’t remove log file”, or “This is the invalid format of post-QuickBooks 2007 Backup file”, worry not.
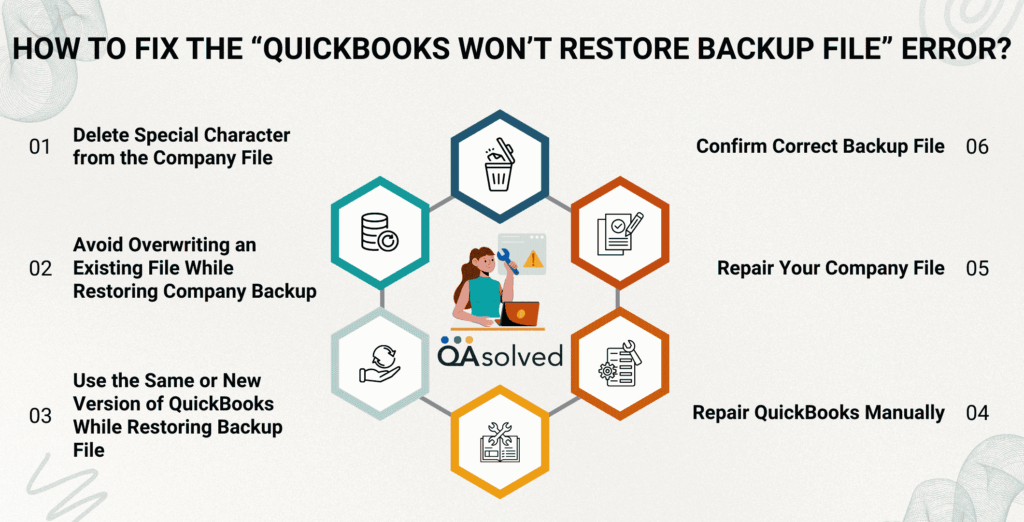
Here are some solutions with which you can Restore QuickBooks Backup File without any hindrance.
Solution 1: Delete Special Character from the Company File
- Right-click on the file name and choose rename.
- Enter a new file name and Enter.
Solution 2. Avoid Overwriting an Existing File While Restoring Company Backup
- Save your file in an easily accessible location.
- If the file name matches with another file in the same folder, a message will appear “The file name exists. Would you like to overwrite this file?”.
- Click No and change the file name.
Solution 3. Use the Same or New Version of QuickBooks While Restoring Backup File
- Use QuickBooks File Manager to know your QB version while restoring the backup file.
Solution 4. Confirm Correct Backup File
- The file should not be less than 6MB, therefore you need to check the file size after creating a company file backup.
- Right-click on File and select Properties to check the file size.
- The file is not a true backup file if it is less than 6MB, you have to make a new backup.
Solution 5. Repair Your Company File
- The company file may get affected due to several reasons. Use QuickBooks File Doctor to troubleshoot any data damage.
Solution 6. Repair QuickBooks Manually
- You can use QuickBooks inbuilt Rebuild and Verify utilities to repair QuickBooks manually.
- Go to QuickBooks File menu, then Utilities and Rebuild Data.
- Go to QuickBooks File menu then go to Utilities and Verify Data.
Conclusion
You have not only created a company file that is unique to your company and fits your needs, but you have also put in place a reliable backup plan that will safeguard your important information. With QuickBooks Desktop as your ally, you’re well-equipped to navigate the complexities of financial management and ensure the seamless operation of your business. If you still need help, reach out to our QuickBooks Desktop Experts via our toll-free number: +1-888-245-6075.
Frequently Asked Questions
To guarantee consistent and prompt data protection, you can indeed adjust the QuickBooks Desktop backup reminder frequency.
To guarantee consistent and prompt data protection, you can indeed adjust the QuickBooks Desktop backup reminder frequency.
As part of the backup process, QuickBooks Desktop enables you to confirm data integrity, ensuring the accuracy of your backed-up data.
Yes, QuickBooks Desktop allows you to schedule automatic backups at predetermined intervals, which simplifies the backup procedure.
Yes, QuickBooks Desktop allows you to schedule automatic backups at predetermined intervals, which simplifies the backup procedure.
