

A Health Reimbursement Arrangement, also known as HRA, is one of the most effective ways for employers to support their team’s healthcare expenses while keeping finances organized. Managing employee health benefits can feel like a juggling act, especially when you’re trying to keep your books organized at the same time. That’s where QuickBooks comes in handy! Setting up a QuickBooks Health Reimbursement Arrangement allows you to manage reimbursements efficiently, maintain compliance, and ensure your financial records stay accurate across every transaction.
Whether you’re using QuickBooks Desktop or QuickBooks Online, configuring an HRA correctly ensures your payroll, expenses, and employee benefits are all in sync. Plus, when you know how to record HRA reimbursements in QuickBooks, you’ll eliminate confusion and reduce manual effort, making your entire benefits management process smoother. In this blog, we’ll explain the meaning of QSEHRA and ICHRA in QuickBooks and will then show you how to set up, manage, and record your HRA reimbursements with complete accuracy. So, let’s begin with it.
What Are QSEHRA and ICHRA, and What’s the Difference Between Them?
Before we jump into the setup process, let’s first clear up what QSEHRA and ICHRA actually mean, because understanding these two terms will make managing them in QuickBooks much easier. QSEHRA, also referred to as, A Qualified Small Employer Health Reimbursement Arrangement, is a type of benefit plan designed for small businesses with fewer than 50 full-time employees. It allows employers to reimburse their team for qualified medical expenses and insurance premiums, tax-free.
On the other hand, an Individual Coverage Health Reimbursement Arrangement (ICHRA) is a more customizable version suitable for businesses of all sizes. Employers can create different employee classes and set personalized reimbursement limits. This gives organizations more control over how benefits are distributed while allowing employees to choose their own health coverage.
Here’s a table with proper differentiation that can help you understand the key difference between QSEHRA and ICHRA.
| Basis of Comparison | QSEHRA | ICHRA |
| Eligible Employers | Only for Small Business with Fewer than 50 full-time employees. | Available for businesses of any size, from startups to large corporations. |
| Integration with Group Health Plans | Employers cannot offer a group health plan alongside QSEHRA. | Employers can offer a group health plan to certain classes while offering ICHRA to others. |
| Employee Eligibility | Must offer the benefit to all full-time employees on the same terms. | Employers can create different employee classes and offer varying benefits. |
| Plan Flexibility | Less flexible, designed for small businesses seeking a simple option. | Highly flexible and customizable to fit diverse workforce needs. |
| Setup Complexity | Easier and quicker to set up. | Requires more planning due to customizable options and compliance details. |
| Reimbursement Limits | Subject to annual IRS limits for individuals and families. | No reimbursement limits. Employers can decide how much to contribute. |
| Premium Tax Credit Eligibility | Employees may qualify for a premium tax credit, but it’s reduced by the QSEHRA amount. | Employees are not eligible for premium tax credits if they accept ICHRA reimbursements. |
| Reporting on W-2 | Reported in Box 12, Code FF for the amount offered. | ICHRA is reported in Box 12, Code FF, based on the total amount available. |
Moving ahead, let’s understand how QSEHRA and ICHRA can be seamlessly managed and tracked in QuickBooks.
A Simple Guide to Handling QSEHRA and ICHRA in QuickBooks
When managing QSEHRA in QuickBooks, you can simplify the entire reimbursement process. By setting up a dedicated reimbursement account, you can easily track and categorize employee medical payments as non-taxable benefits. This ensures every QuickBooks Health Reimbursement Arrangement entry reflects accurately in your payroll and expense reports.
Once it’s set up, you can quickly record HRA reimbursements in QuickBooks, keeping your books compliant and your employee benefits transparent.
Working with ICHRA in QuickBooks is just as simple as it can be and on top of that it offers more flexibility. Since ICHRAs lets you tailor reimbursement limits for different employee groups, QuickBooks allows you to create specific accounts or classes for each group. This makes tracking benefits much easier and ensures every reimbursement aligns perfectly with your payroll setup.
By keeping your ICHRA entries organized within QuickBooks, you can manage healthcare reimbursements confidently without worrying about year-end chaos.
How Can Employers Start Offering HRAs to Their Workforce?
Setting up a Health Reimbursement Arrangement (HRA) for your employees may sound complex at first, but with the right approach, it’s a simple and rewarding process. Here’s a general breakdown of how you can begin offering HRAs to your team:
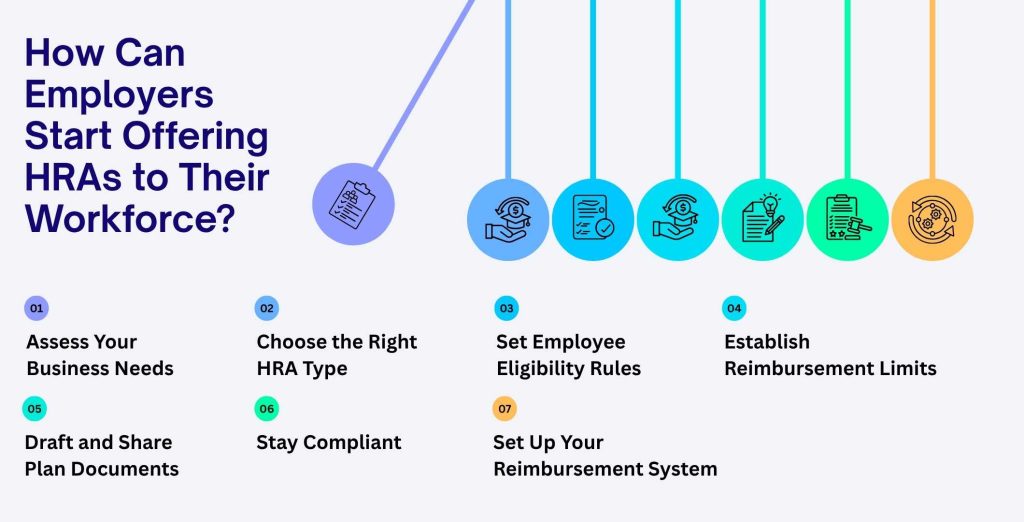
- Assess Your Business Needs: Determine why you want to offer an HRA and what goals it will serve, such as improving employee retention or managing healthcare costs.
- Choose the Right HRA Type: Decide whether a QSEHRA or ICHRA best fits your organization’s size and benefits strategy. You can also use GCHRA for group coverage.
- Set Employee Eligibility Rules: Define which employees will qualify for the HRA based on hours worked, job roles, or other criteria.
- Establish Reimbursement Limits: Specify how much you’ll reimburse employees for medical expenses and premiums each month or year.
- Draft and Share Plan Documents: Prepare a clear written policy outlining HRA details, rules, and employee rights.
- Communicate with Your Employees: Clearly explain how the reimbursement process works and what expenses qualify.
- Set Up Your Reimbursement System: Use tools like QuickBooks to track, record, and manage HRA reimbursements efficiently.
- Stay Compliant: Ensure your plan meets all IRS and ACA regulations to avoid penalties and maintain transparency.
So, these are the 8 aspects that employers can ensure to successfully design, implement, and manage an HRA program that benefits both their business and employees. Now, let us highlight the steps that can help you to record QSEHRA and ICHRA in QuickBooks Desktop and QuickBooks Online respectively.
13 Steps to Record QSEHRA and ICHRA in QuickBooks Desktop
Let’s walk through the easy steps to record QSEHRA and ICHRA in QuickBooks Desktop so you can keep reimbursements organized, payroll accurate, and your employee benefit records perfectly in sync.
Note: Because these payments are non-taxable, they won’t be displayed on Payroll Tax or any other tax-related reports.
- Open QuickBooks Desktop and navigate to the Employees menu.
- Go to the Manage Payroll Items and select New Payroll Item.
- Then, click on Custom Setup and Next to proceed.
- Fourth, select Company Contribution, and again click Next to proceed.
- Now, you need to enter a distinct name for this very new payroll item. For example, “Reportable Qual. Small ER HRA”. This name will appear on pay stubs, vouchers, and payroll reports. Click Next to continue.
- Leave the Agency Information fields empty, since this item is for reporting and tracking only.
- In the Liability Account dropdown, choose <Add New>.
- Now, in the new account window, select Other Expense as the account type, name it (e.g., Reportable Qual. Small ER HRA), then click Save & Close.
- For the Expense Account, select the same account you just created, and click Next.
Note: Using the same account for both liability and expense creates a “wash” item, ensuring QSEHRA reimbursements appear on reports without affecting your Profit & Loss totals. - Click Yes if prompted to confirm using the same account for both fields.
- Under Tax Tracking Type, select Qual. Small ER HRA, and click Next.
- Continue clicking Next to proceed with the default options on the calculation based on the quantity page.
- Finally, click Finish to complete the setup.
So, these are the steps that will help you set up and record a Health Reimbursement Arrangement (HRA) in QuickBooks Desktop with ease. Next, let’s move on to the process for recording HRA in QuickBooks Online and see how it works there.
Steps to Setup Health Reimbursement Arrangement in QuickBooks Online
Setting up a Health Reimbursement Arrangement in QuickBooks Online and Intuit Online and Full Service Payroll involves creating reimbursement accounts, categorizing expenses, and recording transactions. This allows users to ensure employee benefits and company finances stay organized and compliant. Here are the steps:
9 Steps to Record HRA in QuickBooks Online Payroll and QuickBooks Online Payroll Full Service
Follow these steps to set up and record HRA in QuickBooks Online Payroll and Full Service to ensure accurate employee payments and maintain proper tracking of health benefit expenses.
- Open QuickBooks Online.
- From the left-hand menu, go to Workers and select Employees.
- Click on the specific employee’s name whose reimbursement you want to set up.
- Next, select the Edit (pencil) icon beside the Pay section.
- Under How much do you pay, click on Add additional pay types.
- From the Even more ways to pay… dropdown, choose Reimbursement.
- You can enter a fixed recurring amount in the box or choose to add it manually each time you run payroll.
- To personalize it, you can rename this pay type to something more specific, such as QSEHRA Reimbursement or ICHRA Reimbursement, by selecting the pencil icon next to Reimbursement.
- Once you’ve made all the necessary changes, click Done to save your setup.
This ensures your HRA reimbursements are properly added to the employee’s payroll for accurate tracking and reporting.
Also Read: Add or Edit Pay Types in QuickBooks Online and Desktop Payroll
8 Steps to Setup and Record HRA in Intuit Online Payroll and Intuit Full Service Payroll
If you’re using Intuit Online Payroll or Intuit Full Service Payroll, setting up HRA reimbursements is easier than you might think. With just a few quick steps, you can make sure your employee health benefits are added correctly, tracked accurately, and reflected in every paycheck without any confusion.
Let’s walk through how to set up and record your HRA in Intuit Online Payroll and Full Service Payroll the right way.
- Open QuickBooks Online Payroll.
- Go to Employees and select the employee’s name from the list.
- In the Pay section, click the Edit button to make changes.
- Under What additional ways do you pay the employee, choose Show all pay types to view the full list.
- Select the Reimbursement pay type option. You can enter a recurring reimbursement amount or add it manually each time you create a paycheck.
- To personalize the category, rename it to something like QSEHRA Reimbursement or ICHRA Reimbursement by selecting Add/Edit types > Add Reimbursement name.
- If you’re using Intuit Full Service Payroll and this option isn’t available, contact Payroll Support for further assistance.
- Once all details are updated, click OK to save your changes.
Following these steps ensures your HRAs are correctly set up and tracked within your payroll system. Now, we’ll proceed ahead and look at the steps to add taxable QSEHRA reimbursements in QuickBooks Online.
How to Add Taxable QSEHRA Reimbursements in QuickBooks Online Payroll?
Some QSEHRA reimbursements may count as taxable income, especially if the premiums were paid pre-tax through a spouse’s employer plan. In such cases, QuickBooks makes it easy to record them correctly. These taxable reimbursements are treated like regular wages, with income and payroll taxes automatically withheld. Here’s how you can do it step-by-step.
- Login to your QuickBooks Online account.
- Select Employees from the left-hand navigation bar.
- Click on the name of the employee who will receive the taxable reimbursement.
- Choose Edit Employee to open their payroll details.
- In the How much do you pay the employee section, click the pencil icon to make changes.
- Check the box for Other Earnings, and if needed, enter a recurring reimbursement amount.
- Give this earning type a clear name, such as QSEHRA Reimbursement, especially if you plan to add multiple earning types in the future.
- To include another earning category, select Add Other Earnings Type.
- Once all details are entered, click Done to save your updates.
Note: This feature doesn’t actually process payments but helps you keep everything organized for tax season.
QuickBooks includes a helpful tracking code for QSEHRA reimbursements that makes year-end reporting effortless. When you use it, QuickBooks automatically reports the total QSEHRA amount offered, not the amount claimed, on your employees’ W-2 forms in Box 12, Code FF. It’s an easy and reliable way to stay accurate and compliant.
Conclusion
In conclusion, setting up a QuickBooks Health Reimbursement Arrangement (HRA) is one of the most effective ways to simplify how you manage employee healthcare benefits. Whether you choose QSEHRA for small businesses or ICHRA for a more flexible structure, QuickBooks helps you organize, track, and record reimbursements with accuracy and ease. By creating dedicated reimbursement accounts, you can categorize employee medical payments correctly and maintain clear payroll and expense records.
QuickBooks not only helps you stay compliant but also minimizes errors and saves valuable time during payroll processing. Employers can take advantage of its automation and reporting features to ensure every reimbursement is accounted for and easily accessible at tax time. Hence, managing healthcare reimbursements doesn’t have to be complicated.
Frequently Asked Questions
A Health Reimbursement Arrangement, or HRA, is an employer-funded plan that covers employees’ qualified medical expenses such as insurance premiums, copayments, and deductibles. The reimbursements are tax-free, and unlike an FSA, only employers contribute to the account, making it a cost-effective way to support employee healthcare needs.
An HRA is funded entirely by the employer to cover employees’ medical expenses. Here’s how it works:
– Employer-Funded: Each year, the employer sets aside a fixed allowance for healthcare reimbursements.
– Reimbursement Process: Employees pay for eligible expenses and get reimbursed as per their allotted amount.
– Covered Expenses: These can include doctor visits, prescriptions, insurance premiums, dental care, and vision services.
– Tax-free Benefit: The reimbursements are not considered taxable income.
– Unused Funds: Depending on the employer’s plan, any remaining funds may roll over to the next year or revert to the employer.
No, Health Reimbursement Arrangement (HRA) reimbursements are generally not taxable. As long as the funds are used for eligible medical expenses, the amount employees receive through an HRA remains tax-free. However, if the reimbursement is used for non-qualified expenses, it may be subject to taxation.
To properly record reimbursed expenses in QuickBooks, follow these steps:
1. Set up an expense account dedicated to reimbursements (optional but helpful for tracking).
2. Enter the original expense as you normally would.
3. Create a reimbursement check or bill to record the repayment.
4. Link the reimbursement to the original expense for accurate bookkeeping.
5. Match the reimbursement transaction in your bank feed or reconciliation.
By completing these steps, you can accurately manage and track reimbursed expenses in QuickBooks.
If your employer doesn’t offer health insurance, you can apply for coverage through the Health Insurance Marketplace. Based on your income and household size, you may qualify for discounted monthly premiums or reduced out-of-pocket costs through available health plans.
Setting up employer-paid health insurance in QuickBooks ensures accurate payroll deductions and expense tracking. Follow these simple steps:
1. Open QuickBooks and go to Payroll Settings.
2. Select Deductions/Contributions, then click Add a New Deduction/Contribution.
3. Choose Company Contribution as the type.
4. From the list, select Health Insurance or create a custom name like “Employer Health Contribution.”
5. Enter the contribution amount or percentage the company pays for each employee.
6. Assign the benefits to the appropriate employees.
7. Save your settings and review them during payroll runs to confirm accurate calculations.
This setup allows QuickBooks to automatically include the employer’s health insurance contributions in payroll reports, helping maintain accurate financial and tax records.
