
Recurring ACH (Automated Clearing House) payments are a method of electronic funds transfer in the United States that allows for regular, scheduled transactions to be automatically debited from one bank account and credited to another. ACH payments are commonly used for various financial transactions, including direct deposits of salaries, tax refunds, vendor payments, and recurring bill payments.
In the context of recurring ACH payments, they typically refer to ongoing, pre-authorized transactions where a payer permits a payee (such as a business or service provider) to withdraw funds from their bank account on a regular and predetermined basis. Common examples of recurring ACH payments include:
- Subscription Services
- Loan Repayments
- Utility Bills
- Insurance Premiums
- Donations and Charitable Contributions
How do Recurring ACH Payments Work?
To initiate recurring ACH payments, the payee typically obtains the payer’s bank account information and obtains their consent to automatically withdraw funds regularly. Payers should exercise caution when setting up recurring ACH payments and ensure they trust the payee, as they are authorizing ongoing access to their bank account.
Recurring ACH payments are convenient for both payers and payees, as they eliminate the need for manual payments and help ensure that bills and subscriptions are paid on time. However, consumers need to monitor their bank statements regularly to verify that the correct amounts are being deducted and to have a mechanism for cancelling or altering recurring payments if needed.
What are Recurring ACH Payments in QuickBooks?
Recurring ACH (Automated Clearing House) payments in QuickBooks refer to the capability of the software to automatically schedule and process regular payments using the ACH network.
How do Recurring ACH Payments Work in QuickBooks?
- Set Up Recurring Payments: Users can set up recurring ACH payments to pay bills, vendors, or employees regularly. This is useful for expenses that occur regularly, such as rent, utilities, or payroll.
- Payment Schedule: QuickBooks allows users to specify the frequency and timing of these payments. You can set up payments to occur weekly, bi-weekly, monthly, or on a custom schedule, depending on your needs.
- Payment Details: Users enter the payment details, including the payee/vendor’s information, payment amount, bank account information, and any other relevant details.
- Approval and Authorization: Once the recurring ACH payment is set up, it may require initial authorization and approval from the account owner or administrator.
- Automatic Processing: QuickBooks automates the payment process based on the schedule you’ve set. It will initiate the ACH transfer on the specified date, transferring funds from your bank account to the payee’s bank account.
- Recordkeeping: QuickBooks records these transactions in your financial records, making it easy to track your expenses and payments over time.
- Notifications: Depending on your preferences and settings, QuickBooks may send notifications or reminders to you and the payee/vendor before each payment is processed.
How to Manage Recurring ACH Payments in QuickBooks Desktop and QuickBooks Online?
Managing recurring ACH payments in QuickBooks can help streamline your financial processes and ensure that you make regular payments on time. Both QuickBooks Desktop and QuickBooks Online offer options for setting up and managing recurring ACH payments. Below, I’ll outline the steps for both versions:
A. For QuickBooks Desktop
Step 1. Set Up a Vendor Profile
- Go to the “Vendors” menu and select “Vendor Center.“
- Click “New Vendor” to create a profile for the vendor you’ll be making recurring ACH payments to. Enter their details.
Step 2. Create a Recurring Transaction
- Go to the “Banking” menu and select “Write Checks.”
- Enter the vendor name and the necessary payment details.
- Check the “Make Recurring” box at the bottom of the check window.
Step 3. Configure the Recurring Transaction
- A “Make Recurring” window will appear. Give the recurring transaction a name and select “Scheduled.”
- Set the frequency, start date, and end date for the recurring payment.
- Choose “Automatically Enter” or “Remind Me” for handling the transaction. “Automatically Enter” will create the transaction without your approval; “Remind Me” will notify you when it’s time to process it.
Step 4. Add Bank Account Information
- If you haven’t already, set up your bank account in QuickBooks Desktop.
- In the “Write Checks” window, make sure you select the correct bank account for the ACH payment.
Step 5. Save the Recurring Transaction
Click “OK” to save the recurring transaction.
Step 6. Review and Edit
You can review and edit your recurring transactions by going to “Lists” > “Recurring Transactions.”
B. For QuickBooks Online
Step 1. Set Up a Vendor Profile
- Go to the “Expenses” or “Vendors” menu and select “Vendors.”
- Click “New Vendor” to create a vendor profile with their details.
Step 2. Create a Recurring Bill
- Go to the “Expenses” or “Vendors” menu and select “Enter Bills.”
- Enter the vendor name, payment details, and any necessary information.
- Check the “Make Recurring” box at the bottom of the bill window.
Step 3. Configure the Recurring Bill
- A “Make Recurring” window will appear. Give the recurring bill a name.
- Set the frequency, start date, and end date for the recurring payment.
- Choose the “Automatically create” option to automatically create the bill, or “Remind me to create” to receive a reminder when it’s due.
Step 4. Add Bank Account Information
Ensure that your bank account is set up in QuickBooks Online.
Step 5. Save the Recurring Bill
Click “Save Template” to save the recurring bill.
Step 6. Review and Edit
You can review and edit your recurring bills by going to “Expenses” or “Vendors” > “Recurring Transactions.”
Remember to verify your ACH payment details, including the vendor’s bank account information, to ensure accurate and timely payments. Additionally, make sure your bank account in QuickBooks is set up for ACH payments if it’s not already. Always exercise caution and follow security best practices when handling sensitive financial information.
How to Stop Recurring ACH Payments in QuickBooks?
Stopping recurring ACH payments in QuickBooks Online and QuickBooks Desktop involves slightly different processes. I’ll outline the steps for each platform below:
A. For QuickBooks Online
- Log in to QuickBooks Online: Access your QuickBooks Online account using your username and password.
- Navigate to “Banking”: Click on the “Banking” tab in the left-hand menu to access your banking transactions.
- Locate the Recurring ACH Payment: Find the recurring ACH payment that you want to stop in the list of transactions.
- Select the Transaction: Click on the transaction to open the details.
- Click “Edit” or “More”: Depending on your version of QuickBooks Online, you may see an “Edit” or “More” button. Click on it to access the transaction editing options.
- Modify or Delete the Recurring Transaction: Depending on your needs, you can either modify the details of the recurring transaction or delete it entirely to stop future payments.
- Confirm and Save Changes: If you’re editing the transaction, make the necessary changes, and then click “Save” or “Save and Close.” If you’re deleting it, select the option to delete and confirm your choice.
- Review Future Transactions: To ensure that the recurring ACH payment has been stopped, review your future transactions in the “Banking” section to verify that they no longer appear.
B. For QuickBooks Desktop:
- Open QuickBooks Desktop: Launch QuickBooks Desktop and log in to your company file.
- Access the Recurring Transactions List: From the top menu, go to “Lists” and then select “Recurring Transactions List.”
- Locate the Recurring ACH Payment: Find the recurring ACH payment that you want to stop in the list of recurring transactions.
- Select the Transaction: Click on the transaction to highlight it.
- Delete the Recurring Transaction: Right-click on the highlighted transaction and select “Delete Recurring Transaction.”
- Confirm Deletion: QuickBooks will ask you to confirm the deletion. Confirm that you want to delete the recurring transaction.
- Review Future Transactions: To ensure that the recurring ACH payment has been stopped, review your future transactions to verify that they no longer appear in the list of scheduled transactions.
Remember to double-check your work and ensure that you’ve successfully stopped the recurring ACH payment to avoid any unexpected deductions from your bank account.
Please note that the exact steps may vary slightly depending on the version of QuickBooks you are using. If you encounter difficulties, consult the QuickBooks user guide or reach out to the QuickBooks team for assistance.
Conclusion
In conclusion, ACH payments in QuickBooks offer businesses a streamlined and secure method for handling financial transactions. Whether you’re making payroll payments to employees, paying vendors, or receiving customer payments, ACH payments simplify the process and reduce the need for paper checks.
This not only saves time but also contributes to a more eco-friendly and cost-effective financial management system. As businesses continue to adapt to the digital landscape, embracing ACH payments in QuickBooks becomes a valuable step towards greater efficiency and financial control.
Frequently Asked Questions
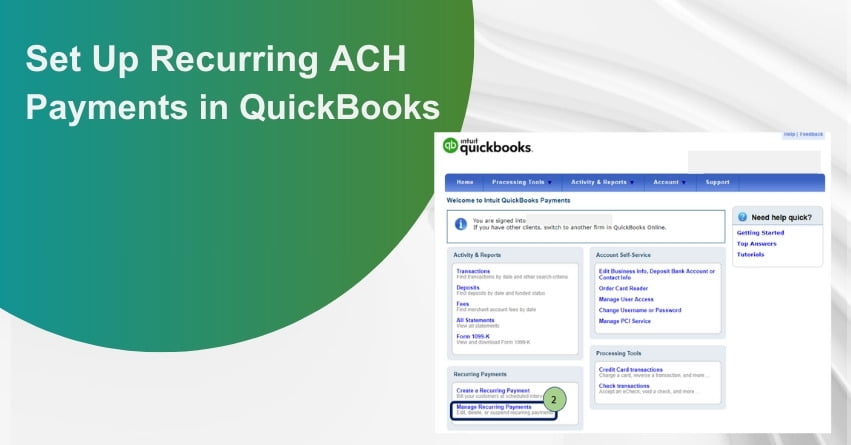
To set up recurring ACH payments in QuickBooks, follow these steps:
1. Log in to your QuickBooks account.
2. Go to “Sales” or “Invoicing” depending on your version.
3. Create a new invoice or select an existing one.
4. Set the invoice to recur by specifying the frequency and start date.
5. Add your customer’s bank account details for ACH payments.
6. Save the recurring invoice.
Yes, you can easily edit or cancel recurring ACH payments by locating the recurring invoice in QuickBooks, making the necessary changes, or choosing to stop the recurrence.
QuickBooks may charge transaction fees for processing ACH payments. Check your subscription or the Intuit website for pricing details.
QuickBooks uses encryption and secure protocols to protect ACH payment data, ensuring it’s secure for both you and your customers.
Yes, you can schedule ACH payments to vendors by setting up recurring bills in QuickBooks. This helps automate your accounts payable process.
