
Managing bills effectively is crucial for any business. Timely payments not only help maintain positive relationships with vendors but also prevent late fees and protect your company’s cash flow. However, as your business grows, keeping track of due dates and processing multiple payments manually can become overwhelming quickly. That’s where QuickBooks Online’s Scheduled Pay feature comes in. It is a smart solution designed to automate and simplify your bill payment process.
Scheduled Pay lets you set up future payments so you don’t have to worry about missing due dates or juggling multiple payment methods. Whether you prefer using bank transfers, printed checks, or other available options, QuickBooks gives you full control over how and when each bill gets paid. This centralized system helps you stay organized, reduces the risk of errors, and ensures no invoice slips through the cracks.
What makes Scheduled Pay even more valuable is its seamless integration with QuickBooks’ accounting features. Each transaction is automatically tracked and recorded, saving time during monthly reconciliations and improving the accuracy of your financial reports. For small and mid-sized businesses aiming to streamline their accounts payable process, this tool offers both convenience and peace of mind.
In this blog, we will guide you through setting up Scheduled Pay in QuickBooks Online, from the initial configuration to customizing individual payment preferences, so you can take full advantage of automated bill payments and keep your financial operations running smoothly.
Benefits of Using Scheduled Pay in QuickBooks Online
Setting up Scheduled Pay in QuickBooks Online isn’t just about convenience; it’s a strategic approach to speeding up your accounts payable process. With automated bill payments, you can gain better control over your business finances, reduce errors, and create a more predictable cash flow. Listed below are some of the key advantages of this feature.
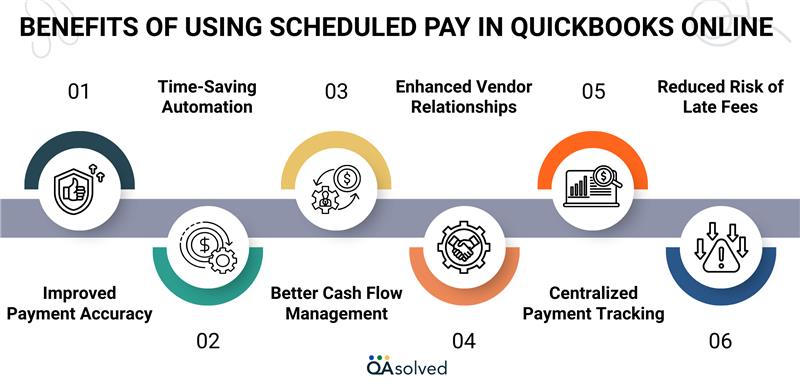
1. Improved Payment Accuracy
Scheduled Pay ensures that bills are paid on time and for the correct amount, significantly reducing the chances of manual errors, duplicate entries, or missed deadlines that can impact your business operations.
2. Time-Saving Automation
Automating your recurring bill payments eliminates the need to track due dates manually or process each invoice individually, giving you more time to focus on strategic tasks and core business priorities.
3. Better Cash Flow Management
With clearly organized payment dates, you can effectively plan future expenses, maintain consistent cash flow, and ensure adequate balance for payments without compromising business stability or financial commitments.
4. Enhanced Vendor Relationships
Making timely payments demonstrates professionalism, enhances trust with vendors, and can lead to improved terms, faster deliveries, or even exclusive discounts that benefit your long-term business relationships and credibility.
5. Centralized Payment Tracking
QuickBooks records all scheduled payments in one place, offering complete visibility, improved control over cash outflows, and simplified reconciliation processes to help you maintain organized and up-to-date financial records.
6. Reduced Risk of Late Fees
Automated bill payments significantly lower the chance of missing due dates, helping you avoid late fees, penalties, or service disruptions while promoting consistent and responsible financial management practices.
The Scheduled Pay feature in QuickBooks Online helps you run your business more efficiently while providing you with peace of mind. By automating bill payments, businesses can focus on strategic growth, knowing that their bills are being paid on time and accurately.
Steps to Set up and Check the Schedule Pay in QuickBooks Online
After understanding the benefits of Scheduled Pay, it’s time to set it up in your QuickBooks Online account. It only takes a few minutes to complete the process. Using the steps below, you will be able to automate your bill payment process, manage due dates efficiently, and ensure your vendors are paid on time.
Let your customers decide when they want to pay after viewing the invoice. They can select any payment date up to the invoice’s due date.
Note: Scheduled payments are available to customers only if online payments are enabled for your invoices.
Set Up Schedule Pay
Customers will have the option to schedule payment when they click Review and Pay. This option will not appear if:
- The invoice is marked due upon receipt.
- Payment must be made in full if the customer changes the amount.
- The original invoice total is $50,000 or more.
- Customers do not have an Intuit Account (though they can create one to access this feature).
Now, let’s discuss how to show your customers how to use Schedule Pay.
Steps to Use Schedule Pay in QuickBooks Online
Learn how to set up and manage Scheduled Pay in QuickBooks Online to automate bill payments, save time, and ensure on-time transactions with ease. Here are the steps:
- Select Set a date for the bill you want to pay.
- Sign in to your Intuit Account to continue.
- Enter the desired payment date (ensure it’s before the due date).
- Click on Schedule payment to finalize the setup.
Once this is done, your customers will receive a confirmation email. Now, let’s take a look at how to check the Schedule Pay status.
Check or Review the Scheduled Payment Status
Here are the steps to check the Scheduled Payment status in QuickBooks Online:
- Find the invoice you wish to review.
- Choose the status field on the invoice.
- Check the activity tracker for Schedule Pay to see if a payment has been scheduled.
Note: Scheduled Pay will be canceled if you make changes to any of the following details on the invoice:
- Amount
- Frequency
- Terms
- Payment Options
- Email Address
- Customer Name
If a scheduled payment is canceled, the customer will receive an email notification. The Cancel payment link in the Schedule Pay confirmation email also allows customers to cancel Schedule Pay. They can schedule a new one or pay the invoice immediately after cancelling.
Once you complete the setup, Scheduled Pay will activate, working automatically for eligible invoices. This allows your customers to pay on time, while keeping your receivables under better control. Reviewing invoice activity and payment status regularly can further streamline your billing process and support healthy cash flow.
In case you face further difficulties while executing the steps and setting up the Scheduled Pay in QuickBooks Online, then it would be ideal to connect with QuickBooks Online Support at toll-free number +1-888-245-6075.
Conclusion
Setting up Scheduled Pay in QuickBooks Online is a smart move for businesses looking to automate and simplify their bill payment process. It not only reduces the administrative burden but also enhances accuracy, ensures timely payments, and supports better vendor relationships. By giving your customers the flexibility to choose payment dates, you create a seamless payment experience while maintaining predictable cash flow.
Whether you’re a small business owner or managing a growing enterprise, this feature can streamline your accounts payable process and keep your finances organized. With QuickBooks automatically tracking and recording every transaction, reconciliation becomes faster, and reporting stays consistent.
In a nutshell, if you’re ready to improve efficiency and reduce payment-related stress, Scheduled Pay is a powerful tool worth using.
Frequently Asked Questions
1. Click on the ‘Expenses’ tab on the left.
2. Choose ‘Vendors’, then the vendor you would like to pay.
3. Click ‘Schedule Payment’ (or “Pay Bills Online” if enabled).
4. Select the bill you want to schedule and click ‘Schedule Payment’.
5. Choose a payment method (bank transfer, check, or credit card).
6. Choose the payment date that works best for you.
7. Pay the scheduled amount and confirm.
1. Select Payroll from the left-hand menu.
2. Click on Run Payroll (even if it’s not a scheduled pay date).
3. Choose the employee(s) you wish to pay.
4. Fill out the pay details (hours, salary, bonuses, etc.).
5. Change the Pay Date if needed.
6. Review and Submit the payroll.
Payroll that is scheduled is one you run on a regular basis, such as weekly, biweekly, or monthly. QuickBooks reminds you when it’s time to process employee payments consistently. Payrolls of this type are ideal for employees whose salaries are fixed or recurring. Unscheduled payroll, on the other hand, occurs when an employee needs to be paid outside of their regular schedule.
This may include issuing bonuses, correcting a missed paycheck, or handling off-cycle payments. You can make payments at any time when you run unscheduled payroll manually.
1. Access the Gear icon at the top right.
2. Choose Terms from All Lists.
3. Then, click New to add a new payment term.
4. Enter a name (like Net 30 or Due on Receipt).
5. Decide how many days until payment is due.
6. Hit Save.
