

Job costing is an accounting method used to track the specific expenses that are directly associated with a particular project or job. This unique approach enables businesses to determine the profitability of individual jobs by collecting and assigning costs. Job costing is used in multiple industries, such as construction, manufacturing, event management, consulting, media production, and printing.
In the past couple of decades, conventional accounting procedures have transformed significantly, and job costing has become more advanced than ever before. One such solution that has grabbed the attention of businesses of all sizes is QuickBooks. QuickBooks is a financial management and accounting software that offers a variety of tools for tasks such as accounting, inventory, payroll, tax filing, job costing, and more.
With the help of job costing in QuickBooks, companies get easy access to detailed insights into the costs associated with individual jobs. This helps businesses to make informed decisions based on resource allocation, pricing, and overall profitability. Learning how to setup job costing in QuickBooks is essential for any project-based business. By understanding the job cost for each project, you can predict the future costs of similar projects.
Moving ahead in this blog, we will help you with the steps to setup job costing in QuickBooks Online and Desktop versions. Let’s proceed.
5 Easy Steps to Setup Job Costing in QuickBooks Desktop
Job costing in QuickBooks desktop enables users to monitor the financial performance of each project in detail. Also, the desktop version allows businesses to access various QuickBooks job costing reports, such as job profitability and job estimates vs actuals. So, follow these steps to begin with job costing in QuickBooks Desktop.
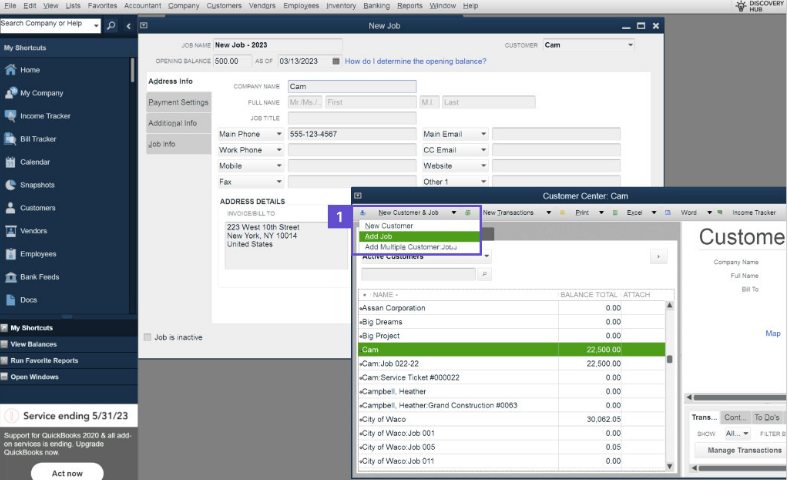
Step 1: Setup a Job for Each Customer
Create separate jobs for each customer, even if they have only one job. If additional jobs for the customer arise later, you can track income and expenses for each one separately.
Step 2: Assign all your Expenses to Jobs
To have a comprehensive view of job costs, make sure all expenses are assigned to specific jobs. When entering a bill, check, or timesheet, select the relevant job in the Customer column.
- For Billable Time: Track job hours using a weekly timesheet or single activity entry and assign them to customers or jobs. Billable entries are marked by default.
Note: Timesheets are non-posting entries. Invoices or bills may be used for financial reporting.
- For Job-Related Purchases: Use a bill, check, or credit card charge to record the purchase. List each item or service purchased on the Items tab and assign each to the appropriate customer or job in the Customer column.
- For Overhead Expenses: To calculate and track overhead expenses, follow these steps. Ensure you consult your accountant before making any changes to your company file.
- For Mileage: Enter the mileage in the Enter Vehicle Mileage window. If you wish to adjust the expense amount (e.g., charge the customer more than the standard rate), simply amend the invoice.
- For Other Expenses: Record your expenses using a bill, check, or credit card charge. Assign each expense to the appropriate customer or job on the Expenses tab.
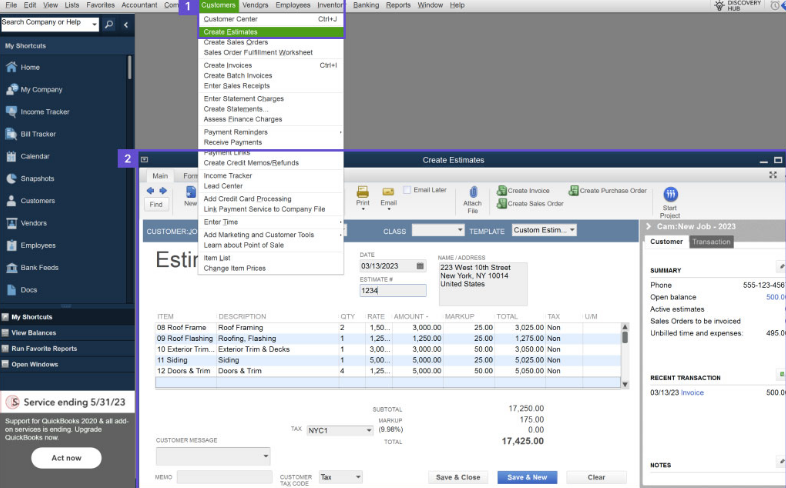
Step 3: Enter Your Estimates in QuickBooks Desktop
You can create estimates in or outside of QuickBooks. Using a spreadsheet or another method, just enter the summary estimates into QuickBooks. If you create estimates outside QuickBooks but generate invoices within the program, you can convert these estimates into invoices by entering the invoice details into the Create Estimates window.
Using estimates in QuickBooks gives you access to full Job Cost reports, helping you track your project budget and adjust future estimates for better accuracy.
Note: If you record time and expenses on estimates, timesheets, or bills, you’ll need to choose one to transfer to an invoice. QuickBooks Desktop does not automatically match the time recorded on an estimate with the time on a timesheet when adding it to an invoice; you must do this manually.
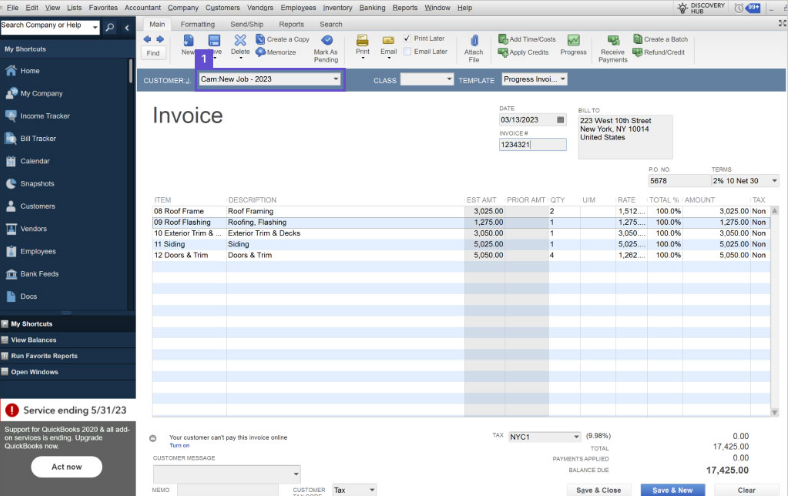
Step 4: Prepare the Invoices
When creating invoices, ensure you select the correct Customer. If you generate invoices outside QuickBooks Desktop, enter a summary of each invoice into the program to include the revenue in the Job Profitability reports.
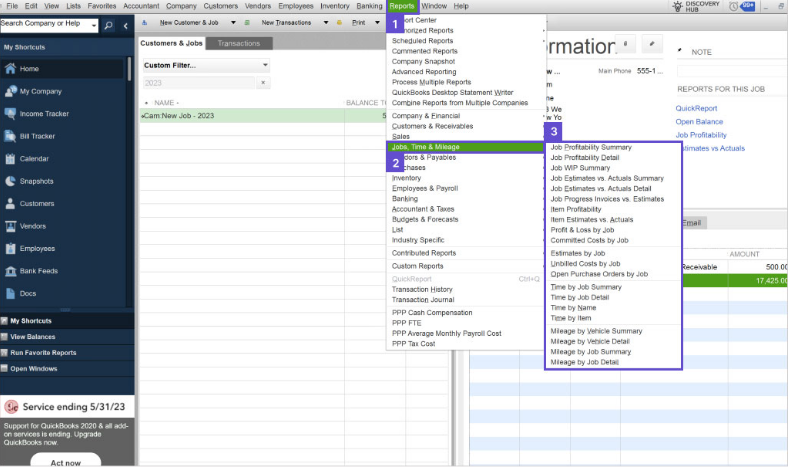
Step 5: Review Job Costing Reports to Assess Your Business’s Performance
Job Reports is a valuable tool for assessing job profitability, refining estimates, monitoring financial progress, and spotting potential issues before they become critical.
To access job reports:
- Navigate to the Reports menu.
- Choose Jobs, Time, & Mileage.
For a broader selection of job costing reports, available in QuickBooks Premier Contractor Edition and Accountant Edition:
- Go to the Reports menu.
- Select Industry Specific, then choose Contractor Reports.
Now that you’ve learned how to setup job costs in QuickBooks Desktop let’s explore how to do the same in QuickBooks Online.
Steps to Setup Job Costing in QuickBooks Online
In QuickBooks Online, job costing involves using the platform’s tools and features to allocate and track costs for individual projects or jobs accurately.
QuickBooks Online Plus and Advanced are the best choices for construction companies that need accurate job costs. Both editions use the “Projects” tool to track costs for each job, unlike other QuickBooks editions that use workarounds like sub-customers.
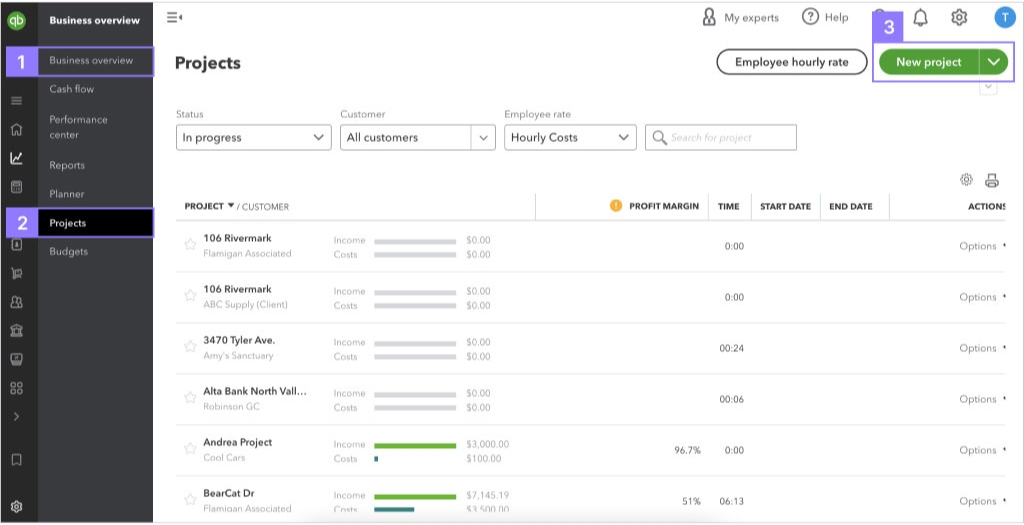
Step 1: Add a New Project
- Go to Projects from the Business overview or left-hand menu.
- Click the green “New project” button in the top-right corner.
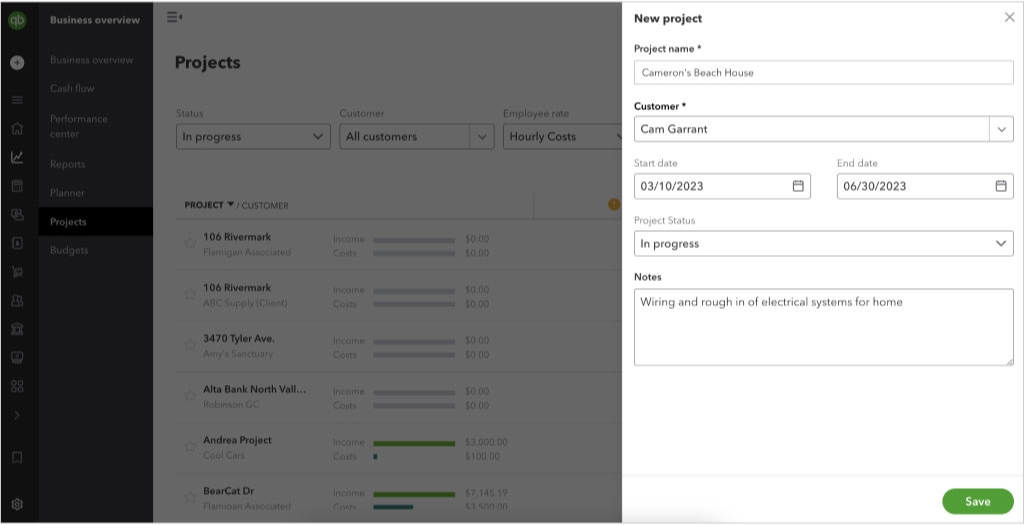
Step 2: Fill Out the Project Details
- Enter the project name, select or add the customer, and fill in any project details.
- Then, click Save.
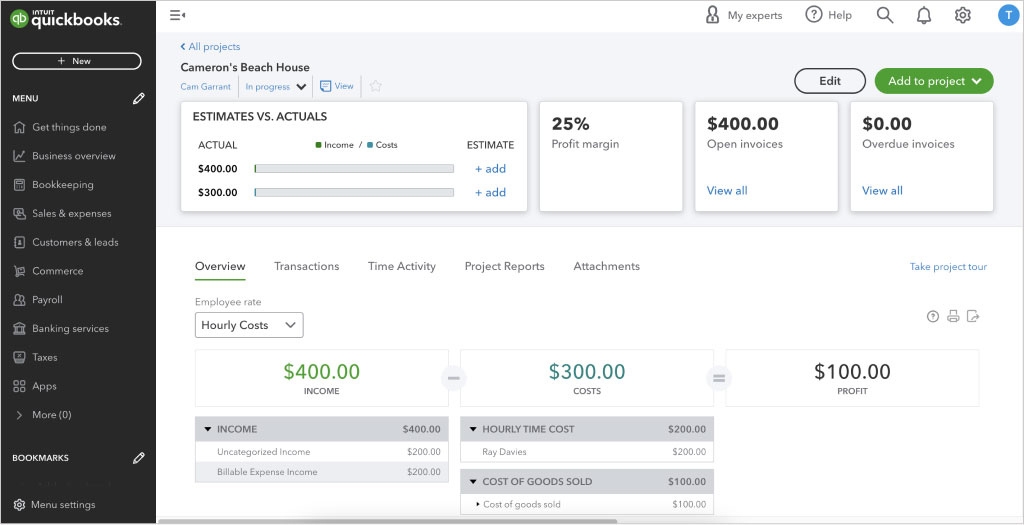
Step 3: Assign Labor Costs to the Project
QuickBooks Online provides effective cost management and budget oversight by assigning labor costs directly to a project for accurate tracking of expenses.
A. When using QuickBooks Payroll
You can assign project time to your employees through their weekly timesheet or QuickBooks Time. Single-time activities can be logged without timesheets. These costs will appear in the project after payroll is run.
B. In the Case of not using QuickBooks Payroll
- Enter employee details and their time manually for each project.
- Select the hourly cost rate, then choose or add the employee.
- Using the built-in calculator, you can determine the employee’s hourly labor burden by entering their cost rate.
Step 4: Assign all Other Costs to the Project
- Find the relevant expenses on the Transactions screen.
- In the customer/project field, select your project.
- Click on the Confirm button to save billable expenses.
- Choose the appropriate project from the Customer/Project field when recording a bill, check, or manual expense.
Step 5: Assign Income to the Project
- Select the project from the customer field when invoicing.
- Add any expenses marked as billable to the project from the right-hand menu.
- Make sure the changes are saved.
Create a Job Costing Report in QuickBooks Online Plus and Advanced
Select from these three reports in the Projects section to analyze your project costs:
- Project Profitability: A standard Profit & Loss report for each project.
- Unbilled Time and Expenses: Shows time and expenses assigned to a project but not yet billed.
- Non-Billable Time: Tracks time that is not billed to the project, such as administrative work. Keeping track of these costs is crucial to understanding the actual costs associated with the project.
Conclusion
So, setting up job costing in QuickBooks Online and Desktop is essential for accurate project financial management. Through its projects feature, QuickBooks Online provides a streamlined approach to tracking and managing costs. Through its various reports and manual entry tools, QuickBooks Desktop provides robust job costing tools, allowing businesses to make informed decisions.
If you’re facing any issue with the same, then we are here to provide the best QuickBooks support service at a very reasonable and affordable price range.
Frequently Asked Questions
The answer is yes. Costing refers to tracking and comparing a job’s expenses and revenue. QuickBooks job costing tools can help you track your job costs and profits.
1. Launch QuickBooks Desktop.
2. Next, access the Reports menu.
3. Choose the Transaction Detail Report.
4. Opt to Customize to filter your report.
5. Choose Customer/Job as the Filter name.
6. Choose Check under Transaction Type.
7. Click OK after you have finished.
Adding labor costs to a project in QuickBooks Online if not using QuickBooks payroll:
1. Go to Settings.
2. Choose a Chart of Accounts.
3. Select New.
4. Select Expenses from the Account Type menu.
5. Pick Payroll Wage Expenses as the Detail Type.
6. Select a tax code from the Default Tax Code dropdown.
7. Hit Save and Close.
Select the plus sign (+) at the top of the screen and select Estimate from the drop-down menu. On the Estimate page, enter customer details and product/service information. You can also email an estimate to your customer.
Select Add work details. Then select the Customer/Project dropdown ▼ and choose your customer or project. To make the timesheet billable, turn on the Billable (/hr) switch. Add notes or any other applicable options.
