

If you use QuickBooks Desktop in a multi-user environment, you might occasionally come across the message: “QuickBooks Hosting Mode is Off.” This simply means that your company file can’t be accessed by other users.
When multiple team members need to work on the same QuickBooks file at the same time, hosting mode becomes essential. Without it, only one user can make changes at a time, leading to workflow bottlenecks and a lot of frustration. Enabling hosting mode is a quick and easy fix that keeps your team productive and in sync, whether you’re an accountant, a business owner, or part of the IT team.
In this blog, we’ll break down what hosting mode means, how it works, and guide you through the simple steps to turn it on in QuickBooks. So, let’s get started!
What is QuickBooks Hosting Mode, and Why Does It Matter?
In a multi-user setup, your company file is “hosted” by the main computer, often referred to as the server, while other users (known as workstations) connect to it remotely.
When QuickBooks hosting mode is off, the software behaves like a single-user application, even if several users try to access it. This can lead to access issues or errors when attempting to switch to multi-user mode.
Why Is Turning On Hosting Mode in QuickBooks Important?
When QuickBooks Desktop hosting mode is off, only one user can access the company file at a time.
- It enables collaborative accounting, where bookkeepers, accountants, and team members all work on the same data simultaneously.
- This is crucial for multi-user environments (like offices or remote setups using a local server).
- Data corruption or errors are prevented when multiple users attempt to access the same non-hosted file at the same time.
- It reduces downtime and confusion by allowing real-time updates, everyone sees the most recent changes without needing to close and reopen the file.
- Hosting mode also streamlines IT management by centralizing the file location, making it easier to back up data and control user permissions securely.
Top Benefits When You Turn On Hosting Mode in QuickBooks
QuickBooks Hosting Mode enables you to manage your accounting processes more efficiently and collaboratively. It’s important to enable hosting mode whether you’re working in a small team or across multiple departments to simplify workflows and keep everyone on the same page.
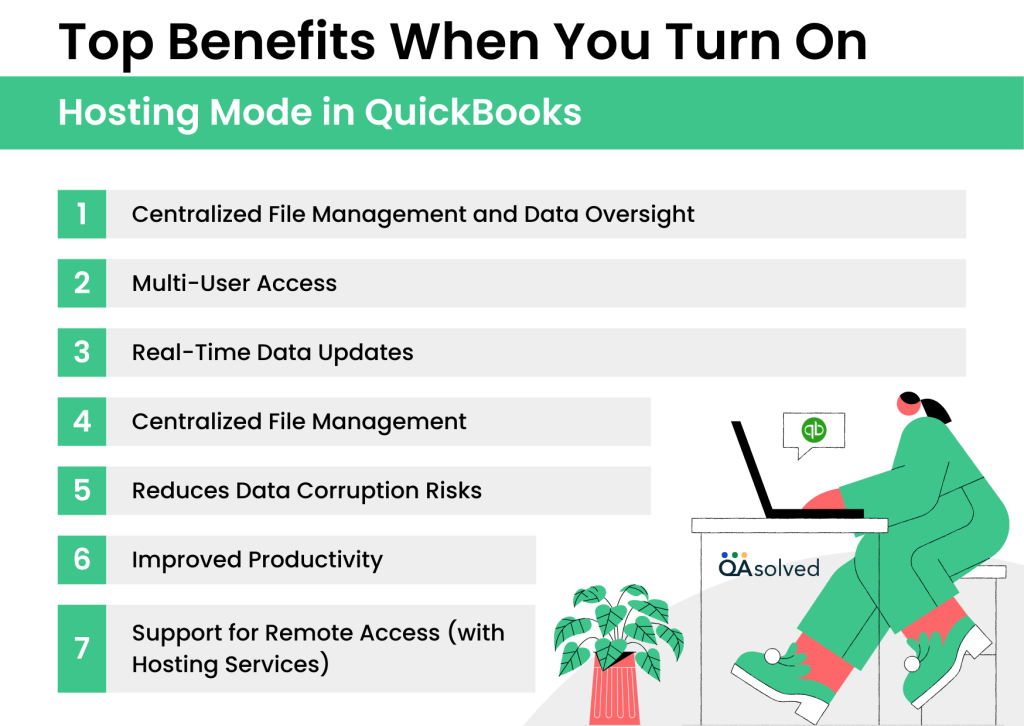
1. Centralized File Management and Data Oversight
Managing QuickBooks files on a central server improves data integrity, backup consistency, and oversight of system performance.
2. Multi-User Access
Using hosting mode allows multiple users to access the same company file from different computers at the same time, boosting collaboration and efficiency.
3. Real-Time Data Updates
Changes are immediately visible to all users. By doing this, version conflicts are eliminated, and everyone works with the most current financial data.
4. Centralized File Management
Company files are stored on a central server, making backups, security, and permissions easier to manage.
5. Reduces Data Corruption Risks
QuickBooks manages simultaneous connections more safely with proper hosting, reducing the risk of file corruption.
6. Improved Productivity
Having teams handle tasks like invoicing, reconciliation, and reporting simultaneously speeds up workflows and reduces month-end close times.
7. Support for Remote Access (with Hosting Services)
Turning on hosting allows remote teams to access the same QuickBooks file from anywhere if you’re using a third-party cloud host.
By enabling hosting mode in QuickBooks, you can create a more efficient, secure, and connected accounting environment. Growing businesses that rely on accurate, real-time financial collaboration can benefit from this simple step.
Why Users Fails to Enable or Turn On QuickBooks Hosting?
Multi-user access to QuickBooks is made possible through hosting mode, which allows several users to access the same company file at the same time. However, users sometimes run into issues where hosting fails to work as expected. It is essential to understand the reasons behind this problem in order to solve it correctly.
There are a few common reasons why you can’t enable QuickBooks hosting mode:

1. Already Enabled on Another Computer
During QuickBooks hosting, only one system can be active at a time. Hosting will not activate on your current computer if it is already enabled elsewhere.
2. Incorrect File Location
When your company file is not stored on the host computer, QuickBooks might not allow hosting to be turned on. Only enable hosting where the actual company file resides.
3. Firewall or Security Settings
Antivirus or firewall settings may block the communication ports required for multi-user hosting. In this case, QuickBooks will not be able to enable hosting mode.
4. QB Database Server Manager Not Installed
Hosting mode can fail to activate if the QuickBooks Database Server Manager is missing or not set up correctly.
5. Damaged QuickBooks Installation
Hosting settings can be affected by corrupted program files or an incomplete installation of QuickBooks.
6. User Permissions Are Restricted
There might be a problem with your admin-level permissions, which prevent you from enabling hosting mode. Both Windows and QuickBooks should be logged in as an administrator.
7. Windows File Sharing Not Set Up
QuickBooks may not detect a suitable hosting environment if your network file sharing settings are incorrect on Windows.
Identifying the root cause of QuickBooks hosting problems-whether they are permissions issues, network misconfigurations, or software glitches-is crucial. With these common obstacles addressed, you can restore hosting functionality and get your team back to collaborating easily.
Things to Check Before Fixing Hosting Mode Error in QuickBooks
To resolve the “QuickBooks Desktop Hosting Mode is Off” error, it’s important to review a few key settings and system requirements.
1. Verify Your Role and Access Level
Log in as an administrator to QuickBooks on the server computer. The only person who can change hosting settings is the admin.
2. Check Multi-User License Availability
Make sure your QuickBooks license supports multi-user mode. For proper configuration, at least two users must have access to the hosting mode.
3. Use the Server Computer Only for Hosting
Verify that only the computer designated as the server has hosting enabled. Conflicts can occur if it is turned on across multiple systems.
4. Update QuickBooks to the Latest Version
Check for QuickBooks updates before making any changes. There may be errors in hosting configuration or connection failures if an outdated version is used. So, update QuickBooks to the latest release to troubleshoot this error effectively.
5. Verify Network Setup
Make sure your computers are properly networked and can communicate with each other. A stable LAN connection is required for hosting mode.
6. Check Windows Firewall and Security Software
Firewalls or third-party antivirus tools may block the necessary ports and services. Ensure they are configured to allow QuickBooks access.
7. Ensure QuickBooks Database Server Manager is Installed
This tool is crucial for hosting mode. QuickBooks won’t function in multi-user mode if it isn’t installed or running.
8. Restart All Systems Before Configuration
You should restart your server and connected workstations before enabling hosting to refresh the network and eliminate temporary glitches.
You can avoid common pitfalls and successfully enable hosting mode in QuickBooks Desktop by checking these considerations in advance. Now, let’s move to the main topic of this blog!
How to Resolve the “QuickBooks Hosting Mode Is Disabled” Issue?
There are several simple ways to enable hosting mode in QuickBooks Desktop if it is disabled. We will walk you through step-by-step solutions to enable hosting mode and restore multi-user access so that work can be done seamlessly.
Solution 1 – Check the Status of QuickBooks Database Server Manager
- Press Windows Key + R to open the Run dialog box.
- Type services.msc in the input field and click OK.
- Locate QuickBooksDBXX and double-click it (replace “XX” with your version year).
- Change the Startup Type to Automatic.
- Set the Service Status to Running or Started. Otherwise, click Start.
- Go to the Log On tab and select Local System Account.
- Select the Recovery tab and choose Restart the service in the following fields:
- First failure
- Second failure
- Subsequent failures
- After applying the changes, click OK.
- Repeat the same steps for QBCFMonitorService.
- Launch QuickBooks Desktop on each workstation.
- Click the File menu and select Multi-user Mode.
Solution 2 – Perform a Quick Scan on the Folders in the Server Computer
- Close QuickBooks Desktop on all workstations and access it from the server.
- Click on the Windows icon, type “Database,” and select QuickBooks Database Server Manager from the list.
- Click the Scan Folders button, then select Browse.
- Select the folder(s) where QuickBooks company data files (with the .QBW extension) are stored.
- Then click OK and hit Start Scan.
- Upon completion of the scan, your QuickBooks company files will appear under QuickBooks company files found.
Solution 3 – Allow the Necessary Windows Permissions for QuickBooks Folder Access
Limited access may prevent proper functioning of files stored in a folder. Follow the steps below to grant the necessary permissions, ensuring QuickBooks operates without interruptions:
- Click on the Windows icon to open the Start menu.
- Type “File Explorer” into the search bar and select it.
- Locate the QuickBooks files folder.
- Click on the folder and choose “Properties.”
- Select the “Advanced” button in the Properties window under the “Security” tab.
- Locate and click on “QBDataServiceUserXX” (where XX is the version year).
- Hit the “Edit” button.
- The next step is to mark the following options as ALLOWED:
- Traverse Folder/Execute File
- List Folder/Read Data
- Read Attributes
- Read Extended Attributes
- Create Files/Write Data
- Create Folders/Append Data
- Write Attributes
- Write Extended Attributes
- Read Permissions
- Select “Edit” if any permissions are missing.
- Click “Allow” for QBDataServiceUserXX and select “Full Control”.
- Save the changes and restart your computer to apply the settings.
Solution 4 – Check QuickBooks Multi-user Settings
- Log in to your QuickBooks application and Windows Operating System using admin credentials.
- Next, access QuickBooks.
- Go to the main menu and click “File”.
- Click the File menu button and choose “Switch to multi-user mode”.
- If permission dialog boxes appear, click “Yes” and respond accordingly.
- Enter “OK” in the multi-user window.
- Select the “Company” tab in QuickBooks.
- Choose “Set up Users and Passwords”.
- Click on “Set up Users”.
- Click the “Add Users” button to grant access to all users so they can open QuickBooks.
Also Read: How to Set Up Multi-User Mode in QuickBooks Desktop?
Solution 5 – Enable Network Discovery
Here are the steps to enable the network discovery and eliminate hosting mode error in QuickBooks:
- To open the Start menu, press the Windows key on your keyboard.
- Enter the Control Panel in the search bar.
- Next, select Network and Sharing Center.
- Click on Change advanced sharing settings.
- Identify the network profile that is currently being used and expand it.
- Under Network Discovery, select Turn on network discovery.
- Scroll down to Password protected sharing and make any necessary adjustments.
- To apply the settings, click Save changes.
- On each connected workstation, repeat the above steps.
Solution 6 – Access Your Company Data File
- Access the File menu in QuickBooks.
- Select Open or Restore a Company and navigate to your saved company file.
- Click twice on the .QBW file to select it.
- Click Open, then log in with your admin credentials to access the file.
Solution 7 – Turn Off Multi-User Hosting on Workstations in QuickBooks
- Open QuickBooks on each client workstation.
- Select File from the top menu.
- Choose Utilities from the dropdown list.
- No action is needed if you see Host Multi-User Access – hosting has already been disabled.
- If you see Stop Hosting Multi-User Access, click it to disable hosting on that workstation.
- Make sure hosting is turned off on all client computers where it isn’t necessary.
Solution 8 – Rename Network and Transaction Log Files (.ND and .TLG)
QuickBooks performance issues can be solved by renaming the .ND (Network Data) and .TLG (Transaction Log) files. The following steps will help you:
- Close QuickBooks on all servers and systems with access to the company file.
- Open the folder where your company file is stored. The default location is usually:
C:\Users\Public\Documents\Intuit\QuickBooks\Company Files
(Note: The path may vary based on your version and installation settings.) - Identify the files with .ND and .TLG extensions that share the same name as your company file.
As an example, you will find MyCompany.QBW.ND and MyCompany.QBW.TLG for MyCompany.QBW. - Right-click the .ND file and choose Rename.
- Change the extension from .ND to .ND_OLD (e.g., rename to MyCompany.QBW.ND_OLD).
- Right-click the .TLG file linked to your company file and select Rename.
- Replace .TLG with .TLG_OLD (for example, MyCompany.QBW.TLG_OLD).
- Rename both files and open QuickBooks Desktop.
By renaming the old files, QuickBooks can rebuild them, which often resolves hosting mode and performance issues.
Solution 9 – QuickBooks Firewall Configuration
Step 1: Find QuickBooks Port Number
- Launch QuickBooks Database Server Manager.
- Go to the Port Monitor tab to get your version’s port number.
Step 2: Add Firewall Rules
- Click Control Panel > Windows Defender Firewall > Advanced Settings.
- Create Inbound and Outbound Rules:
- Choose Port > TCP.
- Enter the port number from Step 1.
- Allow the connection, check all profiles, and name the rule (e.g., QBPorts2024).
Step 3: Allow QuickBooks Program Files
- Choose New Rule > Program while still in Advanced Settings.
- Add these files (adjust path for your version):
- QBW32.exe
- QBDBMgrN.exe
- QBUpdate.exe
- Allow the connection, check all profiles, and finish.
Step 4: Restart Your Computer
- Reboot and restart your system to apply all the changes.
Solution 10 – Test Server Connection by Pinging from Workstations
If you want to confirm your server is connected to the workstations, you can use the ping command using the server’s IP address or hostname.
Step 1: Turn On Network Discovery
Make sure Network Discovery and File & Printer Sharing are enabled on the server and workstations:
- Go to Start > Control Panel > Network and Sharing Center.
- Click on Change Advanced Sharing Settings.
- Turn on Network Discovery and File and Printer Sharing.
Step 2: Find the Server Name
On the server computer:
- Press Windows + R, type cmd, and press Enter.
- Then type ipconfig /all and press Enter.
- Locate the Host Name under Windows IP Configuration—this is your server name.
Step 3: Ping from Workstations
On each workstation:
- Open the Run dialog (Windows + R), type cmd, and press Enter.
- In the Command Prompt, type: ping [your-server-name]
Solution 11 – Repair the QuickBooks Installation
A QuickBooks application repair can help resolve hosting mode errors. Make sure you create a backup of your company file before you begin.
- Close QuickBooks and all other open applications on your system.
- Open the Control Panel from the Start menu.
- Depending on your Windows version, select Programs or Programs and Features.
- Next, access QuickBooks.
- Click on Uninstall/Change, then choose the Repair option when the installer window appears.
- To repair your computer, follow the on-screen instructions.
- Restart your computer after the repair is complete.
So, turn on the hosting mode in QuickBooks by eliminating this error once and for all. In short, addressing the hosting mode off error in QuickBooks requires a combination of network adjustments, permission settings, and program repairs. Following the outlined solutions will enable you to restore multi-user access and ensure smooth collaboration across workstations. Before making any major changes, make sure you backup your data.
Winding Up
Understanding how hosting mode works not only fixes the immediate problem but also helps prevent future disruptions. QuickBooks hosting mode ensures seamless performance and data accessibility for everyone, whether you’re running a small team or managing multiple users.
Enabling the hosting mode is crucial for smooth multi-user collaboration and access across workstations for enhanced user experience. By turning off the QuickBooks hosting mode, you restrict the server to share the company file, resulting in connection problems and inability to switch to multi-user mode. But by following the correct troubleshooting steps, you can restore the hosting capabilities in QuickBooks effectively.
If you want to host your QuickBooks on the Cloud or are looking to change your existing hosting provider for enhanced accessibility and data security, then QAsolved is here to provide the best QuickBooks Cloud Hosting Services.
Frequently Asked Questions
You can enable the hosting mode in QuickBooks with four easy steps:
1. First, Open your QuickBooks Desktop on the Hosted Computer System.
2. Then, click on the File menu.
3. Now, hover over Utilities and then select Host Multi-User Access.
4. Finally, Click on Yes and turn on the hosting mode in QuickBooks.
Yes, it’s indeed possible to switch from QB Desktop to Online. Here are the steps:
1. Prepare your data: Log in as the admin on QuickBooks Desktop. Go to Company > Export Company File to QuickBooks Online. If using Enterprise, press F2, then Ctrl+B+Q, and click OK.
2. Start the export: Click Get Started, then Select Destination. Sign in to your QuickBooks Online account and choose to move either all data or just lists and balances. Decide whether to import inventory now or later.
3. Finish the transfer: Follow the prompts. Once done, you’ll get an email with access instructions for your new QuickBooks Online account.
If the hosting mode is off in QuickBooks Desktop 2021 on your Windows 11 system, it means that multi-user access isn’t currently active, so only one person can open and work on the company file at a time. This usually happens due to incorrect hosting settings, missing file-sharing permissions in Windows, or an improper QuickBooks installation on the server or host computer.
When hosting mode is turned off in QuickBooks Desktop on Windows 10, multi-user access is disabled. This means only the user on the computer where the company file is stored can open it, preventing others from accessing the file at the same time and potentially disrupting collaborative work. Here are the solutions that can help you get rid of this problem:
1. Verify Multi-User Settings: Ensure multi-user mode is enabled on the server.
2. Check Network Discovery: Enable it on both servers and workstations.
3. Access Company File: Try opening the file from another workstation.
4. Turn Off Hosting on Client: Only the server should host multi-user access.
5. Check QuickBooks Services: Make sure QBDXX and QBCFMonitorService are running.
6. Edit Hosts File: Add the server’s IP to the client’s Windows hosts file if needed.
7. Check Folder Permissions: Ensure the company file folder is network-shareable.
8. Install Database Server Manager: Confirm it’s installed on the server.
9. Set Admin Rights: Verify users have Windows admin rights.
10. Scan with QBDBSM: Use QuickBooks Database Server Manager to scan the file folder.
The server computer cannot share the company file with other workstations when hosting mode is turned off in QuickBooks Desktop on Windows. To enable it, open QuickBooks on the server, select File > Utilities, and then select Host Multi-User Access. Configure QuickBooks Database Server Manager to support multi-user access by configuring the network settings, firewall permissions, and firewall policies appropriately. To apply the changes, restart QuickBooks.
No, QuickBooks Desktop 2022 requires hosting mode to allow multiple devices to access the company file. The file cannot be accessed simultaneously without it. For QuickBooks to work effectively in a multi-user environment, hosting mode must be enabled.
