
Are you aware that the QuickBooks Database Server Manager is an essential tool for accessing QuickBooks in multi-user mode? This tool, also known as the Intuit Personal Database Manager, simplifies the creation of network data files for every company file on the host system. Utilizing QBDBSM is the exclusive method to enable multi-user mode in QuickBooks.
In this article, we delve into the various aspects associated with QuickBooks Server Manager. Ensure you read this post in its entirety for a comprehensive understanding.
Understanding QuickBooks Database Server Manager
QuickBooks Database Server Manager is a pivotal tool within QuickBooks, allowing users to configure the QuickBooks server for multi-user access. Renowned as Intuit’s Personal Database Manager Tool, this resourceful tool generates network data files (.ND) for company files on the host computer. Its exceptional capabilities simplify the creation of network data files for company files located on the host system or workstation.
1. Installation and Importance
To utilize multiple desktop versions of QuickBooks, the installation of this effective tool is imperative. Access to multi-user mode is impossible without this tool, and each installed version of QBDSM adds a new user to the desktop version. Subsequent sections of this article will guide you through the installation, update, and setup of QBDSM.
2. Key Functions
QBDSM can perform the following essential activities:
1. Scan the QuickBooks company file, crucial for facilitating multi-user access.
2. Automatically detect new company files by checking the local storage device.
Also Read:- How to Set up and Use QuickBooks Scan Manager?
Important Note
To ensure optimal file performance on the network, it is imperative to install and set up the QuickBooks Database Server Manager on your system in the location of the company files.
3. Guidelines to Follow for Installation
QuickBooks Database Server Manager 2023 is instrumental in creating network data files and housing company files on the host computer. When aiming to use multiple versions of QuickBooks Desktop, it is crucial to install each version of the Database Server Manager.
1. Sequential Installation: Install the Database Server Manager in chronological order, from the oldest to the newest version, when opting for multiple QuickBooks Desktop versions.
2. Version-Specific Processes: While installing multiple versions of Database Server Manager, it provides multiple versions of processes but not of the software itself.
3. Background Database Services: Be aware that the database services for each year run in the background when the server operates for that specific year. Access these services through the Windows interface in the Control Panel, labeled as QuickBooks DBXX, where “XX” denotes the version number.
4. User Addition: Each installation of QuickBooks Database Manager adds one user for that version (e.g., QBDataServiceUser28 for 2018 and QBDataServiceUsers27 for 2017).
How to Download QuickBooks Database Server Manager?
Downloading QBDSM is a straightforward process and is typically included with QuickBooks. If you don’t have the Database Server Manager yet, follow these steps to download it from the official Intuit website:
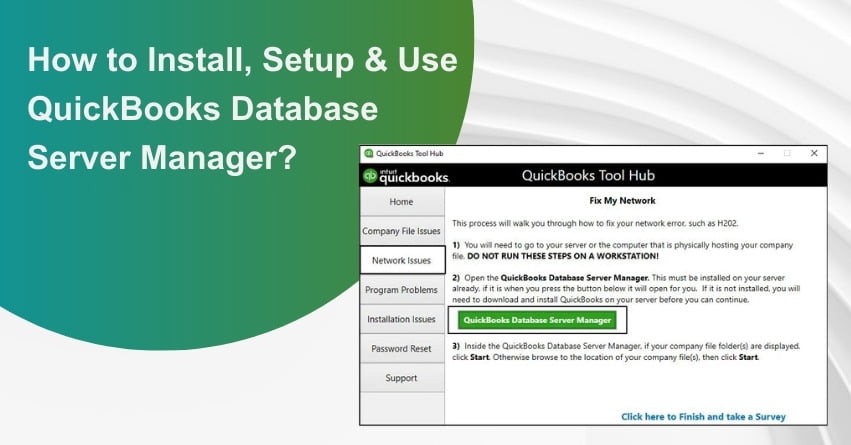
1. Download QuickBooks Tool Hub: Start by downloading the QuickBooks Tool Hub from the Intuit website. Navigate to downloads by pressing Ctrl + J.
2. Launch QuickBooksToolshub.exe: Click on the QuickBooksToolshub.exe file.
3. Allow App Changes: Click “Yes” to allow the app to make changes.
4. Installation and License Agreement: Proceed by clicking “Next” to install it, and then click “Yes” to accept the license agreement.
5. Complete Installation: Continue by clicking “Next” and selecting installation options. The process may take some time.
6. Finish Installation: Once the installation is complete, click “Finish.”
7. Open QuickBooks Tool Hub: Open the QuickBooks Tool Hub icon.
8. Access Database Server Manager: Under the “Network Issues” tab, choose QuickBooks Database Server Manager.
9. Set User Permissions: After the process completes, grant all users permission to access the company folders. QBDBSM will create a unique user for each installation by default.
By following these steps, you will successfully download QBDSM.
How to Install QuickBooks Database Server Manager?
Follow these steps to successfully install QBDSM:
1. Initiate Installation: Begin by double-clicking on the installer and starting the installation wizard for QuickBooks Desktop Database Server Manager.
2. Internet Connection Check: If your computer is connected to the internet, click “Next” to download updates. If not, select “No” and proceed with “Next.”
3. Close Programs: Close all open programs and click “Next.”
4. Accept License Agreement: Carefully read the terms of the software license agreement. If you agree, select “I accept the terms and license agreement” and click “Next.”
5. Custom or Network Options: Choose “Custom or Network Options.”
6. Installation Type:
Select the installation type based on your usage:
- Choose “I’ll be using QuickBooks on this computer And I’ll be storing…” if you will be running the program on this computer.
- Opt for “I will not be using QuickBooks on this computer…” if only QuickBooks data will be stored on this computer.
7. Access Allowance: Click “Yes” to allow access.
8. Enter License and Product Numbers: Enter your “License Number” and “Product Number.”
9. Complete Installation: Follow the on-screen instructions to complete the installation process.
10. Setup QuickBooks Database Server Manager: After the installation, follow the relevant steps to set up QBDSM.
By following these steps, you will successfully install QBDSM on your system.
What are the Steps to Update QuickBooks Database Server Manager?
Keeping QBDSM updated is crucial, especially with critical updates or the installation of a new version of QuickBooks Desktop. Let’s explore the steps to download and install the update:
1. Download the Patch: Initiate the process by downloading the patch.
2. Reboot the Server: Upon completing the installation, it’s imperative to reboot the server. Ensure you do so promptly.
3. Update on Workstations: Once the server is updated, each workstation will display a message: “The Company File needs to be updated to work with this version of QuickBooks Desktop.”
4. Backup Prompt: Updates might modify the database structure, prompting a message to “Create a backup.” Follow this prompt to ensure data integrity.
Also Read:- How to Create Company File & Backup in QuickBooks Desktop?
5. Follow Backup Prompts: Users will be guided through the backup process via prompts. Complete the backup following the provided instructions.
By following these steps, you’ll successfully update QuickBooks Database Server Manager, ensuring compatibility with the latest QuickBooks Desktop version and maintaining data security.
How to Set Up and Utilize QuickBooks Database Server Manager?
QuickBooks Database Server Manager is a powerful tool that facilitates multi-user access to folders and QuickBooks company files. Let’s delve into the steps for setting up and effectively using this indispensable tool.
Step 1: Opening QuickBooks Database Server Manager
To initiate the setup process, follow these steps:
1. Go to the “Start” button, then click on “Programs,” navigate to QuickBooks, and select “QuickBooks Database Server Manager.”
Step 2: Folder Scanning Features
Ensure that the company files stored on the server are configured for multi-user access through the following steps:
1. Click on the “Start” button, then navigate to “Programs,” click on QuickBooks, and select QuickBooks Server Manager.
2. Click on “Scan Folders.”
3. Look for folders containing “QuickBooks company files.” If unsure, scan the entire disk.
4. Click the “Scan” button.
All scanned folders are configured for multi-user access.
Step 3: Adding Folders
To include a folder, follow these steps:
1. Click “Add Folders.”
2. Select the desired folder to include.
3. The folder should be located under the folders containing “QuickBooks company files.”
Step 4: Removing Folders
To remove a folder, follow these steps:
1. Click on the folders containing QuickBooks company files.
2. Click “Remove Folder.”
Step 5: Folder Scan
Execute the folder scan:
1. Click “Scan Folders” under the folders containing QuickBooks company files.
2. Once scanning is complete, view the list of company files found in that folder.
Step 6: Monitored Drive Features
Utilize the Monitored Drive feature to keep QuickBooks Database Server Manager updated when adding new company files to the server:
1. Go to the “Start” button, click on “Programs,” then on QuickBooks, and select QuickBooks Database Manager.
2. Click on the “Monitored Drive” tab.
3. For monitoring company files, click “Remove and Rename” and then select the local drives.
By following these steps, you’ll successfully set up and utilize QuickBooks Database Server Manager for seamless multi-user access.
Also Read:- Features and Benefits of QuickBooks File Manager Application
Enabling QuickBooks Database Server Manager on the Server Computer
If you want QBDSM to operate seamlessly on your server computer, follow these steps:
1. Configure Firewall Manually:
- Manually configure the firewall to allow QBDBSM to run on the server system.
2. Access Port Monitor in QB Database Server Manager:
- Open QB Database Server Manager.
- Click on the “Port Monitor” tab.
3. Navigate to Windows Firewall:
- Open the start menu.
- Search for “Windows Firewall” and open it.
4. Create a New Inbound Rule:
- Right-click on “Inbound Rules” in the advanced settings and choose “New Rule.”
5. Choose Port and Select TCP:
- Select “Port” and click “Next.”
- Choose “TCP” and ensure it’s checked.
6. Enter Specific Ports:
In the “Specific local ports” option, enter the specific ports based on your QuickBooks version:
- QuickBooks Desktop 2020: 8019, XXXXX
- QB Desktop 2019: 8019, XXXXX
- QuickBooks Desktop 2018: 8019, 56728, 55378-55382
- QuickBooks Desktop 2017: 8019, 56727, 55373-55377
7. Allow Connection:
- Click “Next” and allow the connection.
8. Mark All Profiles:
- Click “Next” and mark all the profiles.
9. Create a Rule and Assign a Name:
- Click “Next” and create a rule, assigning a name to it.
10. Finish and Repeat for Outbound Rules:
- Click “Finish” to complete the process.
- Repeat the same steps for outbound rules.
By following these steps, you’ll ensure that QBDSM can effectively run on your server computer, allowing for optimal performance.
Also Read:- How to Configure QuickBooks Firewall while for Multi-User Environment in QuickBooks?
Features of QuickBooks Database Server Manager
Discover the various features offered by QuickBooks Database Server Manager (QBDSM) for efficient management and performance.
1. Database Server Features
User and Company File Monitoring:
- View a comprehensive list of users logged into each company file connected to the server.
- Monitor the status of services to ensure optimal functioning when hosting company files.
Services Configuration:
- Utilize the Services Administrative Tool to configure QBDBXX services and make adjustments as needed.
2. Update Features
QuickBooks Server Updates:
- Access the update features to download the latest QuickBooks Server updates.
- View information about the versions of QuickBooks Server.
3. System Features
Computer Information Lookup:
- Retrieve detailed information about the computer where the database server is installed.
- Access system details through the “System” feature in the QBDSM.
Explore these features to enhance your experience with QuickBooks Database Server Manager and ensure seamless operation and updates for your company files.
Also Read:- How to Fix QuickBooks Won’t Open Company File Error?
Quick Tips for QuickBooks Database Server Manager
To ensure a seamless download and installation process of QuickBooks Database Server Manager, adhere to the following tips:
1. Install Version-Specific Database Managers:
Install a distinct version of QBDSM for each QuickBooks Desktop version you use.
2. Generate Network Data Files:
QuickBooks Database Manager creates Network data (.ND) files and stores the company file on the host system.
3. Sequential Installation for Multiple Versions:
When using multiple QuickBooks Desktop versions, install the Database Manager in a sequential order, starting with the oldest and progressing to the latest.
4. User Creation with Installation:
With each installation of QuickBooks Database Server Manager, a new user is automatically created (e.g., QBDataServiceUser27 for 2017).
By following these tips, users can optimize their experience with QBDSM and ensure efficient functionality.
Configuring QuickBooks Database Server Manager
Learn how to configure QBDSM efficiently by following these step-by-step instructions.
If You Installed Only Database Server Manager
1. Accessing Services:
- Click on the Windows Start menu.
- Type “services” in the search field and choose the “Services” tab.
2. Selecting QuickBooksDBXX.XX Service:
- Choose and open the QuickBooksDBXX.XX service (replace XX with your version number).
- Navigate to the “General” tab and locate the “Server Status” section.
3. Stopping the Service:
- If the service is running, choose the “Stop” option.
4. Configuring Startup Type:
- Click on the “Automatic” tab under the “Startup Type” section.
5. Logon Configuration:
- Head to the “Logon” tab and select the “Local System Account” option.
6. Recovery Configuration:
- Move to the “Recovery” tab and choose “Restart the Service” from each dropdown menu.
7. Restarting Database Server Manager:
- Return to the “General” tab and select “Start” to reboot the Database Server Manager.
If You Installed QuickBooks Desktop and Database Server Manager:
1. Opening QuickBooks Desktop:
- Open QuickBooks Desktop on the server system.
2. Accessing Company File:
- Go to the “File” menu and select “Open or Restore Company.”
- Choose “Open Company File” and view the file.
3. Enabling Multi-User Mode:
- Click “Next” and select “Open file in multi-user mode.”
- Click “Open” and log in to the company file.
4. Closing Company File:
- Go to the “File” menu and choose “Close Company/Log Off” to close the file on the server.
5. Accessing Database Server Manager:
- Open the Windows Start menu, type “database” in the search bar, and open the Database Server Manager.
How to Fix QuickBooks Database Server Manager?
Follow these steps to repair QuickBooks Database Manager:
1. Navigating to File Menu:
- Head to the “File” menu in QuickBooks.
2. Utilities and Rebuilding Data:
- Navigate to the “Utilities” tab and choose “Rebuild Data.”
3. Verification and Completion:
- Verify data or rebuild data and choose “OK” in the information window.
- Wait for the process to complete.
4. Final Confirmation:
- Click “OK” when the process ends.
Follow these instructions carefully to configure QBDSM and troubleshoot any issues effectively.
Conclusion
We trust that this comprehensive guide has efficiently assisted you in downloading, installing, updating, and setting up QuickBooks Database Server Manager. For any queries or additional assistance related to the Database Server Manager, do not hesitate to reach out to our Assistance Team.
Should the problem persist or if you require guidance with any technical procedures, feel free to reach out to our assistance. Dial Toll-Free: +1-888-245-6075 and our team will gladly assist you!
Frequently Asked Questions (FAQs)
To locate the Database Server Manager, follow these steps:
1. Access the host or server system.
2. Click on the Windows tab.
3. In the search menu, type “database.”
4. Press Enter to open QBDMS.
5. Click on Properties to find the location of QBDMS.
Yes, it is crucial to update QuickBooks Database Manager, especially when a new version is released.
To uninstall the QuickBooks Database Manager, follow these steps:
1. Press Windows + R.
2. Open the Run dialog box.
3. Type “appwiz.cpl” and press Enter.
4. Navigate to Programs and Features, and choose QBDSM.
5. Right-click and select Uninstall.
6. Follow on-screen instructions to complete the uninstallation process.
Yes, you can run QuickBooks simultaneously on two systems using QuickBooks Database Server Manager, allowing multi-user access.
If QBDSM is not available, consider the following steps:
1. Ensure proper installation.
2. Check for system compatibility.
3. Reinstall or repair the installation if needed.
4. Seek assistance from QuickBooks support for further troubleshooting.
