
First impressions matter, especially when you’re dealing with customers. Every time you send out an invoice, estimate, or sales receipt, you’re not just sharing a document; you’re representing your brand. That’s exactly why the customization tools in QuickBooks Online are so valuable. With just a few clicks, you can make your forms look and feel like an extension of your business. Add your logo, choose your brand colors, select from clean, professional templates, and even adjust the layout so the most important details stand out.
Whether it’s adding custom fields like PO numbers or service dates, or including personal notes for different clients, QuickBooks gives you the flexibility to make every document count. You can also create different templates for different needs, such as one for retail customers and another for long-term contracts.
The best part is that customizing your forms doesn’t just make them look good. It helps your business stand out and communicate more clearly. If you’re also looking forward to customizing invoices, estimates, and sales receipts in QBO, then you have indeed landed on the right page. In this blog, we’ll show you exactly how to customize your invoices, estimates, and sales receipts in QuickBooks Online, and make them work harder for you.
Benefits of Customizing Invoices, Estimates, and Sales Receipts in QuickBooks Online
Sales forms aren’t just paperwork, they’re an extension of your company. An invoice, estimate, or sales receipt with a clean, personalized format helps your brand stand out and ensures customers understand the details. It’s easy to customize these documents with QuickBooks Online. It’s even possible to customize estimates in QuickBooks Online to match your branding and streamline communication. Here are some benefits of customizing invoices, estimates, and sales receipts in QuickBooks Online.
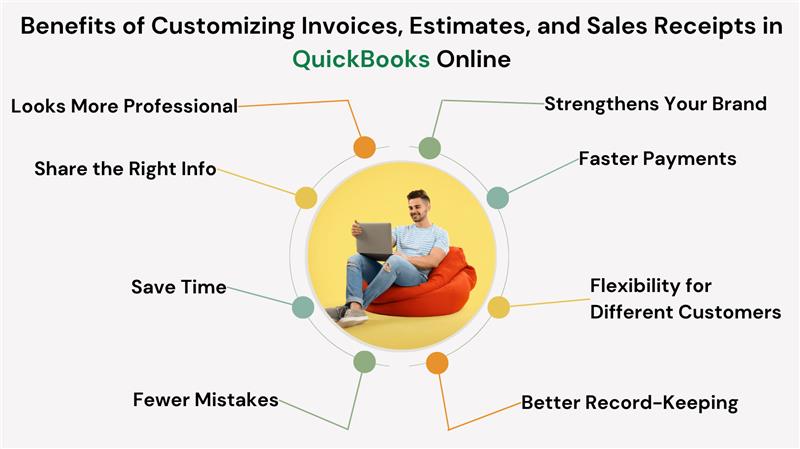
1. Looks More Professional
Customizing your forms with your logo, brand colors, and layout makes your documents look professional. Having a well-designed invoice or estimate demonstrates to clients that you take your business seriously and gives your business credibility.
2. Strengthens Your Brand
Every document you send is an opportunity to brand yourself. Invoices and sales receipts that match the look and tone of your business create a consistent experience that helps customers remember and trust you.
3. Share the Right Info
Depending on what you want your customers to see, QuickBooks lets you add or remove fields. Among the things you can include are PO numbers, service details, custom notes, and payment terms. As a result, your forms will be clear and tailored to your workflow.
4. Save Time
QuickBooks automatically applies your customized templates once they have been created. Your documents won’t have to be formatted from scratch, saving you time and ensuring consistency.
5. Fewer Mistakes
Having your forms customized can help reduce confusion. To ensure your customers know exactly what they’re paying for and when, highlight key details like due dates, payment methods, and terms.
6. Faster Payments
Invoices that are clean, clear, and contain all the information customers need make it easier for them to process payments. Furthermore, professional invoices increase your customer’s confidence in your business, resulting in faster payment turnaround.
7. Flexibility for Different Customers
Depending on the type of customer, service, or location, you can create multiple templates. When you customize estimates in QuickBooks Online to suit different job types or client needs, you keep your process efficient while maintaining flexibility.
8. Better Record-Keeping
Documents that are clear and organized help you and your clients keep better records. Forms that are customized make it easier to reference and understand past transactions. Investing in QuickBooks invoice customization pays off in terms of clarity and professionalism.
It’s not just about aesthetics when you customize your forms, it’s also about being a bit more productive. QuickBooks invoice customization allows you to create consistent, professional documents that reflect your business while minimizing errors and saving you time. What’s the result? Your client relationships will improve, your transactions will be smoother, and your invoices and estimates will look more polished.
Also Read: How to Create an Estimate & Convert it to an Invoice in QuickBooks Online?
Steps to Customize Invoices, Estimates & Sales Receipts in QuickBooks Online
The process of customizing your QuickBooks Online forms is easier than you might think. You can customize invoices, update estimates, and add a personal touch to receipts using QuickBooks. Follow these simple steps to customize sales receipts in QuickBooks Online or make sure all forms reflect your business branding.
You can easily update and personalize your forms while you’re creating them. Here are the things you can change:
- Extra or additional fields to display on your forms
- The contents of a form’s tables
- Your business or company logo and contact details
- The colors, fonts, and overall layout
Note: If you update your company information, like your logo or business address, it will apply to all future invoices, estimates, and update customer details across QuickBooks automatically.
A. Edit The Look and Information While Working On Your Form
As you work on your sales form, you can adjust its look and content-any changes you make will be visible immediately.
Note: On printed invoices, the “Service date” column appears as “Date.”
Let’s get started:
- Create a new sales form (like an invoice, estimate, or sales receipt), or open an existing one.
- On the form, click Edit company, make your changes, and click Save.
- Select the logo on the form, upload a new image from your computer, and click Open.
- Select Manage to adjust fields, colors, or enable payment options.
- You can toggle fields on or off in Customization according to your requirements.
- Choose a template under Design. You can also change the font and color scheme if you are using a modernized version.
- To preview your current form layout, click Print or Download.
Tip: You can also make these updates like editing company info, logo, and fields, through your Account and settings.
B. Use Custom Templates
Here are the steps to use custom templates.
- Click the Gear icon in the top right corner of QuickBooks Online.
- Select Custom Form Styles from the dropdown menu.
- Click the Design dropdown.
- Under Other templates, select the custom template you want to use.
- To add a new template or edit an existing one, click Add/Edit.
- Make your changes, then click Done to save.
C. Update Your Company Logo and Contact Details Without Working On a Form
You don’t need to open or customize a form just to make changes to your logo or contact information. QuickBooks Online allows you to update your business details quickly from the company settings. Here’s how to do it:
- Click the Gear icon in the top right corner of QuickBooks Online.
- Select Account and Settings under the “Your Company” section.
- In the Company tab, select the pencil icon next to your logo to make changes.
- Choose a new image file from your computer and click Open to upload it.
- Update your company contact details by selecting the fields you want to change, such as business name, email, phone number, or website.
- After making the necessary updates, click Save, then select Done to finish.
D. Add Custom Fields to Your Forms
You’ll need to set up custom fields in your settings before they can appear on your sales forms. To do this, follow the steps given below.
- Choose Add custom field, and if you want to make changes to an existing field, click Edit next to it.
- Select a data type from the dropdown menu and name your field.
- Choose Transaction as the category.
- Enable Print on form for the forms where you want the custom field to appear.
- Click on Save.
Tip: You can also manage custom fields directly while working on a sales form. Just select the Manage icon, choose Customization, then click Manage next to Custom fields.
E. Change Your Forms’ Starting Fields and Settings
QuickBooks Online lets you customize the default fields that appear on your sales forms like invoices, estimates, and sales receipts. Here’s how you can update those settings:
- Click the Gear icon in the top right corner of QuickBooks Online.
- Select Account and Settings under the “Your Company” section.
- Go to the Sales tab in the left-hand menu.
- Click the Sales form content section to expand it.
- Choose the fields you want to include on your forms, such as custom transaction numbers or service dates. Then click Save.
- Scroll down and select the Products and services section.
- Turn the Show Product/Service column on sales forms and Show SKU column on or off, based on your preference.
- Click Done to apply the changes.
After you’ve customized your forms, you’re ready to send your customers professional-looking documents. Remember that you can always edit invoice template in QuickBooks Online if your business details or preferences change. With flexible customization, you can fine-tune your forms as needed.
Conclusion
In short, customizing your QuickBooks Online invoices, estimates, and sales receipts goes beyond just looking good. By tailoring these forms to reflect your brand identity and include exactly the information your clients need, you can create a more professional, trustworthy experience and improve client relationships. Customize invoices in QuickBooks Online to align with your unique workflow and presentation style, whether you want to update your logo, adjust form fields, or apply specific layouts.
Using QuickBooks’ flexible tools, you can edit these forms while creating them or manage templates in your settings. Additionally, you can add custom fields and choose colors and fonts to make your business communications stand out.QBO customize invoice templates give you a powerful way to streamline operations while remaining true to your brand if you’re just starting to explore this feature.
In case you’re having trouble in executing the above-mentioned steps, then it would be ideal for you to contact our QuickBooks Online Experts at toll-free number +1-888-245-6075.
Frequently Asked Questions
You can customize invoices in QuickBooks Online in three ways:
1. Design – Select different templates, fonts, colors, and layout styles to customize your invoice.
2. Content – Choose which fields to display, such as invoice date, due date, and item details.
3. Emails – You can customize the email message you send with your invoice, including the subject line and body.
1. Click + New Sales Receipt, or choose Sales > All Sales to open an existing one.
2. Change customer information, items, payments, or notes.
3. Click the Manage icon to customize fields and layout.
4. Choose either Save and send or Save and close.
1. Access Lists > Templates.
2. Then right-click the invoice template and select Edit Template.
3. Basic Customization allows you to:
– Add your logo
– Change fonts, colors, and layout
– Choose which company and customer information will appear.
4. Click Additional Customization to adjust columns, headers, and footers.
5. To save your changes, select OK.
6. Create invoices using the customized template.
SAP uses 3-way matching of invoices to ensure supplier payments are accurate and legitimate. Before approving a payment, three key documents must be compared:
1. Purchase Order (PO) – Describes the order, the quantity, and the price.
2. Goods Receipt (GR) – Confirms the quantity and condition of goods received.
3. Invoice – A statement from the vendor that outlines what they are charging.
There must be a match between all three documents in terms of item, quantity, and price. In the case of a discrepancy (ex., an overbilling or a missing item), SAP flags it for review. Fraud, overpayments, and paying for items not received can be prevented this way.
