

Running payroll efficiently is one of the most crucial responsibilities for any business owner. With employees expecting accurate and timely payments, having a structured process in place can save time, reduce errors, and ensure compliance. This is where the QuickBooks Payroll Schedule feature comes in. It allows you to automate paydays, define pay periods, and manage different employee groups based on their payment frequency such as weekly, biweekly, or monthly.
Whether you’re managing a small team or a growing business, knowing how to create a payroll schedule in QuickBooks can make your payroll processing faster and more organized. In this blog, we’ll walk you through how to set up and manage payroll schedules in both QuickBooks Online and QuickBooks Desktop. We’ll also highlight common mistakes to avoid and ensure smooth payroll runs and consistent payment accuracy. By the end of this blog, you’ll understand how to use payroll scheduling to streamline operations, maintain consistency in employee payments, and simplify tax calculations.
Steps to Set Up or Update Pay Schedules in QuickBooks Online Payroll Core and Desktop Payroll
Setting up or updating your pay schedules is a key step to ensure employees are paid correctly and on time. QuickBooks makes this process simple and flexible for different business needs. Learning how to create a payroll schedule in QuickBooks Online and Desktop helps streamline payroll management, reduce manual work, and maintain accurate records for every pay cycle.
How to Set Up and Update a Pay Schedule in QuickBooks Online Payroll Core?
With QuickBooks employee scheduling, you can easily create one or more pay schedules to ensure your team members are paid on time. Just remember, once a pay schedule is added, it cannot be removed, so set it up carefully to match your payroll needs.
6 Steps to Set Up a New Pay Schedule in QuickBooks Online Payroll Core
Before setting up a new pay schedule in QuickBooks Online Payroll Core, make sure you’ve activated payroll in your account and added all employees with their correct pay details. Confirm that your company’s bank account is set up for payroll processing and that your tax information is accurate.
- Open QuickBooks and sign in to your account.
- Go to the Payroll Settings or Payroll section from the dashboard.
- Select Edit Payroll Items to access your payroll setup options.
- Click on New Payroll Item, then choose Pay Schedule.
- Set the pay frequency (weekly, biweekly, or monthly), enter the next payday, and specify the end date of the next pay period.
- Review your entries carefully and select Save to create your new pay schedule.
Once saved, your schedule will automatically help you organize future payroll runs, making employee payments timely and accurate.
5 Steps to Update a Pay Schedule in QuickBooks Online Payroll Core
Keeping your payroll schedules up to date ensures employees are paid correctly and on time. In short, you can easily update or change your payroll schedule in QuickBooks Online, helping you adjust pay frequencies, payment dates, or employee assignments without disrupting your payroll process. Here are the steps:
- Login to your QuickBooks Online account.
- Go to Edit Payroll Items in your QuickBooks account.
- Click on Pay Schedules and choose the schedule you wish to modify.
- Make the necessary updates and then select Save to apply the changes.
These are the steps that can help you set up and change your payroll schedule in QuickBooks Online Payroll Core.
How to Set Up and Update a Pay Schedule in QuickBooks Desktop Payroll?
With the QuickBooks Desktop Payroll Schedule feature, you can create customized pay periods to match your business needs. Payroll schedules are optional, giving you the flexibility to organize your payroll as you see fit, and you can have up to 200 payroll schedules in QuickBooks Desktop. Let’s take a better look at it.
6 Steps to Set Up a New Pay Schedule in QuickBooks Desktop Payroll
Creating a new pay schedule in QuickBooks Desktop helps organize employee payments, set pay frequencies, and ensure accurate, timely payroll for a smooth payroll process.
- Login to your QuickBooks Desktop.
- Navigate to Employees and open the Payroll Center.
- Click the Payroll Schedule dropdown and select New.
- Enter a name for the schedule and choose the payment frequency for employees.
- Fill in the remaining required fields and click OK.
- Choose Yes or No to assign the new schedule to all employees.
6 Steps to Update or Edit a Payroll Schedule in QuickBooks Desktop Payroll
Updating or editing a QuickBooks Desktop payroll schedule ensures accurate employee payments and flexible pay periods, helping businesses manage payroll efficiently without disrupting existing payroll setups. Changing dates in the Enter Payroll Information window only affects the current pay period. To update future schedules, adjust settings for all upcoming payrolls.
Note: Direct Deposit or Assisted Payroll accounts for lead times and federal holidays.
- Open QuickBooks Desktop.
- Navigate to Employees and open the Payroll Center.
- In the Create Paychecks section, choose the payroll schedule you wish to update.
- Click the Payroll Schedules dropdown and select Edit Schedule.
- Make the required changes in the Edit Payroll Schedule window.
- Click OK to save your updates.
After setting up and updating payroll schedules in QuickBooks Online and Desktop, the next step is to assign a pay schedule to an employee. This ensures that each team member is paid according to the correct frequency and helps maintain accurate payroll records, streamline processing, and avoid any payment errors.
Also Read: How to Fix Incorrect Pay Period Dates on Paychecks in QuickBooks?
Steps to Choose a New Pay Schedule for a Team Member in QuickBooks Online Payroll Core and QuickBooks Desktop Payroll
Assigning a pay schedule to an employee ensures they are paid accurately and on time. With a QuickBooks Payroll Schedule, you can easily select the appropriate pay frequency for each team member, keeping your payroll organized and consistent. Here are the steps to choose a new pay schedule for a team member in QuickBooks Online Payroll Core and QuickBooks Desktop.
4 Steps to Choose a New Pay Schedule for a Team Member in QBO Payroll Core
Selecting a QuickBooks Payroll Schedule for an employee ensures timely, accurate payments and simplifies payroll management for your team. Here are the steps:
- Open QuickBooks Online and Login.
- Choose the employee you want to assign a pay schedule to.
- Go to Employment Details and click Edit.
- Pick the desired pay schedule and click Save.
6 Steps to Choose a New Pay Schedule for a Team Member in QB Desktop Payroll
The steps to choose a new pay schedule for a team member in QuickBooks Desktop are quite easy for someone who’s using it for a while. Here are the steps you need to follow if you use QuickBooks Desktop:
- Launch QuickBooks Desktop.
- Navigate to Employees and open the Employee Center.
- Double-click on the employee’s name to open their profile.
- Go to the Payroll Info tab.
- Choose a payroll schedule from the Payroll Schedule dropdown.
- Click OK to save the changes.
By following these steps in QuickBooks Online Payroll Core and QuickBooks Desktop, you can efficiently assign pay schedules to your employees. This ensures timely, accurate payments and helps maintain a well-organized, error-free payroll system.
How to Remove a Payroll Schedule in QuickBooks?
If you want to streamline your payroll system, removing outdated payroll schedules is a smart choice. This keeps your payroll organized and allows you to reactivate a schedule later if needed. Follow the steps below to do so.
- Login to your dedicated QuickBooks version.
- Navigate to Employees and open the Employee Center.
- In the Create Paychecks section, select the payroll schedule you wish to remove.
- Click the Payroll Schedules ▼ dropdown and choose Edit Schedule.
- Check the option Schedule is inactive to deactivate it.
Note: To permanently delete a payroll schedule, select Delete Schedule. Deleted schedules cannot be reactivated. - Click OK to save your changes.
So, these are the steps to remove or delete a particular payroll schedule in QuickBooks. Now, let’s take a look at the common mistakes that one should avoid while creating or setting up a new payroll schedule in QuickBooks.
Common Mistakes to Avoid When Setting Up Payroll Schedules
Setting up payroll schedules incorrectly can lead to delayed payments, compliance issues, and employee dissatisfaction. Here are the 5 most common mistakes that you can avoid while setting up a new payroll schedule in QuickBooks.
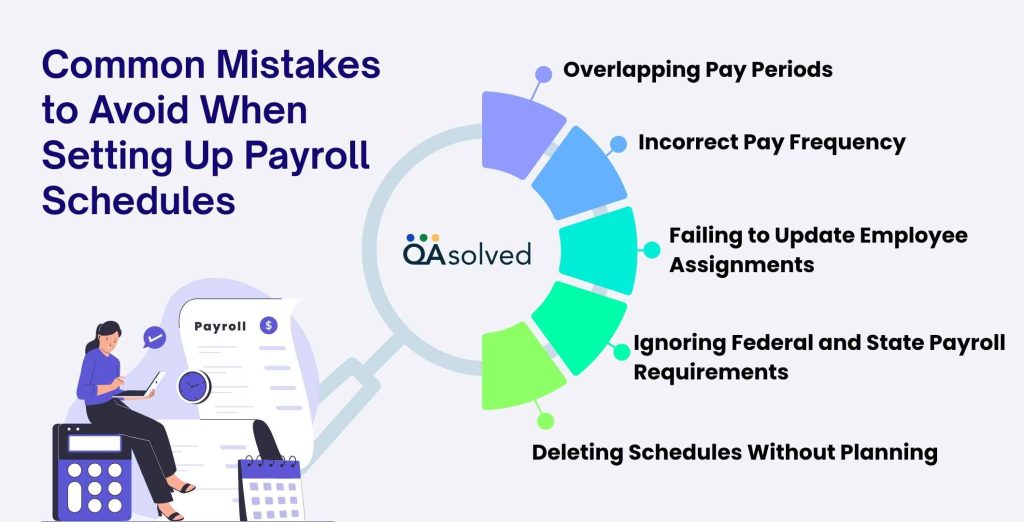
1. Overlapping Pay Periods
Assigning overlapping pay periods can cause duplicate payments or missed deductions. Always review existing schedules to ensure each pay period is distinct and clearly defined.
2. Incorrect Pay Frequency
Using the wrong pay frequency for employees can disrupt cash flow and create confusion. Verify whether employees should be paid weekly, biweekly, semi-monthly, or monthly.
3. Failing to Update Employee Assignments
Not assigning new hires or updated roles to the correct payroll schedule may result in delayed or incorrect payments. Regularly review employee schedule assignments.
4. Ignoring Federal and State Payroll Requirements
Overlooking federal or state payroll regulations when creating schedules can cause compliance issues. Ensure your schedules align with legal requirements for pay dates and taxes.
5. Deleting Schedules Without Planning
Removing a payroll schedule without checking employee assignments can disrupt payroll runs. Always reassign affected employees before deleting schedules to avoid errors.
Being aware of common pitfalls helps you maintain accurate, timely, and organized payroll management in QuickBooks. Moving towards the end, let us also help you with the essential tips that can help you with the three most valuable tips for managing multiple payroll schedules effectively in both QuickBooks Online and Desktop.
3 Tips to Manage Multiple Payroll Schedules Effectively in QuickBooks
Managing multiple payroll schedules can seem complex, especially for businesses with diverse employee types or varying pay frequencies. By organizing schedules effectively, you can ensure timely payments, reduce errors, and simplify payroll processing. Here are the three most valuable tips for users to manage multiple payroll schedules effectively:
1. Categorize Employees by Pay Frequency
Group employees based on how often they are paid, such as weekly, biweekly, or monthly. This ensures that payroll runs are organized, prevents errors, and makes schedule assignments more efficient.
2. Label Payroll Schedules Clearly
Use descriptive names for each payroll schedule, like “Weekly Staff” or “Monthly Management.” Clear labels reduce confusion, make updates easier, and help quickly assign schedules to the right employees.
3. Regularly Review and Update Schedules
Check payroll schedules periodically to ensure they reflect changes such as new hires, role changes, or pay frequency adjustments. Regular updates prevent missed payments and maintain accurate records.
Hence, by avoiding common mistakes and making the best use of these tips, you can manage multiple payroll schedules efficiently and maintain a well-organized, error-free payroll system.
Conclusion
In a nutshell, managing payroll effectively is crucial for any business, and a well-structured QuickBooks Payroll Schedule can make all the difference. By setting up, updating, and assigning payroll schedules accurately, you ensure that employees are paid on time, pay periods are consistent, and tax calculations remain precise. Whether you’re using QuickBooks Online or QuickBooks Desktop, understanding how to create, edit, or remove payroll schedules allows you to streamline your payroll process while maintaining compliance with labor laws and company policies.
Ultimately, mastering payroll schedules not only simplifies employee management but also provides peace of mind, allowing you to focus on growing your business while ensuring a smooth, organized, and error-free payroll process.
Frequently Asked Questions
No, in QuickBooks, each employee can only be assigned to a single payroll schedule at a time. If an employee’s pay frequency changes or they move to a different department with a different schedule, you will need to update their assignment to the new payroll schedule. So careful planning of pay periods is essential to avoid errors in payroll processing.
Deleting a payroll schedule permanently removes it from QuickBooks. Once deleted, the schedule cannot be restored or reactivated. Before deleting, ensure that no employees are currently assigned to that schedule to prevent disruptions in payroll processing. It’s a good practice to review all employee assignments and reassign them to active schedules to maintain accurate and timely payroll.
To adjust pay periods, you need to edit the payroll schedule in QuickBooks and update the next payday or the end date of upcoming pay periods. These changes will only affect future payroll runs and will not modify previously processed paychecks. This ensures that past payroll records remain accurate while giving you flexibility for upcoming pay cycles.
Yes, marking a payroll schedule as inactive allows you to remove it from current use without permanently deleting it. This is useful if a schedule is temporarily not needed but may be used again in the future. Inactive schedules can be reactivated when necessary, providing flexibility in payroll management while keeping your schedule list organized.
QuickBooks Desktop allows you to create up to 200 payroll schedules. This flexibility is particularly helpful for businesses with multiple employee groups, varying pay frequencies, or unique payroll requirements. By organizing schedules efficiently, you can maintain accurate records, simplify payroll processing, and ensure timely payments across all employee groups.
