


Running a growing BigCommerce online store is exciting. Orders flow in, customers increase, marketing drives traffic, and revenue grows. The front end feels dynamic and fast-paced. But behind the scenes, accounting tells a different story. Many e-commerce businesses still use manual processes to transfer order data into QuickBooks. BigCommerce integration with QuickBooks Online solves this problem.
Once you integrate these two robust platforms, the entire process becomes quite easy. Instead of entering transactions manually or reconciling spreadsheets at the end of each month, this integration automates the entire financial workflow. Proper integration between BigCommerce and QuickBooks creates a seamless connection between your sales engine and your accounting backbone. Every order, payment, tax calculation, and refund flows directly into your books without the need for constant manual updates.
If you want to make the most of this integration, you’re in the right spot. In this blog, we’ll walk you through the steps for setting up BigCommerce Integration with QuickBooks in a simple, structured way. Let’s get started.
An Overview of BigCommerce and QuickBooks Integration
BigCommerce is a leading eCommerce platform designed to help businesses build, manage, and scale online stores. It offers built-in tools for product management, order processing, payment gateway integration, shipping configuration, and tax calculation.
Businesses use BigCommerce to:
- Manage product catalogs and SKUs
- Process online payments securely
- Handle discounts, refunds, and promotions
- Track customer activity
- Operate across multiple sales channels
As order volume increases, BigCommerce efficiently handles the sales side of operations. However, it does not replace a dedicated accounting system.
QuickBooks Online is one of the most popular cloud-based accounting solutions trusted by small and mid-sized businesses to manage their finances more efficiently. From bookkeeping and invoicing to expense tracking, payroll management, tax reporting, and financial analysis, QBO brings all your accounting activities together in one centralized platform.
By centralizing financial data within a single platform, QuickBooks Online helps businesses streamline accounting workflows, reduce manual effort, save valuable time, and make more informed financial decisions. As your business continues to grow, QuickBooks Online also provides the flexibility and scalability needed to manage increasing transaction volumes and more complex financial operations with greater ease and efficiency.
When properly integrated with BigCommerce, QuickBooks enables seamless synchronization of orders, payments, taxes, refunds, customer records, and inventory data, creating a more connected and efficient eCommerce accounting ecosystem. Now, let’s walk you through the checklist and step-by-step process to connect both platforms smoothly and efficiently.
Pre-Integration Checklist to Integrate BigCommerce with QuickBooks Online
Before setting up the connection between BigCommerce and QuickBooks Online, it is important to ensure that both platforms are properly configured and ready for connection. A smooth integration depends not only on technical setup but also on accurate data structure, updated systems, and clearly defined workflows.
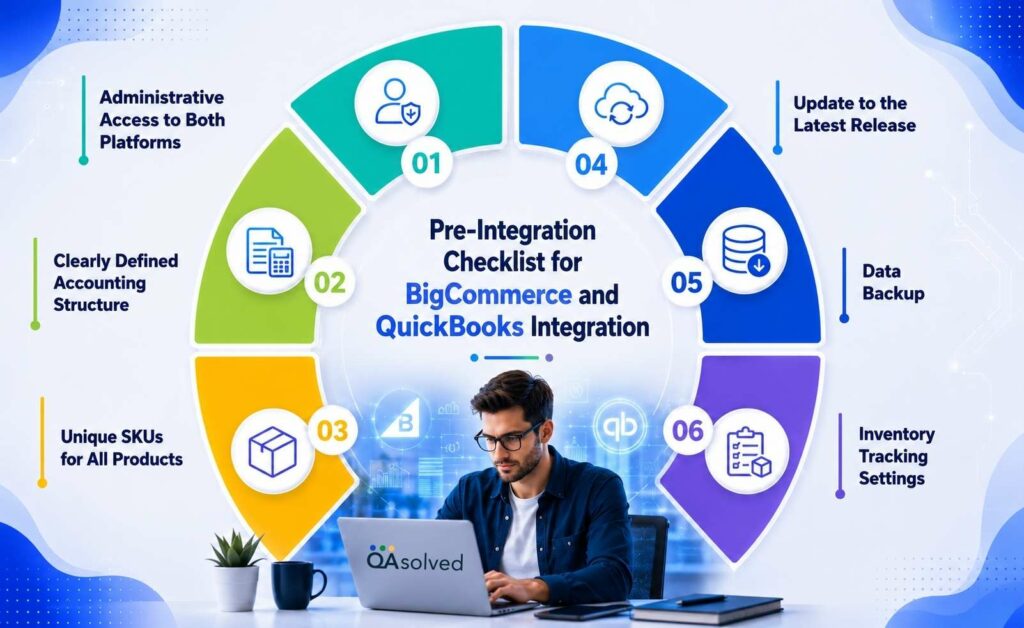
- Administrative Access to Both Platforms: You should have admin-level access to both your BigCommerce store and QuickBooks Online account to authorize integration and configure settings properly. If someone else currently holds admin access for operational reasons, it is important to change the primary admin role to a trusted and reliable individual and restrict access while syncing.
- Clearly Defined Accounting Structure: Your chart of accounts, income categories, tax codes, and expense accounts should be properly organized in QuickBooks before starting the integration.
- Unique SKUs for All Products: Ensure that product names, SKUs, pricing, and tax settings are accurate and standardized in your BigCommerce store to prevent sync errors.
- Update to the Latest Release: Running outdated software may cause significant sync interruptions between BigCommerce and QuickBooks. So, make sure to update BigCommerce and QuickBooks to the latest release.
- Data Backup: Backing up your QuickBooks data before starting integration is recommended to safeguard against accidental misconfiguration.
- Inventory Tracking Settings: Decide whether inventory tracking will be enabled and confirm that stock quantities are accurate before initiating the sync.
Taking the time to review these prerequisites ensures that your BigCommerce and QuickBooks Online integration runs efficiently from day one, supporting accurate financial reporting, streamlined operations, and scalable eCommerce growth.
Now, let’s take a look at the step-by-step guide to connecting BigCommerce with QuickBooks Online effortlessly.
How to Set Up BigCommerce and QuickBooks Online Integration?
Setting up BigCommerce and QuickBooks Online integration is more straightforward than many businesses expect. With tools like BigCommerce Connector by QuickBooks, powered by OneSaas, the process is designed to be guided and user-friendly rather than overly technical.
In most cases, the setup begins by connecting both accounts and granting the necessary permissions. So, let’s take a look at the steps involved in setting up the integration and getting both platforms connected smoothly.
6 Steps to Connect BigCommerce with QuickBooks Online Using OneSaaS Connector
- Log in to your QuickBooks Online account using your administrator’s credentials.
- Navigate to the Integrations section by clicking on the My Apps or My Integrations menu, then select Find Integrations to explore available connectors.
- In the search bar, type BigCommerce Connector by QuickBooks and open the integration listing from the results.
- Click on Get Integration Now to begin the setup process.
- Review the on-screen instructions carefully, then select Continue to proceed.
- Now, click on Log In and enter your store’s credentials to authorize the connection.
- Note: If you are new to BigCommerce, select Sign Up and follow the guided steps to create and connect to your store.
This structured process establishes the secure connection between both platforms before you move on to configuring sync preferences and data mapping.
Note: Once the connection has been successfully authorized, you may either select Add Connection to link an additional account or proceed with configuring the integration settings to complete the setup process.
App Settings and Key Terminology
Once you connect BigCommerce with QuickBooks Online using the BigCommerce Connector, configuring the app settings correctly is essential. These settings determine how your sales data flows, how transactions are recorded, and how items and taxes are mapped inside QuickBooks. Here’s a breakdown of the most important settings you should understand before finalizing your integration.
- Retrieve Settings: Defines which BigCommerce order statuses should be imported into QuickBooks. This helps control when a transaction is ready to sync.
- Sales Settings: Determines how sales are created in QuickBooks. You can choose whether orders appear as invoices or sales receipts. Sales receipts are imported only after full payment is received. You can also enable automatic invoice numbering if required.
- Shipping and Discount Settings: Specifies which QuickBooks items should be used for shipping charges and discounts. These settings are necessary if shipping and discount options are not already enabled in your QuickBooks company settings.
- Item Settings: Controls how products are created in QuickBooks. You can choose to create them as inventoried or non-inventoried items. Matching can be done based on SKU or product name to avoid duplication. You can also define a default income account for all synced items.
- Tax Settings: Maps BigCommerce tax rates with the corresponding QuickBooks tax codes to ensure accurate tax reporting.
- Payment Settings: Configures which QuickBooks accounts are used to record payments and processing fees associated with BigCommerce transactions.
Carefully reviewing these settings before activating the sync ensures a smooth data flow and prevents reporting inconsistencies later.
How to Manage Your BigCommerce Transactions in QuickBooks Online?
Managing BigCommerce transactions within QuickBooks Online also allows you to review, categorize, reconcile, and track sales efficiently. With the right configuration, businesses can maintain better visibility into revenue, simplify bookkeeping processes, and reduce errors across their eCommerce and accounting operations. Here are the steps,
- Follow the six steps outlined in the section above if you are setting up the integration for the first time.
- Note: If your platforms are already integrated, follow the steps to connect and manage BigCommerce transactions in QuickBooks.
- Enter your BigCommerce account credentials and select Log In.
- Authorize the connection by selecting Confirm to allow BigCommerce to sync order data with QuickBooks Online.
- Choose the Transaction Start Date from which you would like to begin importing orders. You can import up to one year of historical transactions.
- Configure the app settings based on your business requirements. These settings can be updated later from the BigCommerce tile under the App Transactions or Integration Transactions page.
- Once the setup is complete, select Done to finalize the integration.
How to Configure the Integration with Order, Product, and Inventory Sync Workflows?
Configuring the integration with order, product, and inventory sync workflows allows you to control how data is transferred between BigCommerce and QuickBooks. Each workflow plays a specific role in ensuring accurate financial records, proper product mapping, and up-to-date stock levels. Here’s how you can configure the integration properly:
Before configuring the individual workflows, you must first define your core synchronization preferences. These include:
- Account Timezone – Ensures transactions are recorded accurately based on your business location.
- Integration Start Date – Determines from which date orders will begin syncing.
- Email Sync Reports – Lets you choose how and when you receive sync activity notifications.
Once these preferences are set, you will see a list of available workflows. Each workflow is optional, so review them carefully before enabling. Typically, the integration allows:
- Sales/order data from BigCommerce to sync into QuickBooks Online.
- Product data from BigCommerce to sync into QuickBooks Online.
- Inventory quantities from QuickBooks Online to update BigCommerce, if inventory tracking is enabled.
Careful configuration ensures that data flows accurately and supports your accounting practices without disruption.
Order Sync Configuration Settings in QuickBooks Online
- Begin the setup by selecting the first workflow that syncs BigCommerce orders into QuickBooks Online. These configuration options define how sales data will be retrieved and recorded.
- Choose the BigCommerce order statuses that should sync to QuickBooks Online, including options like Pending or Awaiting Payment if required.
- Select how orders will be recorded in QuickBooks Online, either as Sales Invoices or Sales Receipts, based on your business preference.
- Open Default Product and Advanced Options to access additional configuration settings.
- Order Number Prefix: Add a custom prefix to your BigCommerce order numbers before they sync to QuickBooks. For example, adding “BC-” will convert order 1234 to BC-1234 in QuickBooks.
- Gift Card Product: Assign a dedicated item for gift card sales to accurately track gift card transactions.
- Assign Sales to Class or Location: Select a default class or location in QuickBooks Online, provided these features are enabled in your company file.
- Customer Record Options: Choose how customer records are created in QuickBooks. You can sync using the original customer name, the customer’s organization name, or a generic online sales customer.
- Automatic Invoice Numbers: Enable this option to let QuickBooks generate invoice numbers automatically instead of using the BigCommerce order number.
- Discount Product: Specify a dedicated item to record and track discounts applied to sales.
- Rounding Adjustment Product: Assign an item to handle minor rounding differences between BigCommerce and QuickBooks totals.
- Shipping Item: Map shipping charges to a specific item in QuickBooks to track shipping revenue separately.
- Default Customer Message: Use the default message template in QuickBooks instead of importing order notes from BigCommerce.
- Allow Credit Card Payments: Enable this option to allow credit card payments on synced transactions.
- Due Date Offset: Set a due date calculation based on the transaction date. If not configured, the transaction date will be used as the due date.
- Now, you can enable the option to sync refunded or cancelled orders from BigCommerce into QuickBooks. During configuration, you will be required to select a fallback account from which refunded amounts will be recorded. This ensures that refund transactions are mapped accurately within your accounting system. Under Order Status, choose the BigCommerce status that should trigger refund or cancellation syncing. The app will retrieve only those selected refunded or cancelled orders and push them into QuickBooks accordingly.
- To ensure that sales sync accurately with your accounting system, all BigCommerce products must have unique SKUs assigned. Proper SKU setup prevents duplication and ensures correct item mapping during the integration process. For QuickBooks Online integrations, there are two product matching methods available:
- Match by Name: The SKU from BigCommerce is matched with the Name field of the corresponding product in QuickBooks Online.
- Match by SKU: The SKU from BigCommerce is matched directly with the SKU field in QuickBooks Online.
Selecting the appropriate matching option helps maintain clean item records and ensures seamless data synchronization.
- You will be directed to the tax configuration page, where each BigCommerce tax rate must be mapped to the corresponding sales tax in your accounting system.
- Now, you can also enable the option to allow QuickBooks Connector to create new items in QuickBooks Online. For inventory items, the system will assign a COGS account during creation; however, the actual COGS price will not be synced.
- Note: You will need to select the Income and Expense Accounts for non-inventoried items.
- The payment sync settings allow you to decide whether BigCommerce payment data should be recorded against sales in QuickBooks Online. You can also map different payment methods to separate clearing accounts using the individual payment mapping option. If you are unsure which clearing accounts to select, consult your accountant for guidance.
- Finally, click Save.
Product Sync Configuration in QuickBooks Online
This setting allows the QuickBooks Connector to pull all your BigCommerce products and create them in QuickBooks Online automatically. Some businesses prefer creating items only when they appear in actual sales transactions, while others choose to sync their entire BigCommerce product catalog upfront.
Note: If you need different products to be linked to different income or expense accounts, those account mappings must be configured directly within QuickBooks Online after the items have been created by the app.
Inventory Sync Workflow in QuickBooks Online
To sync stock levels from QuickBooks Online to your BigCommerce store, select the final workflow option during configuration. This enables inventory quantities in QuickBooks to update corresponding products in BigCommerce. Please note that stock level configuration is not available for QuickBooks Online France.
Only enable this option if inventory tracking is already properly set up in QuickBooks. Activating it without existing stock records may overwrite your current BigCommerce inventory levels. Once configured, select Save to apply the changes.
How to Disconnect BigCommerce with QuickBooks?
There may be situations where businesses need to temporarily pause or permanently disconnect the integration between BigCommerce and QuickBooks Online. This may happen due to workflow changes, platform migration, account restructuring, or troubleshooting needs.
- Open QuickBooks Online and go to Integrations by selecting the My Integrations icon.
- Click on Manage Integrations to view your connected applications.
- Locate the BigCommerce app from the list of integrations.
- Select the options menu on the BigCommerce app card and click Disconnect.
- Complete the short questionnaire and confirm by selecting Disconnect to finish the process.
While setting up the integration between BigCommerce and QuickBooks Online ensures seamless syncing of sales, payments, and customer data, understanding the app’s terminology helps you configure the system accurately. At the same time, knowing how to disconnect the platforms gives you flexibility and control whenever required. Together, these steps help you manage the integration confidently and make the most of your connected ecosystem.
If you’re planning a BigCommerce and QuickBooks Desktop integration, it’s best to consider professional QuickBooks integration services to ensure a smooth setup, accurate data mapping, and seamless synchronization across your systems.
Common Issues That Users Can Face While Integrating BigCommerce and QuickBooks
Integrating BigCommerce with QuickBooks Online can significantly streamline financial operations. However, during setup or ongoing synchronization, businesses may encounter certain technical or configuration-related challenges.
Understanding these common issues in advance helps prevent data discrepancies, reporting errors, and workflow disruptions.
- Duplicate customer errors occur when QuickBooks detects an existing customer name and rejects the synced record from BigCommerce.
- SKU matching conflicts happen when product SKUs in BigCommerce do not correctly match the Name or SKU field in QuickBooks Online.
- Tax calculation discrepancies arise due to rounding differences or improper tax code mapping between both platforms.
- Inventory start date errors occur when the transaction date falls before the inventory start date configured in QuickBooks.
- Multi-currency sync issues happen when orders are placed in currencies that are not enabled or supported in QuickBooks.
- Authorization or connection failures occur when API permissions expire or the integration connection is interrupted.
- Account mapping errors arise when income, expense, or payment accounts are deleted or incorrectly configured in QuickBooks.
- Payment method mapping issues occur when multiple payment gateways are not individually mapped to appropriate clearing accounts.
- Refund sync failures happen when refunded or cancelled order statuses are not properly selected in the integration workflow.
- Web Connector instability (Desktop versions) occurs in QuickBooks Enterprise or other Desktop editions due to firewall, hosting, or connectivity restrictions.
Understanding these common integration issues can help businesses maintain smoother synchronization between BigCommerce and QuickBooks Online while reducing reporting errors, data mismatches, and workflow disruptions.
How BigCommerce and QuickBooks Integration Improves Business Operations?
Connecting BigCommerce with QuickBooks does more than just transfer data. It strengthens operational efficiency, improves financial visibility, and supports scalable growth. Here’s how this integration enhances business capabilities:
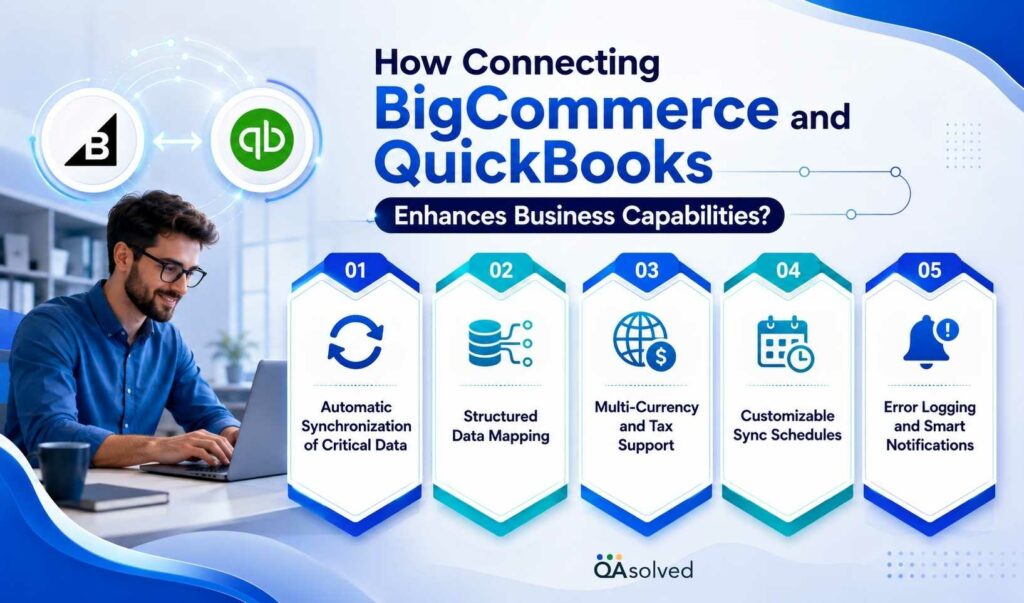
- Automatic Synchronization of Critical Data: Orders, customers, products, taxes, and shipping charges sync automatically between systems. This eliminates manual entry, reduces errors, and ensures your accounting records reflect real-time sales activity.
- Structured Data Mapping: BigCommerce data is intelligently mapped to the correct QuickBooks accounts, income categories, tax codes, and items. This structured mapping keeps your financial reports accurate and organized.
- Multi-Currency and Tax Support: For businesses operating across regions, the integration supports multiple currencies and varying tax rates. This ensures compliance and accurate reporting, even for international transactions.
- Customizable Sync Schedules: Data can be synchronized in real time or at scheduled intervals based on your operational needs. Whether you prefer hourly updates or daily batch syncing, the system adapts to your workflow.
- Error Logging and Smart Notifications: In case of failed syncs or mismatched records, the system generates detailed error logs and alerts. This allows your team to quickly identify and resolve issues before they impact reporting.
Conclusion
In short, integrating BigCommerce with QuickBooks Online helps businesses automate accounting workflows, improve financial accuracy, and streamline order, payment, tax, and inventory management. Whether you use QuickBooks Online, QuickBooks Desktop, or QuickBooks Enterprise, a properly configured integration can save time, reduce manual errors, and support scalable eCommerce growth. If you face setup challenges or sync issues, consulting Certified QuickBooks ProAdvisors can help ensure smooth and reliable integration performance.
If you encounter technical challenges or require advanced integration support, working with our Certified QuickBooks ProAdvisors can help ensure a seamless and reliable integration experience.
Frequently Asked Questions
Yes, the BigCommerce Connector by QuickBooks, powered by OneSaaS, is designed to help businesses integrate BigCommerce with QuickBooks Online efficiently. The connector automates the synchronization of orders, customers, products, payments, taxes, refunds, and inventory data between both platforms, reducing the need for manual data entry and minimizing accounting errors.
QuickBooks can integrate with a wide range of popular eCommerce platforms besides BigCommerce, helping businesses automate accounting, order management, payment tracking, and inventory synchronization. Some widely used eCommerce platforms that support QuickBooks integration include:
– Shopify
– WooCommerce
– Magento
– Amazon
– eBay
– Wix
These integrations help businesses streamline financial operations, reduce manual bookkeeping tasks, improve reporting accuracy, and maintain synchronized sales and inventory data across multiple sales channels.
The integration between BigCommerce and QuickBooks can automatically synchronize a wide range of business-critical data, including orders, customer information, products, SKUs, taxes, shipping charges, discounts, refunds, payments, and inventory quantities. Depending on the integration settings and workflows configured, businesses can also sync invoice details, sales receipts, payment methods, and transaction statuses in real time or at scheduled intervals.
Yes, the integration allows businesses to map multiple payment gateways to separate clearing accounts in QuickBooks for accurate payment tracking and reconciliation.
Sync issues between BigCommerce and QuickBooks can occur due to several technical or configuration-related reasons. Common causes include SKU mismatches between products, incorrect tax code mapping, expired API authorizations, duplicate customer or item records, and improperly configured payment, refund, or inventory settings.
If your integration continues to experience sync failures or data mapping errors, it’s best to seek immediate QuickBooks Error Troubleshooting support from Certified ProAdvisors to identify the root cause and restore seamless synchronization quickly.
Yes, BigCommerce can integrate with QuickBooks Desktop using reliable third-party integration tools, middleware platforms, or custom-built connectors designed to streamline communication between both systems.