

Imagine checking your bank statement at month’s end and noticing the balance doesn’t quite match what you see in QuickBooks Online. Maybe a payment is missing, a deposit was recorded twice, or a transaction you expected to clear is still sitting uncleared. That’s exactly where QuickBooks Online reconciliation comes into play.
Reconciliation lets you compare your QuickBooks Online records with your bank or credit card statement and track down differences before they become bigger accounting problems. And if you’re using an eligible QuickBooks Online plan, AI-powered reconciliation can make that comparison easier by highlighting transactions and differences that need your attention. Pasted text
In this blog, we’ll walk through the reconciliation workflow process, AI-powered capabilities, and show you how to handle the issues that can throw your balances off.
QuickBooks Online Reconciliation: Its Process and AI-Powered Workflow
Reconciling an account in QuickBooks Online means comparing the transactions and balance recorded in QB with your actual bank or credit card statement. The purpose is simple: make sure your books reflect what actually happened in your financial account.
Note: For this reason, it is generally recommended to reconcile accounts regularly using the corresponding bank or credit card statements.
QuickBooks Online also provides an AI-powered reconciliation process for eligible plans. Below are the steps to make the best use of AI-powered reconciliation in QuickBooks Online.
How to Use AI-Powered Reconciliation in QuickBooks Online
The AI-powered reconciliation feature is currently available with QuickBooks Online Plus, QuickBooks Online Advanced, and Intuit Enterprise Suite. To start a reconciliation:
- Open QuickBooks Online and go to All apps and select Accounting.
- Select Reconcile.
- Choose Upload or use Statement Auto Import, depending on your available option.
- Select the applicable bank statement from your computer.
- QuickBooks extracts the statement information and automatically enters the ending balance and ending date.
- Wait for the AI-powered reconciliation process to finish analyzing the statement.
- Select Start reconciling.
- Open the Insights tab to review the comparison between your statement and QuickBooks records.
So, these are the steps that can help you reconcile an account in QuickBooks Online with the help of AI. Once the AI-powered reconciliation process is complete, QuickBooks Online provides insights that help you understand how your statement data compares with the transactions recorded in QuickBooks.
What Does QuickBooks AI-Powered Reconciliation Show
The Insights tab helps you understand how the transactions in QuickBooks compare with those on your bank statement. It can highlight several types of differences that may need your attention.
- Paired Transactions: These are transactions in QuickBooks that QuickBooks successfully matched with transactions on the uploaded statement.
- Transactions in the Bank Feed that need Review: These are transactions within the statement period that are still sitting in For Review and may need to be reviewed or categorized before the reconciliation is complete.
- Extra Transactions in QuickBooks: These are transactions recorded in QuickBooks that have not been matched to anything on the bank statement and remain uncleared.
QuickBooks may also identify potential explanations for extra transactions, such as timing differences, duplicate entries, manually recorded transactions, or unclear transfers and deposits.
Note: An unmatched transaction is not automatically an error.
Follow the QuickBooks Online Reconciliation Process
Once you have your monthly bank statements, you can start comparing the transactions recorded in QuickBooks with those listed on your account statement. Before you begin, check that the opening or beginning balance matches the balance shown on your statement for that date.
- Set up an opening balance in QuickBooks Online
- If you’ve reconciled the account before and the beginning balance doesn’t match, you may need to fix the beginning balance.
- Reconcile your account in QuickBooks Online.
- Resolve issues that come up during the reconciliation process
- If required, you can also record an adjustment for the reconciliation.
What to Do After Reconciling
Once you finish reconciling an account, the ending balance in QuickBooks should match the balance on your account statement. If the two amounts don’t agree, the account still needs to be reviewed.
- You can add the opening balance later if it wasn’t entered when the account was created.
- If you enter transactions dated before the opening balance, those older transactions may need to be reconciled.
- If you need to review a completed reconciliation, you can check the previous reconciliation report.
- If you accidentally reconciled a transaction, you can undo its reconciliation status.
Note: If you need to correct a reconciliation or start the process over, it’s best to contact your accountant. They can help make the necessary changes without creating new discrepancies in your accounts.
Now that you know how AI-powered reconciliation works in QuickBooks Online, it’s time to look at the common errors and their solutions. But before you start a reconciliation, it’s important to understand two balances you’ll come across in QuickBooks Online: the opening balance and the beginning balance. Although they sound similar, they serve different purposes in the reconciliation process.
- Opening Balance: Opening Balance is the starting amount entered when you first set up an account in QuickBooks Online. It mainly represents the account balance on the date you begin tracking it in QuickBooks.
- Beginning Balance: Beginning balance is the amount that is carried forward from your previous reconciliation. It should match the ending balance from that previous reconciliation.
In simple terms, the opening balance starts the account, while the beginning balance starts each new reconciliation.
How to Fix Issues When Reconciling an Account in QuickBooks Online for the First Time
If you’re reconciling an account for the first time in QuickBooks Online and the balance doesn’t match, an incorrect opening balance is often the reason. Your opening balance serves as the starting point for tracking the account in QuickBooks.
Before you begin, keep a copy of the relevant bank or credit card statement handy and make sure you have access to the Chart of Accounts.
Step 1: Check the Opening Balance in QuickBooks Online
The opening balance is recorded as a journal entry in the account register. Here’s how to find it:
- Open All apps, select Accounting, and then choose Chart of accounts.
- Find the bank or credit card account you’re reconciling.
- Select View register to open the account’s transaction history.
- Look for the opening balance entry with Opening balance equity in the Account column.
- Note the entry date and balance.
Note: If you recently added older transactions dated before the opening balance, reconcile those transactions first before continuing.
Step 2: Compare It with Your Bank or Credit Card Statement
Once you’ve located the opening balance, compare it with the actual balance for the same date on your bank or credit card statement.
- Open your bank’s website or pull up the relevant bank or credit card statement.
- Locate the account balance for the same date as the opening balance recorded in QuickBooks.
- Compare the QuickBooks amount with the balance shown on your statement.
- If the two balances match:
- The opening balance is correct, so you can continue with Step 3.
- If the balance doesn’t match your bank records, you’ll need to update it:
- Select the Opening balance equity entry in QuickBooks to view its details.
- Change the amount in the Deposit column to match the balance on your bank statement.
- Select Save to keep the changes.
Step 3: Check the Account Register for Incorrectly Reconciled Transactions
During the first reconciliation, the opening balance should be the only reconciled entry. Other transactions should not have an R status. To verify this:
- Return to All apps, select Accounting, and then choose Chart of accounts.
- Find the account and select View register.
- Find the opening balance entry.
- Look for Opening Balance Equity in the Account column.
- Make sure the checkmark column shows R for the opening balance.
- Review the remaining transactions.
- Check that the checkmark column is either blank or shows C.
- If any other transaction has an R status, select it to expand the details. You can also sort or filter the transactions to find entries marked R more easily.
- Select the box in the checkmark column until it becomes blank, then select Save.
Once the opening balance and register are corrected, the beginning balance on your reconciliation screen should match your bank statement. You can then proceed with the reconciliation.
Next step: If QuickBooks still shows an incorrect beginning balance after you’ve completed these checks, you’ll need to review the issues that can affect accounts that have already been reconciled.
Now that you know how to fix issues when reconciling an account for the first time in QuickBooks Online, it’s time to look at what you can do when the numbers don’t match at the end of a reconciliation. Let’s walk through the checks you can make to find and resolve the difference.
How to Fix Issues at the End of a QuickBooks Online Reconciliation
When you reconcile an account in QuickBooks Online, the ending balance should match the balance on your bank statement, leaving a difference of zero. If the numbers don’t match, work through the following checks before finishing the reconciliation.
Step 1: Verify the Opening and Beginning Balance
Start by confirming that your reconciliation began with the correct numbers.
- Compare the opening balance and beginning balance in QuickBooks with your bank statement.
- Make sure the balances match exactly.
- If they match, continue to Step 2.
- If they don’t, resolve the balance issue before continuing.
Step 2: Confirm the Ending Balance and Date
Next, check whether the ending balance and date entered in QuickBooks match your bank statement.
- Open All apps, select Accounting, and then choose Reconcile.
- In the reconciliation window, select Edit info.
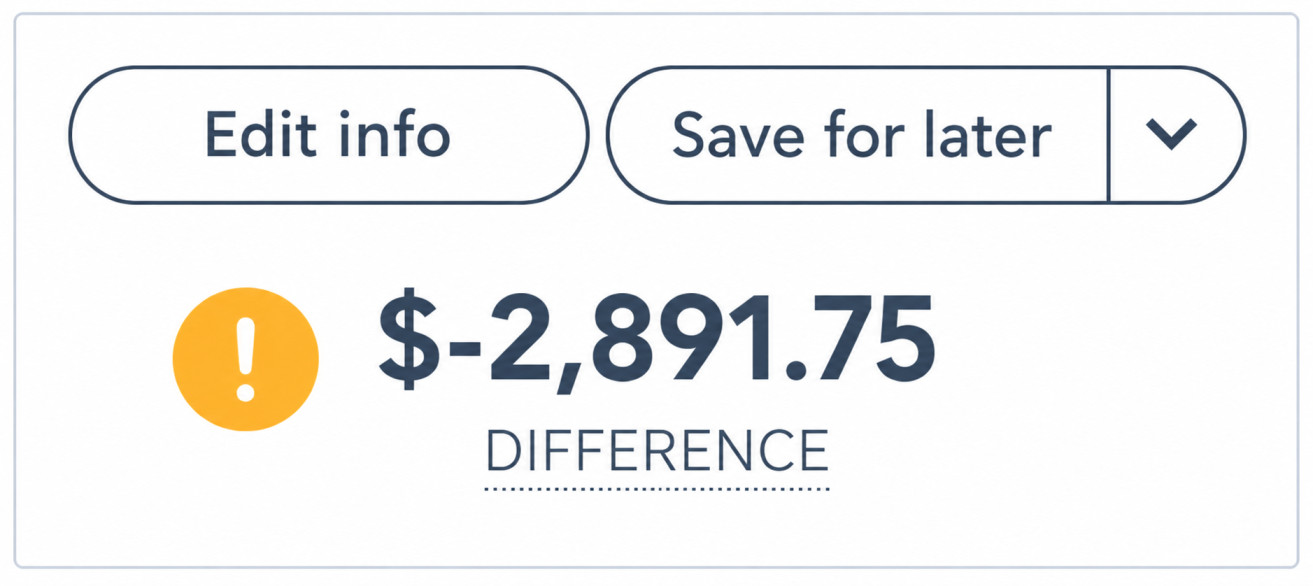
- Review the Ending balance and Ending date.
- Compare both details with your bank statement.
- Correct any information that doesn’t match.
- Select Save.
If the difference remains, move on to the next step.
Step 3: Combine Transactions That Your Bank Has Grouped Together
Your bank may sometimes combine several payments into a single transaction. If QuickBooks has recorded those payments separately, the balances may not line up.
- Review your bank statement to identify payments that were grouped together.
- If the same payments aren’t combined in QuickBooks, move them to Undeposited Funds.
- Create a bank deposit to combine them into one transaction.
- Compare the combined amount with the single transaction shown on your bank statement.
If the difference is still there, continue to Step 4.
Step 4: Rule Out Transactions That Already Match
Once you’ve confirmed the opening, beginning, and ending balances, narrow down the remaining transactions that could be causing the difference.
- Review your bank statement again.
- Compare each transaction with the corresponding entry in QuickBooks.
- Mark the transactions that match your statement.
- Use the matched transactions to rule them out as potential causes of the discrepancy.
If the balances still don’t match after these checks, continue investigating the remaining transactions in the reconciliation.
Step 5: Add or Enter Missing QuickBooks Transactions
If transactions appear on your bank statement but aren’t recorded in QuickBooks, they can prevent your reconciliation from balancing. First, make sure all downloaded transactions have been reviewed and categorized. Follow the steps given below:
- Review your sales and expense transactions to find any transactions that appear on your bank statement but are missing from QuickBooks.
- Open any transaction that you find.
- Now, check the Deposit to or Payment account to make sure the transaction is assigned to the correct account.
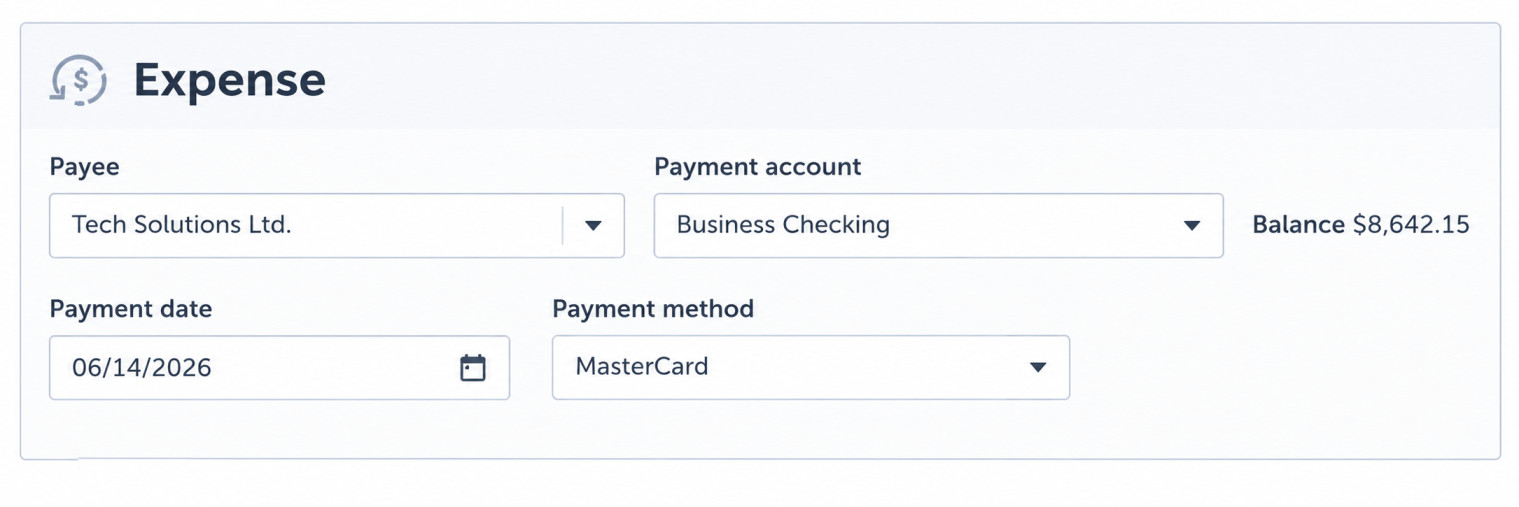
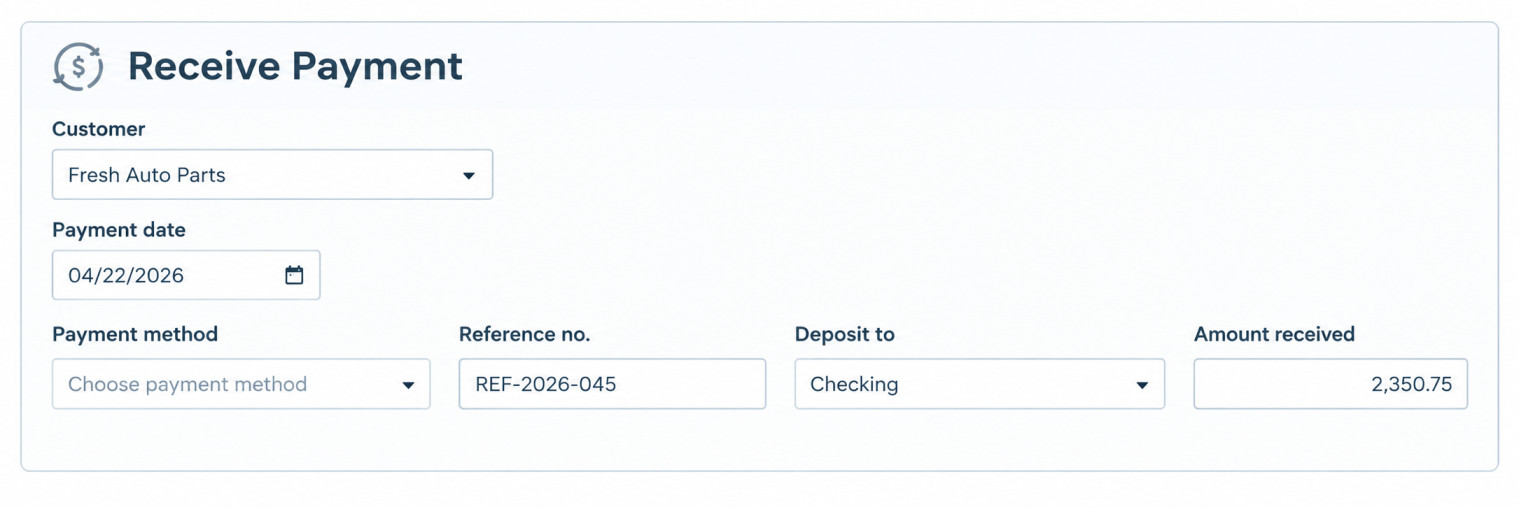
Note: If needed, select the appropriate account and save the change.
Once you’ve reviewed your records carefully, compare them with your bank statement and look for transactions that haven’t been recorded in QuickBooks.
Step 6: Review Transactions Missing from Your Bank Statement
Once you’ve compared the transactions in the Reconciliation window with your bank statement, you may find entries in QuickBooks that don’t appear on the statement. Before removing or changing anything, verify whether the transaction belongs to an earlier statement period.
- Review the transaction date and check your bank statements for that period.
- Note the transaction’s date and amount so you can trace it accurately.
- Run a Past Reconciliation report for the relevant dates to determine whether the transaction was included in a previous reconciliation.
A. If the Transaction Doesn’t Appear in the Past Reconciliation Report
If the transaction wasn’t part of a previous reconciliation, review its status in the account register and mark it as reconciled if appropriate.
- Open All apps, select Accounting, and then choose Chart of accounts.
- Find the account you’re currently reconciling and select View register.
- Locate the transaction in the register and select it to open its details.
- Check the box in the checkmark column. If it’s blank or shows C, review the transaction to make sure the details are correct.
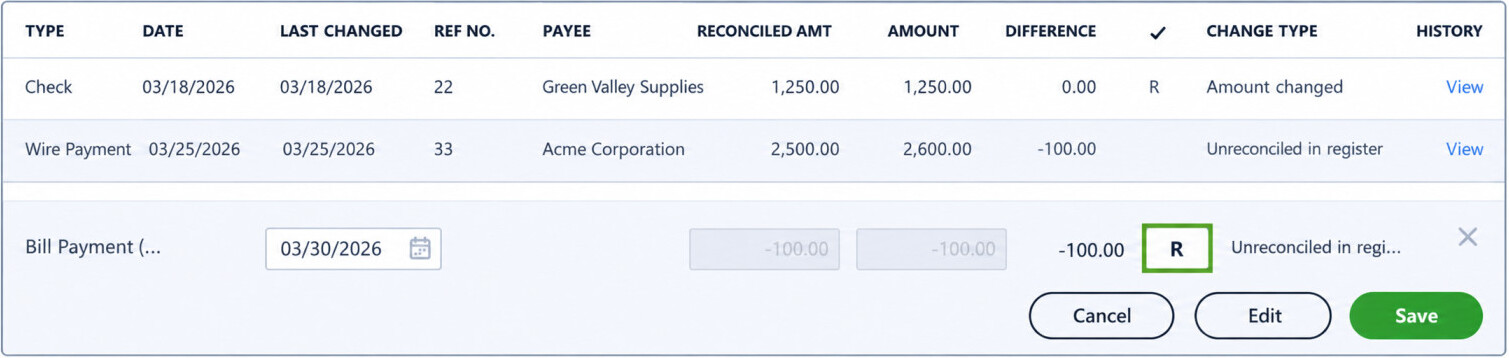
- Select the checkmark box until it displays R. If it already shows R, leave the transaction unchanged.
- Select Save once you’ve finished reviewing the transaction.
B. If the Transaction Appeared on a Past Reconciliation Report
In case you find the transaction on a previous reconciliation report, check whether it was entered more than once before making any changes.
- Start by reviewing your Sales transactions and Expense transactions.
- Sort the transactions by date, customer, vendor, or amount to make potential duplicates easier to spot.
- If you find a transaction that is clearly a duplicate, you can delete it.
- Important: Delete a transaction only when you’re certain it’s a duplicate or an error. If you’re unsure, check with your bookkeeper before removing it.
- To remove the transaction, open All apps, select Accounting, and then choose Chart of accounts.
- Find the account you’re reconciling and select View register.
- Locate the duplicate transaction and select it to open its details.
- Select Delete, then select Yes to confirm the deletion.
If the QuickBooks balance still doesn’t match your bank statement, continue to the next troubleshooting step.
Step 7: Review and Highlight Transactions with Slight Differences
Sometimes, a transaction in QuickBooks may look like the one on your bank statement but have a slightly different amount. Before changing anything, review the transaction carefully and consult your accountant if you’re unsure about the correct adjustment. Avoid editing transactions, such as invoices, that have already been paid by customers.
A common reason for a small difference is a bank or processing fee that was added after the original transaction was recorded in QuickBooks. If your bank statement includes such a fee, you can record it separately.
- Select + Create in QuickBooks.
- Choose Bank deposit.
- Follow the steps to add the bank or processing fee to the account you’re reconciling.
- Add a note in the Memo field describing the transaction the fee relates to.
Check for Errors on Your Bank or Credit Card Statement
If you’ve reviewed your QuickBooks records and still can’t find the source of the difference, the issue may be with your bank or credit card statement. Review the statement carefully and contact your financial institution if you find a discrepancy.
Ending balance issues are only one part of the reconciliation process. Next, let’s look at what can cause the beginning balance to change after a previous reconciliation.
How to Fix Beginning Balance Issues After a Previous Reconciliation
If the beginning balance doesn’t match when you start a new reconciliation in QuickBooks Online, something may have changed in the account since your last reconciliation. The beginning balance should match the previous reconciliation’s ending balance. If it doesn’t, you’ll need to identify and resolve the difference before continuing.
Before troubleshooting, understand the common causes that trigger this issue.
What Causes Beginning Balance Issues in QuickBooks Online
A beginning balance can change when something is altered in your account after a previous reconciliation. Here are some common reasons:
- The opening balance entered when the account was created was incorrect.
- A reconciled transaction was edited, deleted, voided, moved, or unreconciled, changing the previous ending balance.
- A categorized bank transaction was undone and moved back to pending.
- A transaction dated before the last reconciliation was manually reconciled, which can affect the beginning balance.
Now that you understand the causes, let’s take a quick look at the troubleshooting steps to get rid of beginning balance issues after a previous reconciliation in QuickBooks Online.
Step 1: Get Ready to Reconcile
- Keep the bank statements for the account and period you want to reconcile handy. You also need admin access to view or make changes to reconciliations.
- Open All apps, select Accounting, and then choose Bank transactions.
- Before starting, make sure all transactions for the period have been matched, categorized, posted, or excluded. If the account is connected to online banking, match and categorize all downloaded transactions.
Tip: Note the exact amount of the beginning balance difference before you begin. The changes you identify should add up to this amount.
Step 2: Open the Reconcile Discrepancy Report
- Open All apps, select Accounting, and choose Reconcile.
- From the Which account do you want to reconcile? dropdown, select the account you’re working on.
- Note: If you have multiple accounts with the same bank or several accounts of the same type, double-check that you’ve selected the correct one.
- Look for the message Your account isn’t ready to reconcile yet. Your beginning balance is off by… and select We can help you fix it.
Step 3: Review and Fix Each Change
Go through the report one transaction at a time to identify what changed and determine the right correction.
- Start with the What happened column to see what changed, when it happened, and who made the change.
- Select Review in tray to see more details. For the complete transaction history, select the dropdown next to Review in tray, then choose View History.
- Use the recommended fix shown in the tray, or make the necessary correction based on your records.
Before making any corrections:
- Only correct changes that were made by mistake. Some changes may be intentional, and the suggested fix assumes that the change was an error. If a correction affects a reconciled period or your opening balance and you’re unsure what to do, consult your accountant.
- If the recommended fix asks you to reconcile an individual transaction, you can either mark it as R (reconciled) in the account register or reconcile the account again using the same ending date and ending balance as the previous reconciliation. Both methods correct the beginning balance, but reconciling again is the only method that records the change in a reconciliation report.
Step 4: Look for Other Changes
If the report doesn’t show anything but your beginning balance is still off, check for changes that may not appear in the report.
A. Review Deleted or Voided Transactions
Open Settings and select Audit log. Filter the results by the account and the period since your last completed reconciliation. Look for any transactions that were deleted or voided during this time.
B. Check Transactions Reconciled Outside a Regular Reconciliation
- Open All Apps, select Accounting, and then choose Chart of accounts.
- Find the account you’re reviewing and select View register.
- Filter the register by Reconcile status and look for transactions marked R with dates after your last completed reconciliation. If you find one, change its status back to uncleared. For the detailed process, refer to Undo or remove transactions from reconciliations in QuickBooks Online.
C. Confirm That the Balance Is Correct
Once you’ve addressed the discrepancies, the Total discrepancy difference should show $0.00. The changes you identified should also equal the difference you recorded in Step 1. At this point, your beginning balance should match the bank statement, and you can continue with the reconciliation.
If you still run into problems, review fix issues the first time you reconcile an account in QuickBooks Online. If the balance remains incorrect after completing these checks, consider working with Bookkeeper to resolve the difference.
In case you want to change the beginning balance in QuickBooks Online, go through the next section.
How to Change or Edit the Beginning Balance in QuickBooks Online
If your beginning balance doesn’t match, you’ll need to identify the underlying discrepancy and correct the transactions causing the difference before continuing. Here are the steps:
Step 1: Review the Opening Balance in QB Online
Before jumping into the reconciliation process, first verify the account’s opening balance. Quickly check the dates and amounts. This gives you a reliable starting point for fixing the beginning balance in QuickBooks Online.
- Open All apps, select Accounting, and then choose Chart of accounts.
- Find the bank or credit card account you want to review.
- Select View register for that account.
- Look for the opening balance entry with Opening Balance Equity in the account column.
- Note the balance and date of the opening balance entry.
Step 2: Compare the Balance and Reconcile with Your Bank Account
Check the beginning balance in QuickBooks Online with your bank records to identify any differences.
- Open your bank account or refer to the relevant bank statement.
- Check the balance for the same date shown in QuickBooks.
- Compare both balances and note any difference.
Step 3: Confirm the Opening Balance Against Your Bank Records
After recording the opening balance in QuickBooks, compare it with the actual balance in your bank records.
- Sign in to your bank’s website or open the relevant bank statement.
- Check the account balance for the same date as the QuickBooks opening balance.
- If both balances match, the opening balance is correct.
- If they differ, open the Opening Balance Equity transaction in QuickBooks.
- Update the amount in the Deposit column to match the bank record.
- Select Save to apply the change.
Step 4: Review the Account Register
When reconciling an account for the first time, check the register to make sure no other transactions have been incorrectly reconciled.
- Open Bookkeeping or Accounting, then select Chart of Accounts.
- Find the account and select View register.
- Locate the opening balance entry labeled Opening Balance Equity.
- Check the other transactions. Their reconciliation status should be blank or marked C.
- If any transaction is marked R, open it and clear the reconciliation status.
- Save your changes.
- Compare the balances again to confirm that the difference has been resolved.
Following these steps can help you identify the cause of a beginning balance issue after a previous reconciliation and correct the balance in QuickBooks Online without affecting the rest of your reconciliation history.
If you find transactions dated before the opening balance, you may need to reconcile those older transactions separately. This helps bring the account records in QuickBooks Online in line with your actual bank or credit card statement.
How to Reconcile Transactions Older Than Your Opening Balance
If you recently added transactions dated before the opening balance, you may need to review and adjust it before reconciling the account. The opening balance represents when QuickBooks starts tracking the account and summarizes transactions recorded before that date. When older transactions are added later, the original opening balance may no longer reflect the account history accurately.
This can happen when QuickBooks has limited historical transactions available after you first connect an online bank account. The good news is that there are two ways to handle this and we’ll now show you how to get this done.
A. Keep Older Transactions Covered by the Opening Balance
You don’t necessarily need to enter every older transaction when setting up an account in QuickBooks. The opening balance already represents the account’s balance before you began tracking transactions in QuickBooks, so you can leave it unchanged and focus on recording transactions from your chosen starting date onward.
When creating an account, choose the date from which you want QuickBooks to begin tracking activity and enter the corresponding balance from your actual bank account for that date. Setting the opening balance at the start of a bank statement can also make your first reconciliation easier and more straightforward.
B. Add and Reconcile Transactions Older Than Your Opening Balance
When you need to include transactions from before your current opening balance, you’ll first need to update the opening balance date and amount. This gives QuickBooks the correct starting point and helps prevent older transactions from being counted twice.
Note: Adding older transactions is usually easier before you complete your first reconciliation. You can still add them after several reconciliations, but you may need assistance from your accountant to avoid affecting previously reconciled records.
Step 1: Add the Older Transactions
- If your account is connected to online banking, download the relevant transactions from your bank and import them into QuickBooks.
- For transactions that aren’t available through your bank connection, enter them individually as sales receipts or expenses.
Step 2: Update the Opening Balance
- First, open Settings and select Chart of accounts.
- Locate the account you’re working on and open it.
- Review the account history and find the opening balance entry. Look for Opening Balance Equity with Opening Balance in the Memo field.
- Select the opening balance entry to open its details.
- Next, sign in to your bank’s website and find the account balance for the date you want to use as the new opening balance date.
- Update the opening balance in QuickBooks so both the date and amount match your bank records.
This updates the account’s opening balance to match your bank records, giving QuickBooks the correct starting point and keeping the account properly balanced. Now all you need to do is reconcile the account.
C. Reconcile the Account After Updating the Opening Balance
Once the opening balance reflects the correct date and amount, you can move on to reconciling the account. If you encounter issues during your first reconciliation, review the troubleshooting steps for a first-time reconciliation. For accounts you’ve reconciled before, use the relevant steps for resolving reconciliation issues.
- Start by opening the account you want to reconcile and reviewing its transaction history.
- Locate the opening balance entry. It should show Opening Balance Equity in the account field, with Opening Balance in the Memo field.
- Check your bank records by signing in to your bank’s website. Find the account balance for the new date you want to use as the opening balance in QuickBooks.
- Return to QuickBooks and open the existing opening balance entry.
- Update the date and amount so they match the balance shown by your bank for the selected date.
Once the older transactions are added and the opening balance is updated, the account should be ready for reconciliation. Matching the opening balance with your bank records helps QuickBooks start from the correct point and makes it easier to keep future reconciliations accurate.
Conclusion
Reconciling your QuickBooks Online account doesn’t have to feel like a monthly hunt for a missing dollar. Once you know where to look, most reconciliation issues can be traced back to a few common causes, such as incorrect opening or beginning balances, missing transactions, duplicates, timing differences, or changes made after a previous reconciliation.
The key is to work through each difference carefully rather than making quick adjustments just to reach a zero balance. QuickBooks Online’s AI-powered reconciliation can also help by highlighting transactions and differences that need your attention.
With your balances checked, transactions reviewed, and discrepancies resolved, you can finish each reconciliation with greater confidence. And when an issue affects a previously reconciled period, don’t hesitate to involve your accountant before making changes.
Frequently Asked Questions
Think of reconciliation as a financial cross-check between your accounting records and your actual bank or credit card activity. Even when transactions are imported automatically, differences can still occur because of timing, duplicate entries, manually entered transactions, or transactions that have not yet cleared the account.
To reconcile for the first time in QuickBooks Online, open All apps > Accounting > Reconcile and select the bank or credit card account. Enter the statement ending date and ending balance, then review the transactions and select the ones that appear on your bank statement. Check the Difference and resolve any missing, duplicate, or incorrect transactions. When the difference reaches $0, complete the reconciliation.
Yes. QuickBooks Online lets you undo a reconciliation either all at once or manually, transaction by transaction. The full undo option is available to primary admins, in-house accountants, and users of QuickBooks Online Accountant. Follow these steps:
1. Go to All apps > Accounting > Reconcile.
2. Select History by account.
3. Choose the account and date range.
4. Find the reconciliation you want to undo.
5. Select Undo from the Action column.
6. Check the box acknowledging the consequences.
7. Select Undo reconciliation.
No. QuickBooks does not fully automate bank reconciliation from start to finish, although it can automate several steps involved in the reconciliation process.
If your opening balance is incorrect or missing, you can correct it with a journal entry. First, check whether an Opening Balance Equity entry already exists.
A. Check for an Existing Opening Balance
1. Open All apps, select Accounting, then Chart of accounts.
2. Find the bank or credit card account and select View register.
3. Look for an entry with Opening Balance Equity as the payee. If you find one, edit it instead of creating a new journal entry.
B. Create the Journal Entry
1. Select + Create or +New, then choose Journal entry.
2. Set the date before the account’s oldest transaction.
3. On Line 1, select the bank or credit card account and enter the difference as a Debit or Credit, as appropriate. Add a note such as “Opening Balance.”
4. On Line 2, select Opening Balance Equity. QuickBooks will automatically balance the entry.
5. Select Save and close.
C. Reconcile the Journal Entry
Return to the account register, find the journal entry, and mark it R if needed for the initial setup. Otherwise, continue with your regular reconciliation.
QuickBooks may show a reconciliation difference even when your current transactions appear correct because something changed in previously reconciled data. Common causes include:
1. Edited or Deleted Transactions: When we change, void, or delete a reconciled transaction.
2. Incorrect Balance: When the beginning or ending balance is incorrect.
3. Duplicate or Missing Transactions: When transactions are duplicate or missing during bank feed imports.
4. Date Differences: Transaction dates don’t match the dates on your bank statement.
5. Future-Dated Transactions: Cleared transactions fall after the statement closing date.
6. Unlinked Journal Entries: When payments or deposits are linked to the wrong journal entry.