
Do you remember the first time a contractor told you roughly how much a project would cost before it started? That’s an estimate; it gives you a sense of costs before committing. Consider it a promise for the future. For businesses, estimates are just as important for giving clients a sense of what they will pay. Today, you can create an estimate in QuickBooks Desktop and Online to give your clients a clear breakdown of potential costs, helping them understand the scope of work and make informed decisions before moving forward with a project.
Using scraps of paper or spreadsheets to generate rough cost estimates is a thing of the past. With QuickBooks, you can get a much more efficient and refined solution. With a few clicks, you can generate customized estimates in QuickBooks Online. Also, users can provide a clear and accurate breakdown of costs, including item descriptions, quantities, rates, and taxes, to ensure that there are no ambiguities.
It isn’t necessary to enter the information again once when the estimate has been approved by the client. So, you can not only create an estimate in QuickBooks but also convert the same into an invoice in seconds, streamlining the process from proposal to payment. Moving further in this blog, we will first understand the importance of creating an estimate to quote in QuickBooks and will then share a step-by-step procedure to create one.
Why is Creating Estimates Important in QuickBooks?
Construction and other business verticals must know how to create an invoice from an estimate in QuickBooks Online and Desktop versions. This allows them to provide a clear breakdown of project expenses, enabling clients to understand the overall scope before committing to work. In short, estimates act as a blueprint for both financial and operational success in construction projects.
Now, let us understand the significance of creating an estimate in QuickBooks:
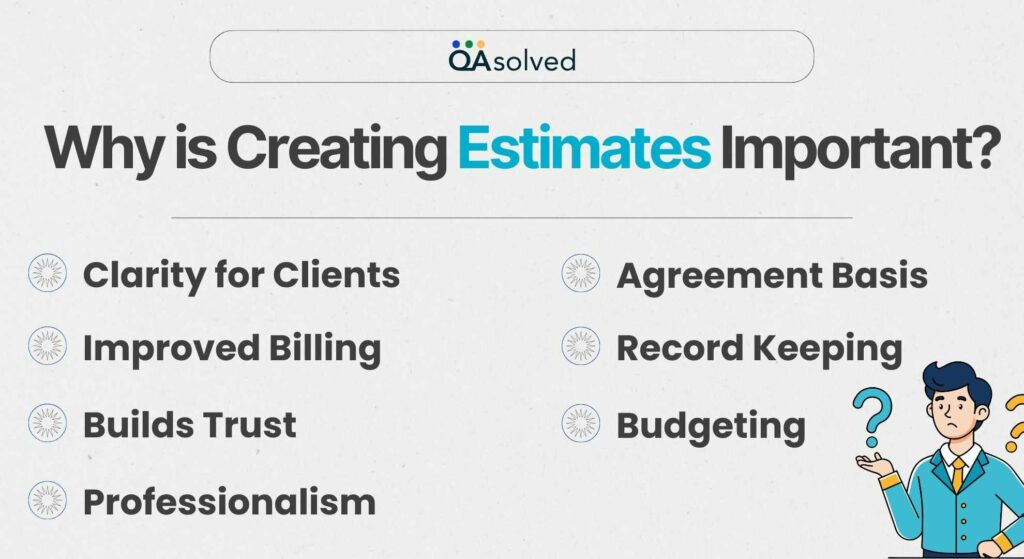
- Clarity for Clients: Providing clients with a clear picture of expected costs helps to avoid surprises.
- Budgeting: Clients use estimates to plan their budgets effectively and ensure that funds are utilized appropriately.
- Builds Trust: It helps to build trust between builders and clients by setting realistic expectations and plans.
- Professionalism: Well-written estimates enhance your company’s professional image and demonstrate your organization and transparency.
- Agreement Basis: Formal agreements are often based on estimates. After a client approves an estimate, it becomes a reference point for pricing and scope.
- Improved Billing: An agreement is based on a formal estimate, with client approval setting the scope and pricing.
- Record Keeping: Estimates keep track of potential revenue and project scope for future reference and analysis.
Hence, the purpose of creating an estimate or a quote in QuickBooks Desktop and Online is to set clear expectations and facilitate smoother project execution. The best thing about using this software is that you can easily customize estimates in QuickBooks to meet your distinct business needs and provide a tailored experience for your esteemed clients.
How to Create an Estimate and Convert It to an Invoice with the New Layout?
You can create an estimate in QuickBooks by entering the client’s details and itemizing the projected costs. Here are the 3 steps to create an estimate and convert it to an invoice using the new layout:
Step 1: Create an Estimate in QuickBooks Online
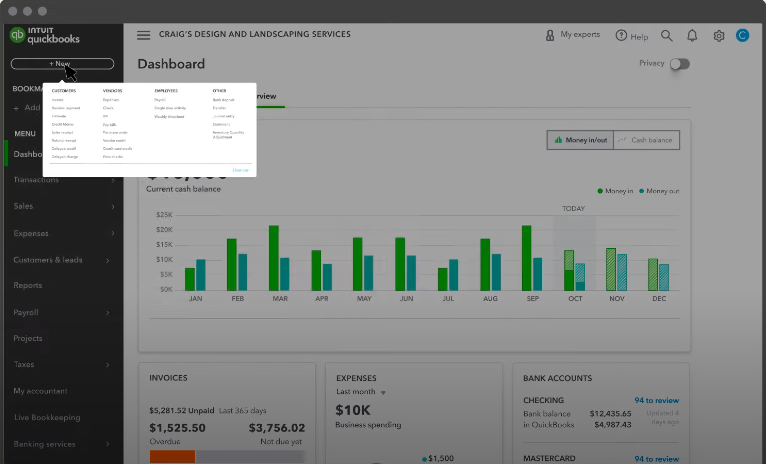
- Open QuickBooks Online.
- Click on + New on the left corner.

- Then pick Estimate.

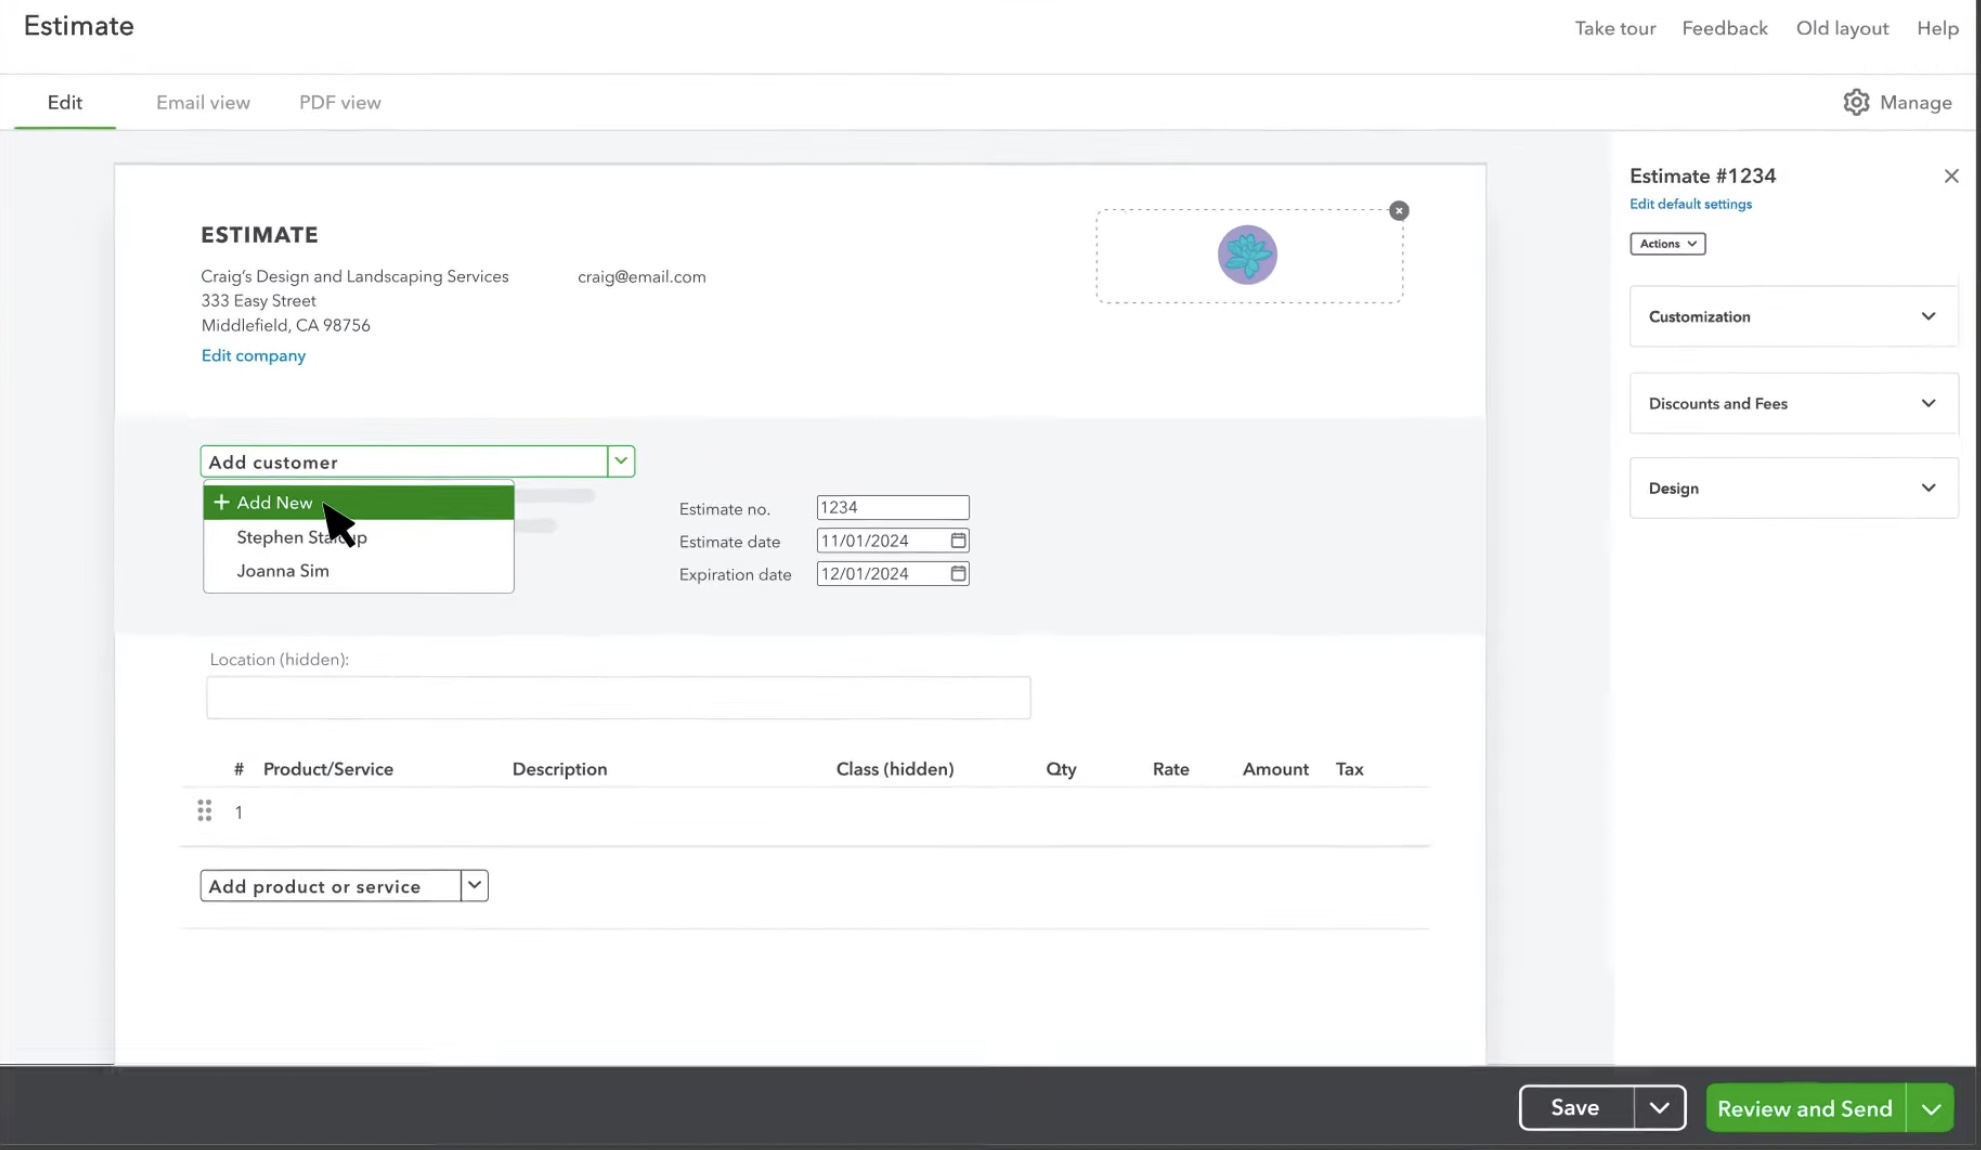
- Choose + Add customer and select your customer from the list. If it’s a new customer, click on +Add new, enter their details, and then, save.

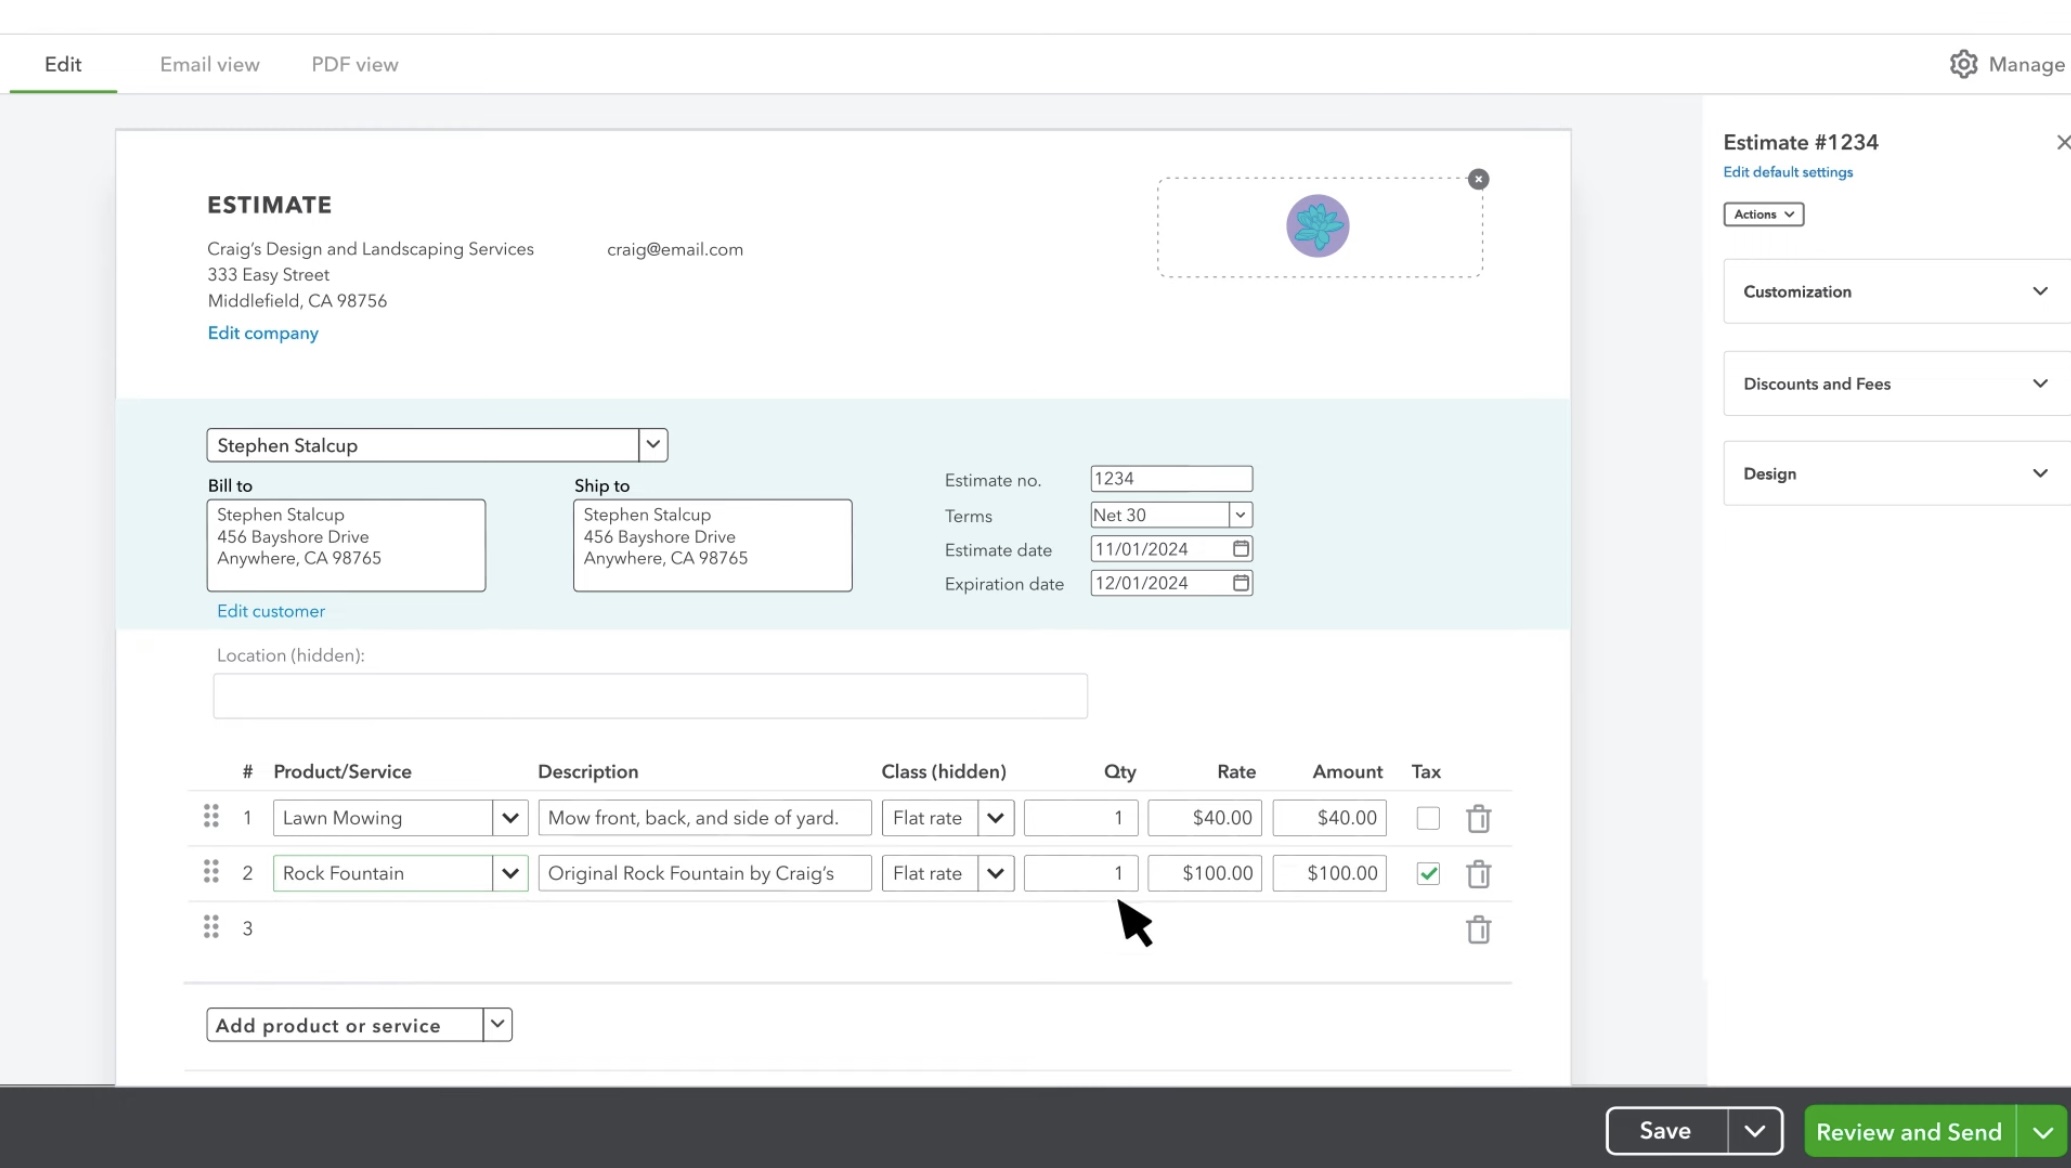
- Click on the dropdown arrow in the Product or service box and pick the items you want to include in the estimate. If it’s something new, click on + Add new, fill in the details, and Save.

- If you have set a price for your item, it will show up in the Amount column. You can change the quantity or amount according to you.

- By default, a new estimate is marked as “Pending“. If you want to change this, click on the dropdown arrow next to Pending and choose a different status.
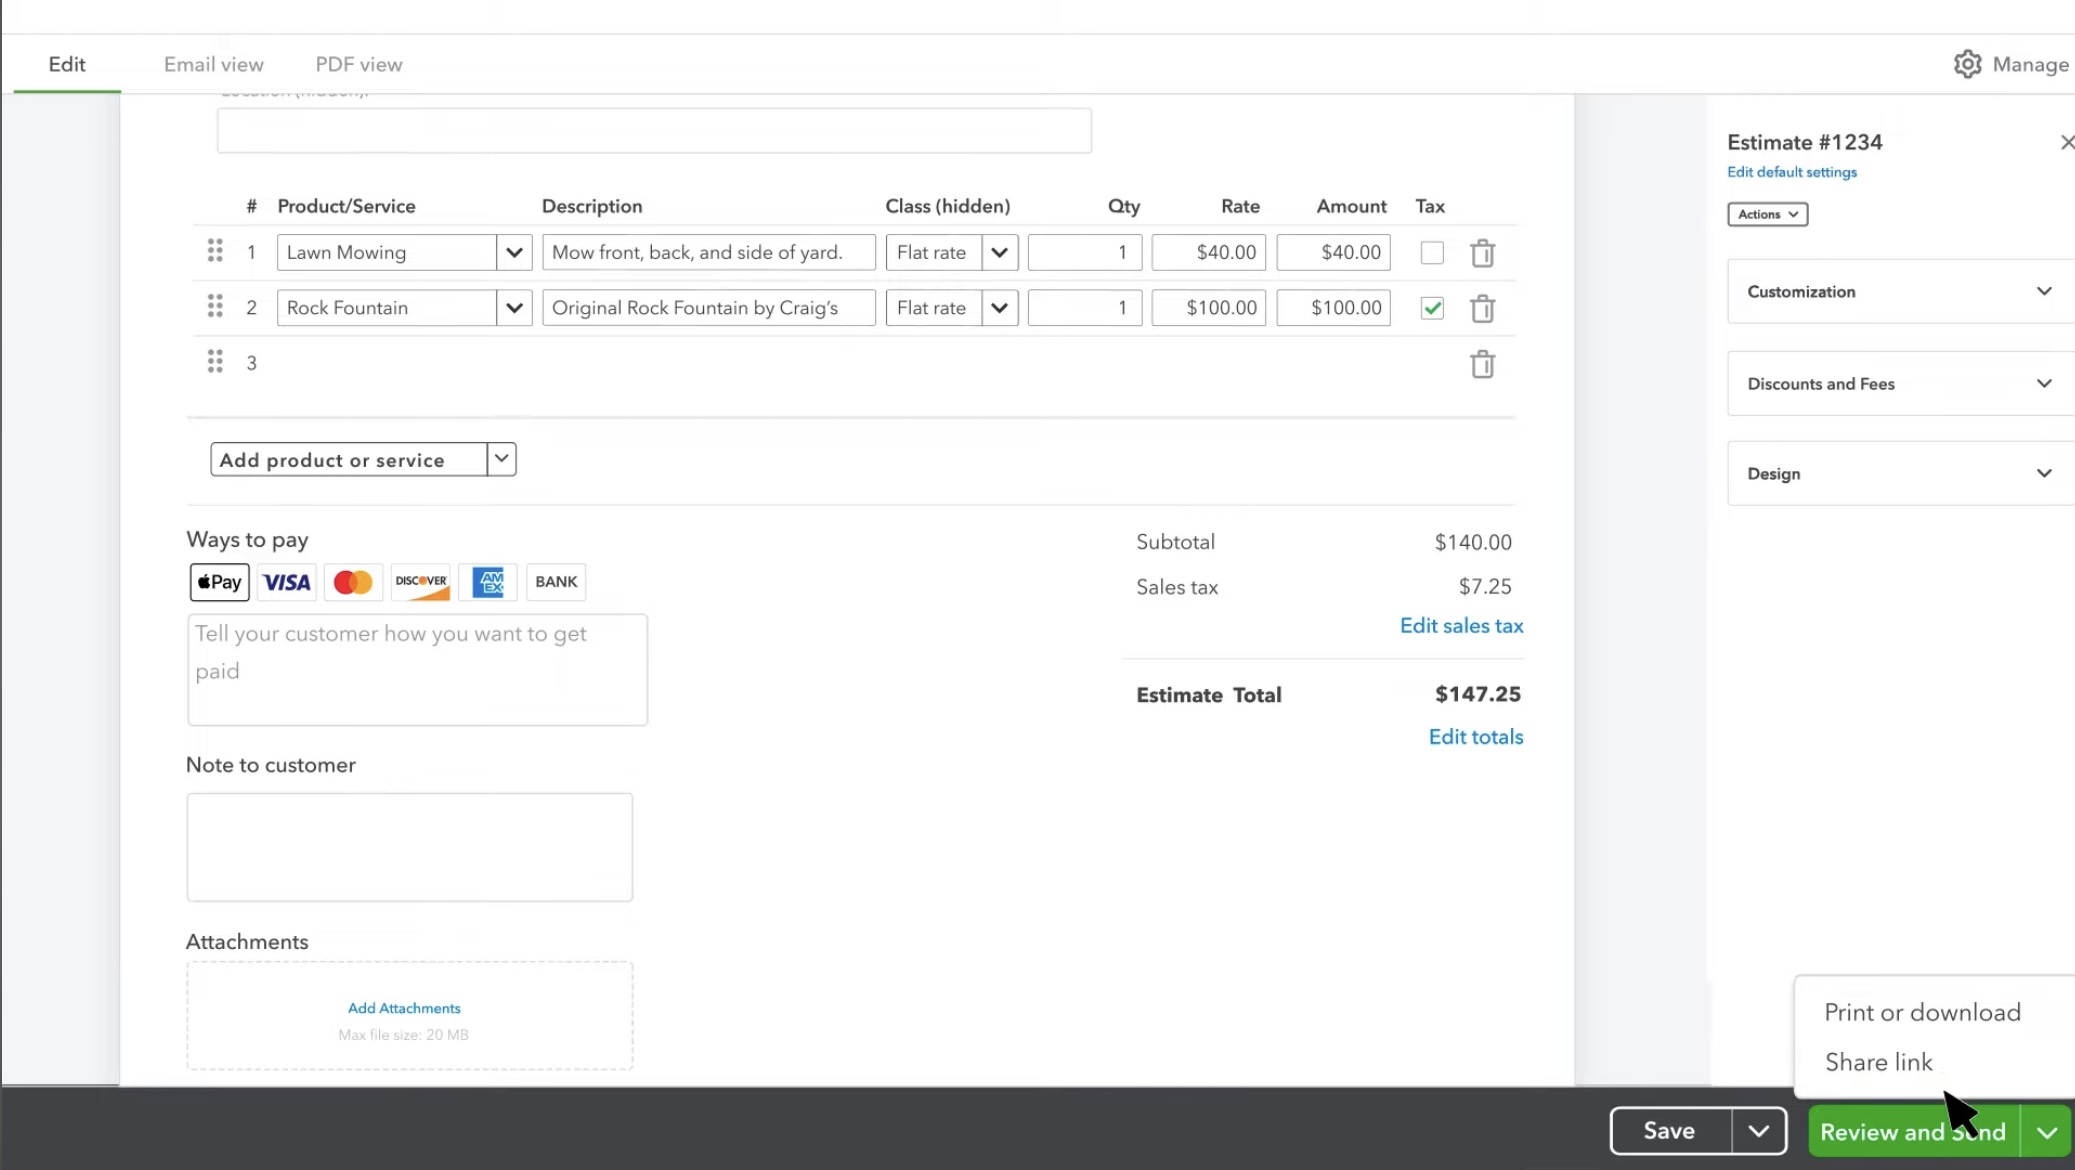
- To personalize the estimate further, go to Estimate settings on the side panel. Click on the dropdown arrow beside each section to see more options. You can decide what information appears on your estimate by switching the toggles on or off. You’ll see a preview of your changes on the form as you make them.
- Once you’re done, click Save.
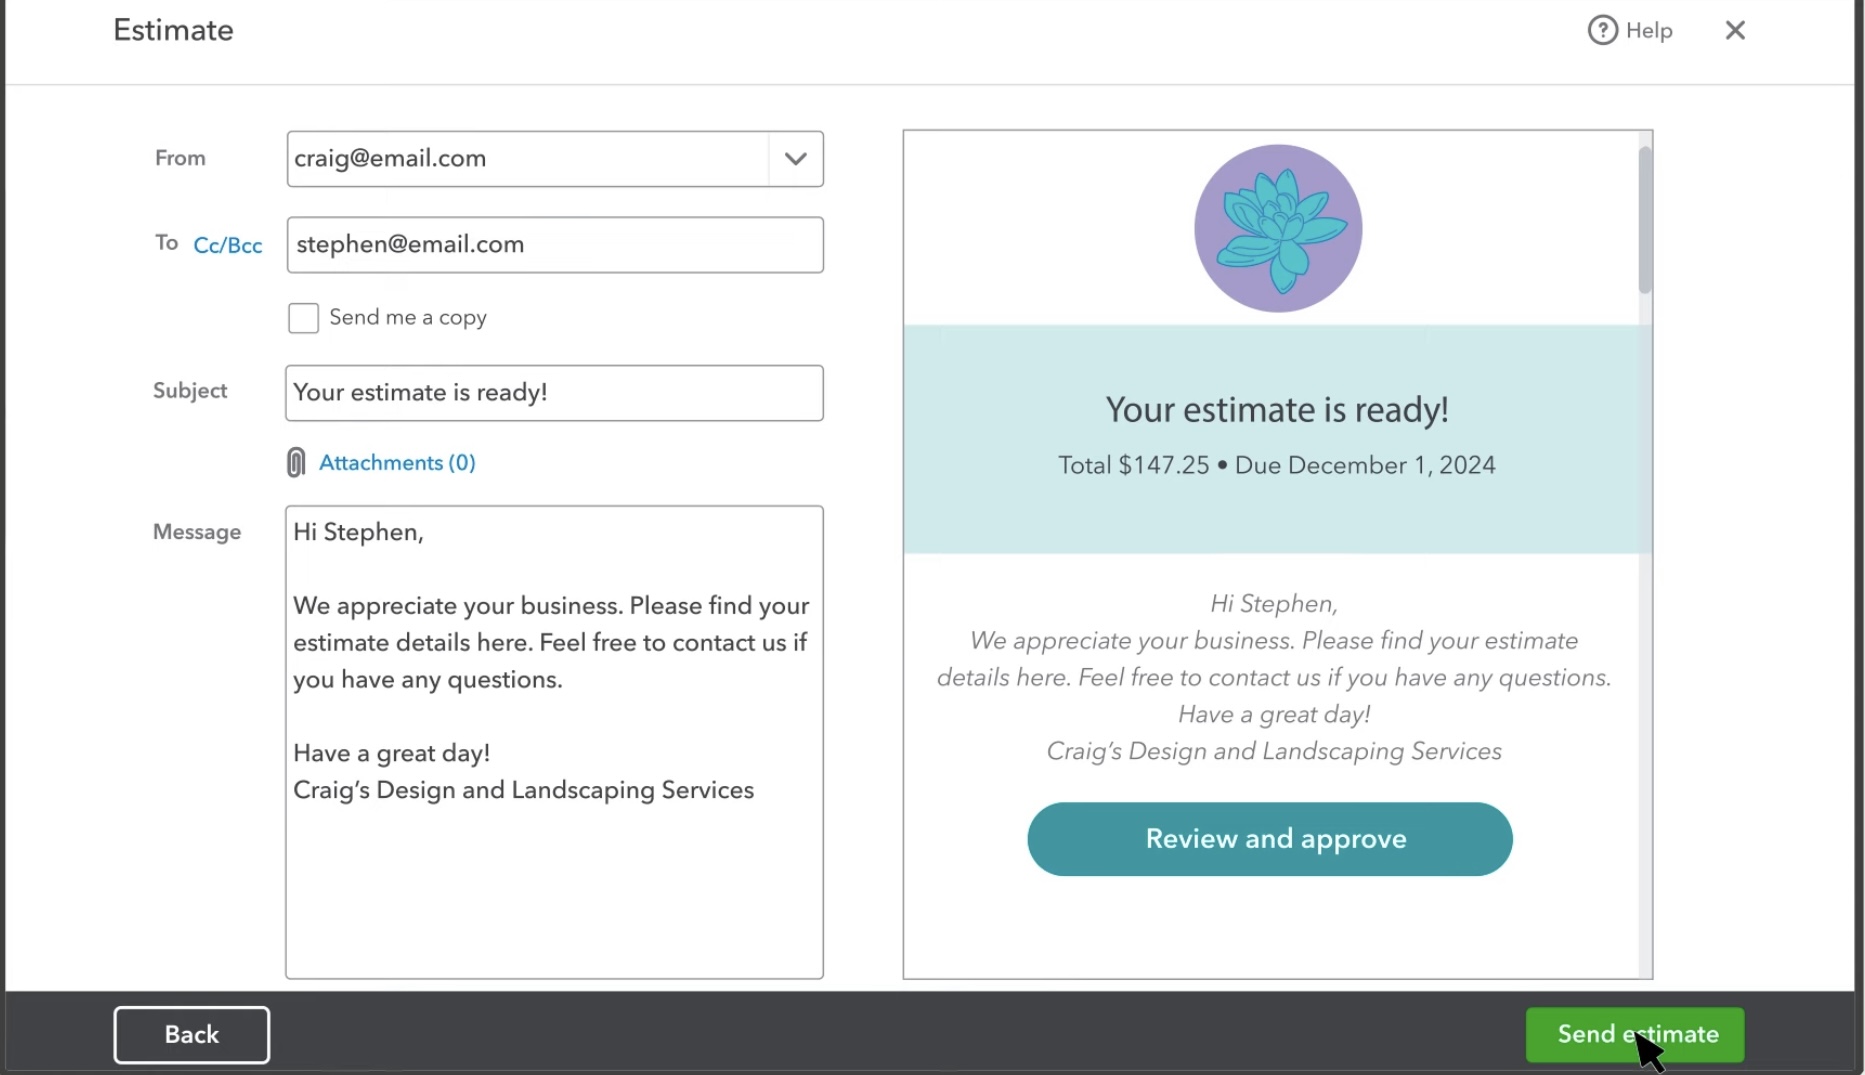
- If you want to email the estimate to your customer, click on Review and Send.
- You can edit the email message if you want, then click Send estimate.


Step 2: Update an Estimate’s Status
Once you send the estimate to your customers they have the option to either accept it, or decline it. Customers can do this directly from their email and QuickBooks update this information itself by changing the status of the estimate.
Tip: If it’s not updating automatically you have to update the status manually.
Here’s how to do it:
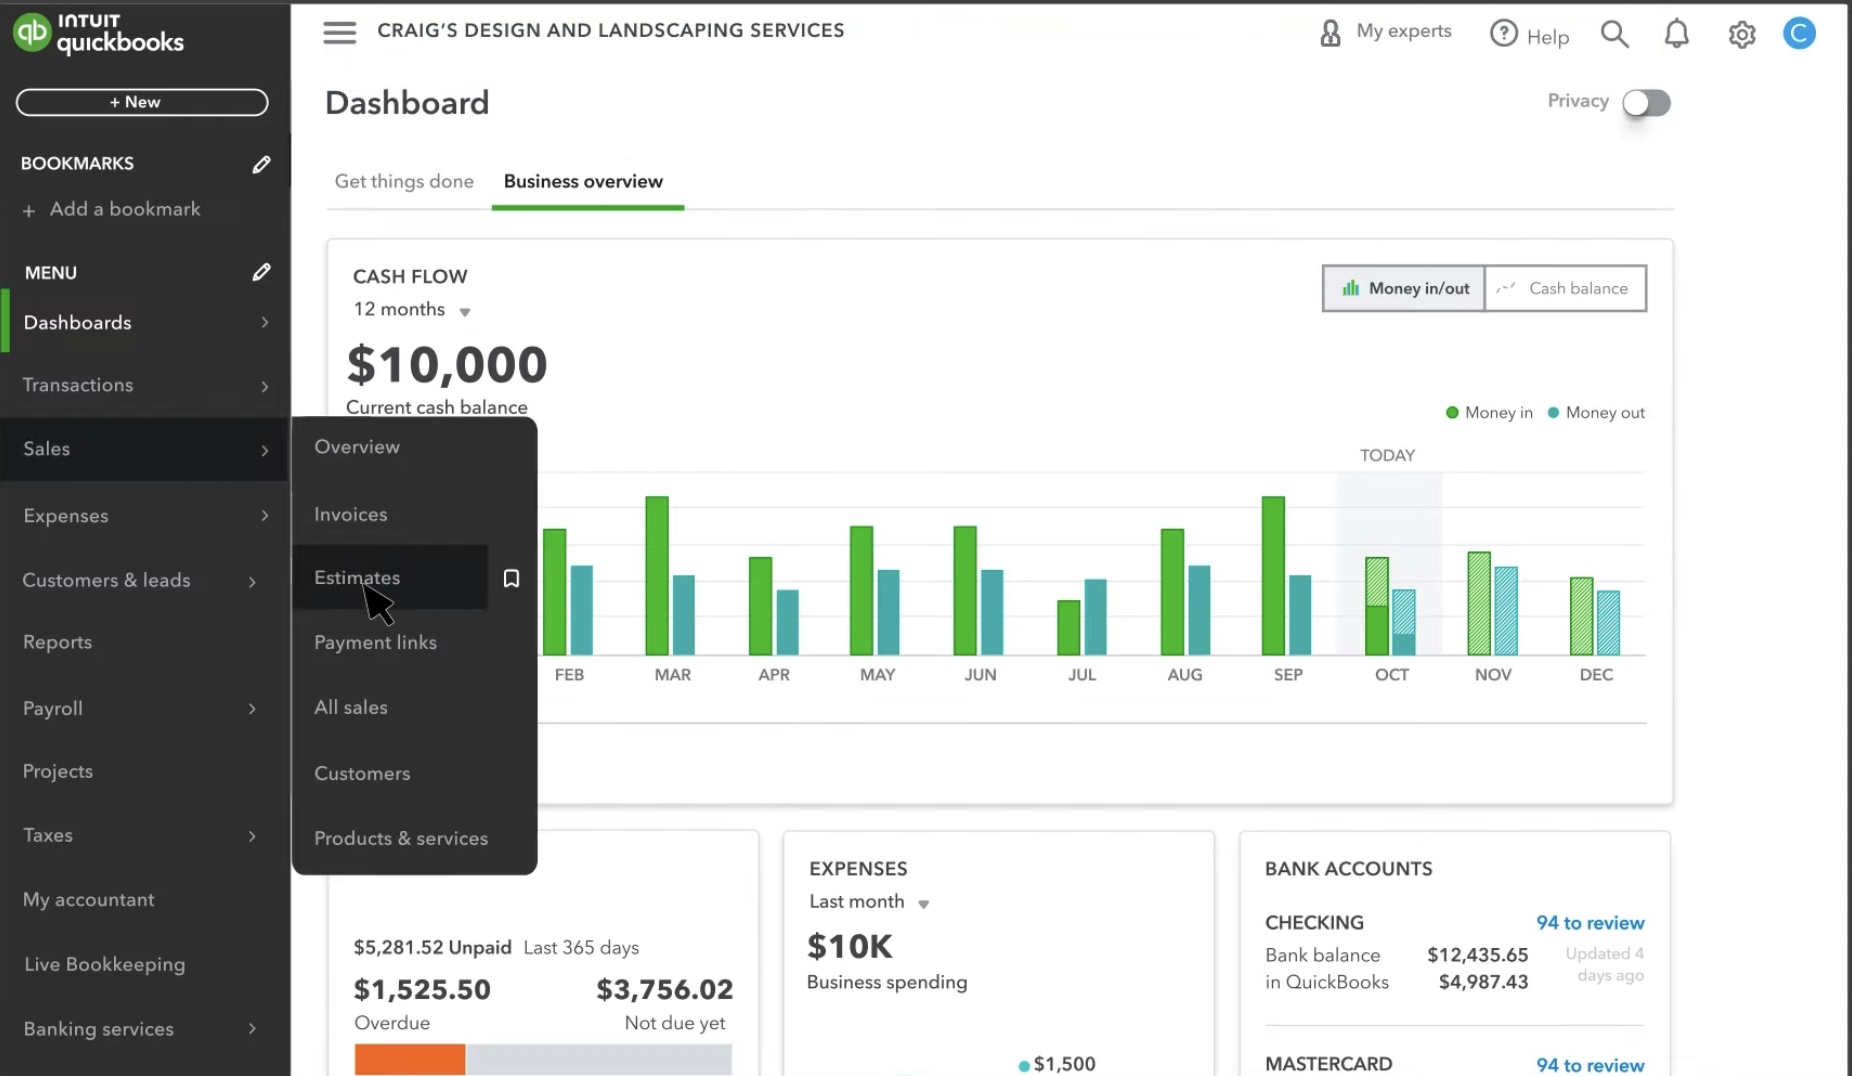
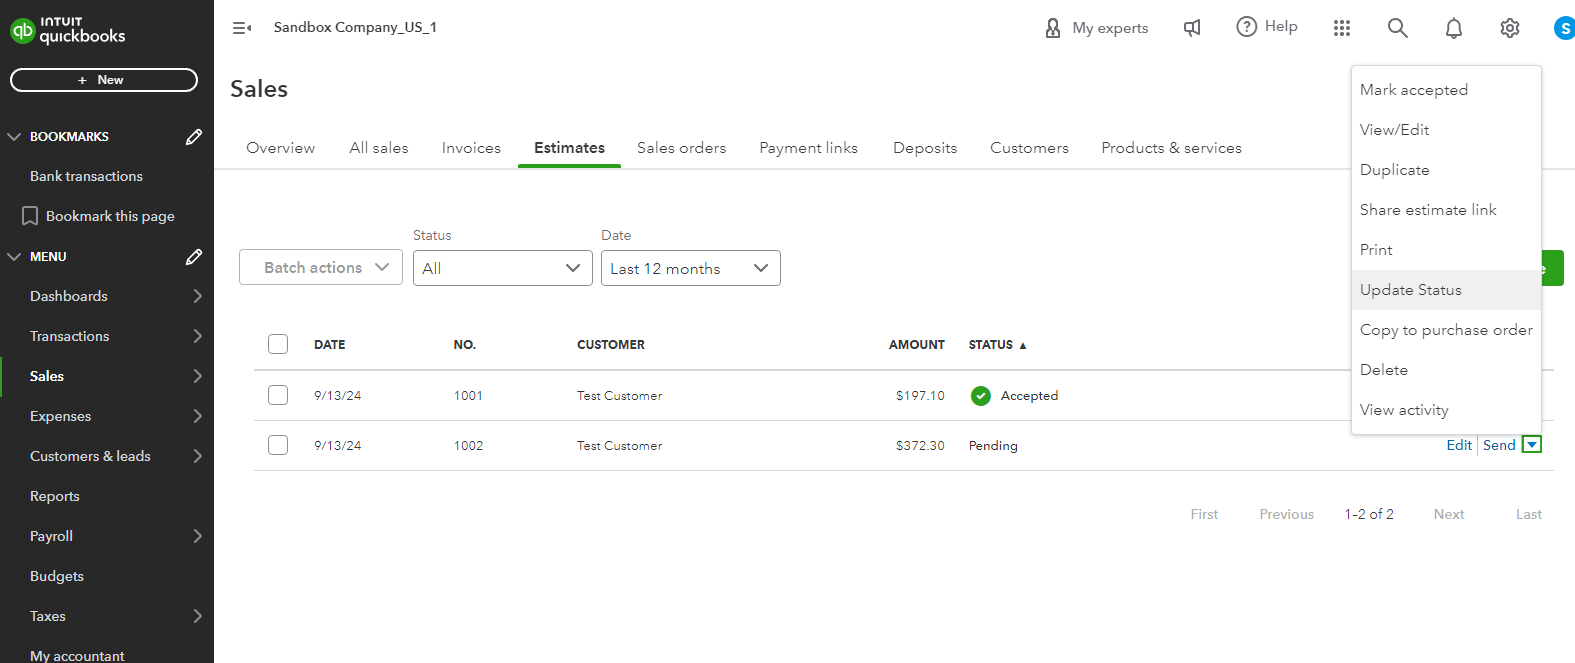
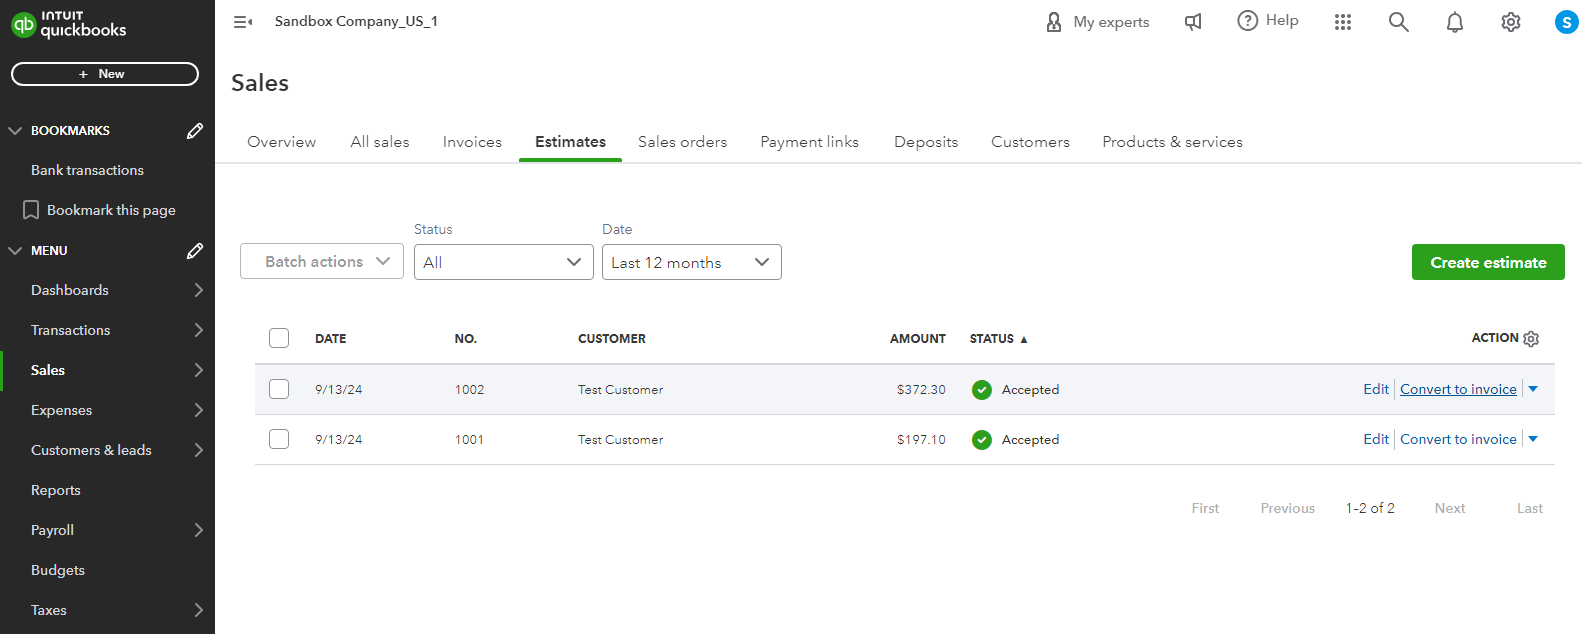
- Go to Sales in QuickBooks Online.

- Click on the Estimates tab.

- Look for the estimate you want to update.
- In the Action column, click the dropdown and choose Update status.

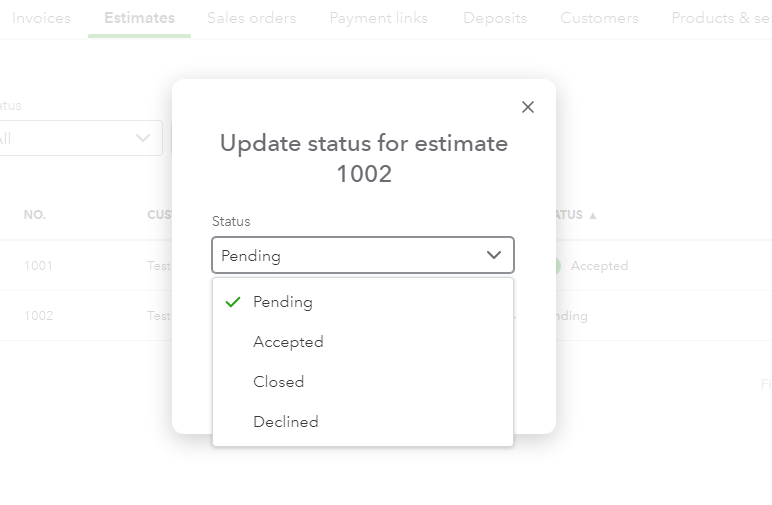
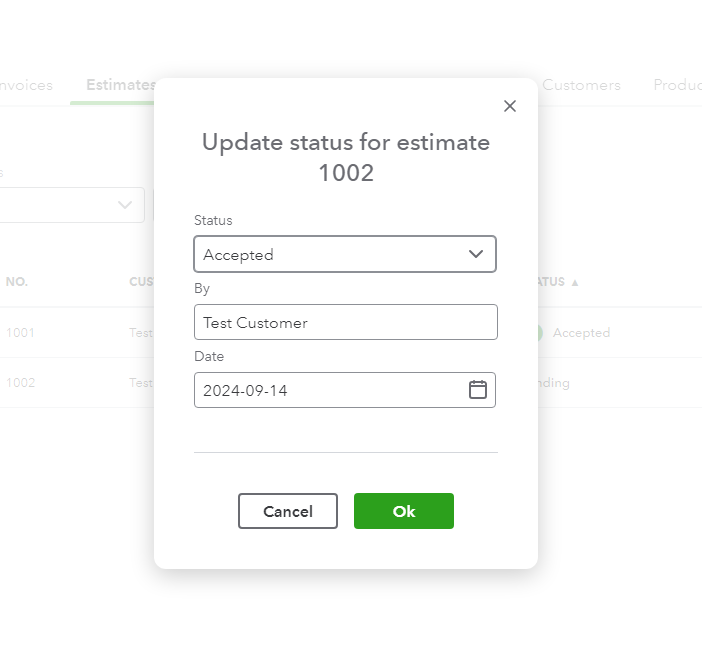
- Pick Accepted, Pending, or another status from the options.

- Click OK.


Step 3: Convert an Estimate to an Invoice
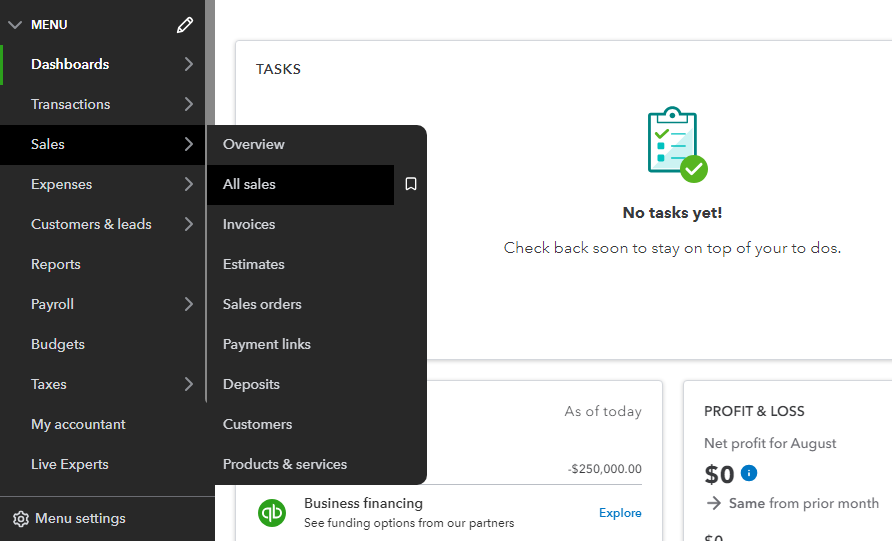
- Go to Sales, then click on All Sales.
- Look for the estimate you want to turn into an invoice.

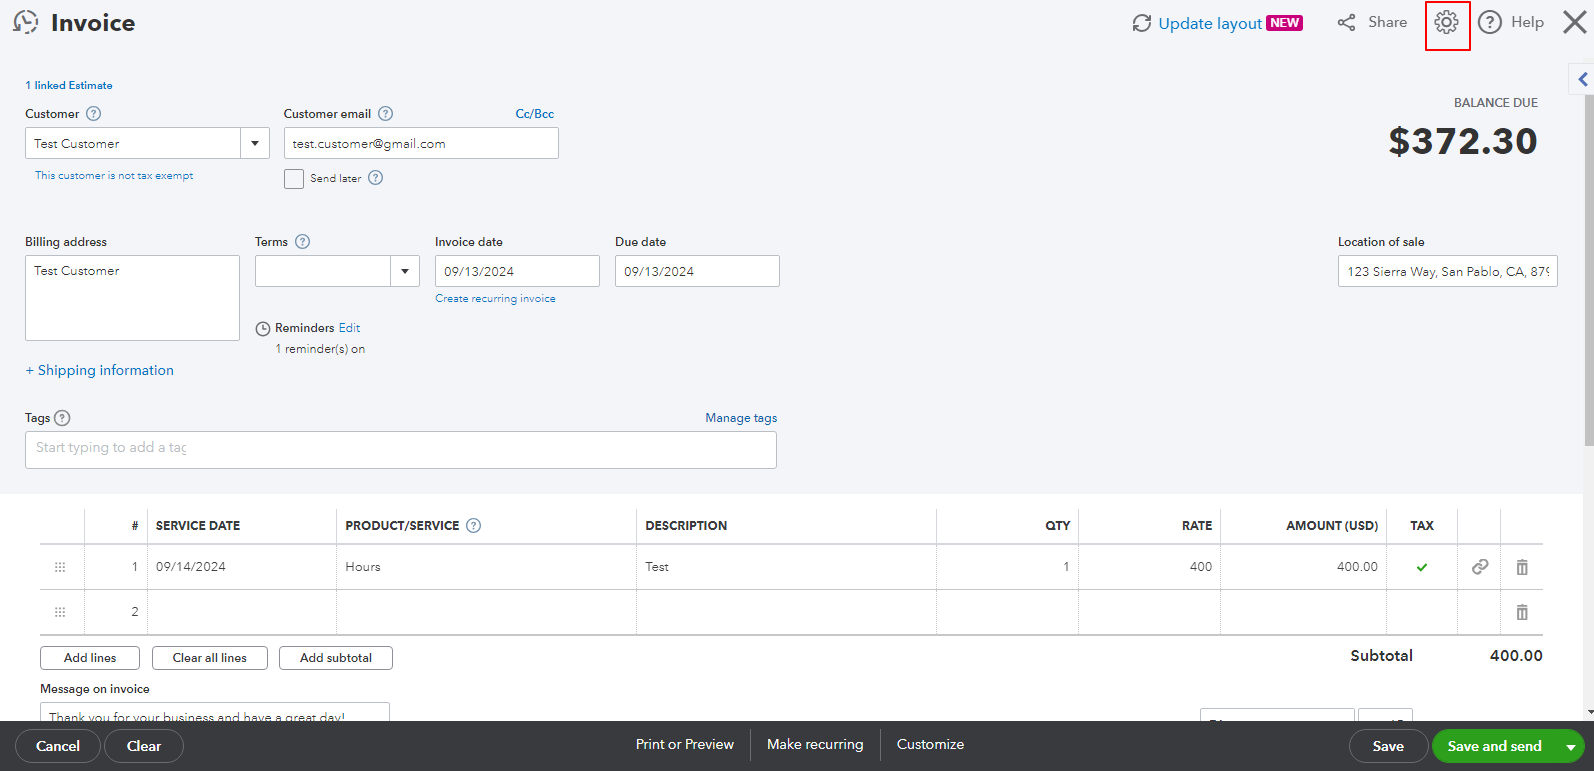
- In the Action column, click on Create Invoice.
- Make any changes needed to the invoice.
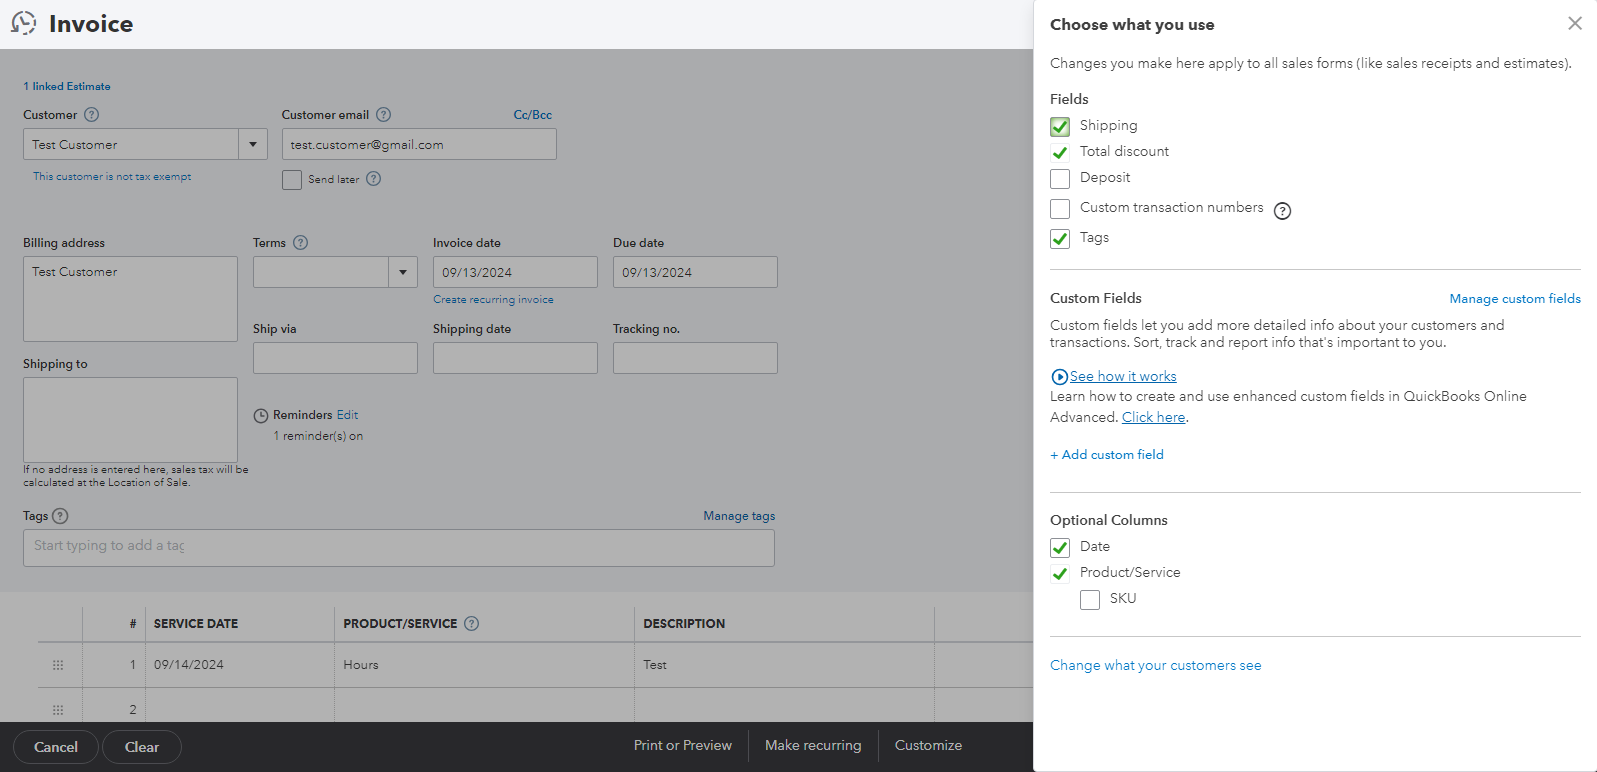
- If you want to customize fields on the invoice, click Manage (gear icon), then choose the dropdown on the section you want to customize.

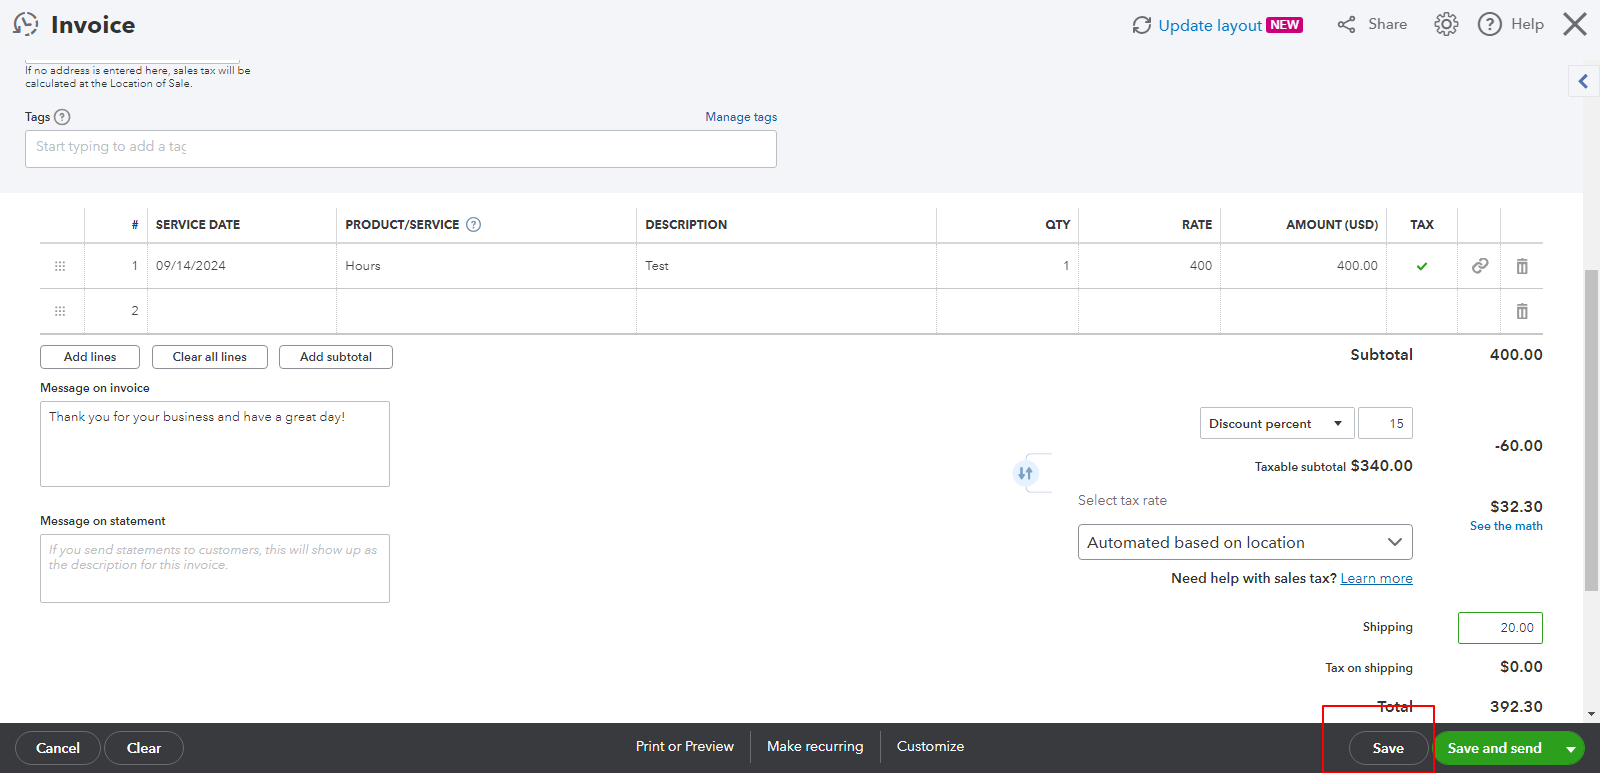
- Turn the switches on or off to change what shows up on the invoice. You’ll see a preview as you make changes.
- Click Save to save the invoice.
- Or, click Save and Send an email to your customer.
As soon as an estimate has been created and converted into an invoice, it’s time to review your open estimates in QuickBooks Online to ensure nothing has been missed.
Review Open Estimates in QuickBooks Online
- Go to Sales in QuickBooks Online.
- Click on the Estimates tab.
- Look for your estimate and then click on it to review.
- You can organize how estimates are shown by clicking on the date, number, customer, total, or status column headers.
After reviewing open estimates in QuickBooks Online, it’s time to run a report to get more detailed insights. The reports you run allow you to see a summary of your estimates and their statuses, so you can stay on top of potential income. Follow these steps to ensure you have all the information you need to make an informed decision:
- Go to Reports
- Access the Estimates by Customer report.
- Choose your date range and click Run Report.
- This report contains the customer name, estimate number, status, and invoice number if it has been converted.
When you are finished reviewing your estimates, you can make easy adjustments by deleting an estimate in QuickBooks Online.
Also Read: How to Customize Invoices, Estimates & Sales Receipts in QuickBooks Online?
Steps to Delete an Estimate in QuickBooks Online
If you accidentally created an estimate, you can easily delete it.
- Access Sales in QuickBooks Online.
- Click on the Estimates tab.
- Find and click on the estimate you want to delete.
- Click on More Actions.
- Choose Delete, then click Yes to confirm.
How to Create an Estimate and Convert It to an Invoice with the Old Layout?
If you’re using the old layout, the process is slightly different but still quite efficient. Here’s how to create an estimate in QuickBooks and seamlessly convert it to an invoice:
Step 1: Create an Estimate in QuickBooks Online
- Click on + New.
- Click on Estimate.
- Pick a customer from the Customer dropdown.
- If work has begun, select a status from the Pending dropdown. This step is optional.
- Pick the Estimate date and, optionally, the Expiration date.
- Enter the products or services you intend to sell.
- Add any other necessary information.
- Click on Save.
Step 2: Update an Estimate’s Status
It’s important to update the estimate’s status when your customer approves or declines the work:
- Go to Sales, then click on All Sales.
- Find the estimate you want to update.
- In the Action column, click the dropdown and choose Update status.
- Select Accepted or another status from the options.
- Click OK.
Step 3: Convert an Estimate to an Invoice
- Access Sales in QuickBooks Online, then click on All sales
- Look for the estimate you want to convert.
- In the Action column, click on Create Invoice.
- If you use progress invoicing, choose how much you want to invoice:
- If you’re invoicing for the entire estimate amount, select the Remaining total of all lines, then click Create Invoice.
- If you’re invoicing for only part of the estimate, select the option to enter a percentage of each line or a custom amount, then click Create Invoice.
- Make any necessary changes to the invoice.
- Click Save and send, or Save and close.
As we’ve completed creating and converting an invoice using the old layout, let’s add an estimate to an existing invoice. To seamlessly integrate them, follow these steps:
Steps to Add an Estimate to an Existing Invoice
You can also add estimates to existing invoices instead of converting them directly:
- Click on + New.
- Choose Invoice.
- From the Customer dropdown menu, select the customer.
- Next, in the Add to Invoice window, click Add on each estimate you want to include.
- If you use progress invoicing, decide how much to invoice:
- To invoice for the entire estimated amount, select the Remaining total of all lines, then click Copy to the invoice.
- To invoice for part of the estimate, choose to enter a percentage or custom amount for each line, then click Copy to the invoice.
- Make any necessary updates or edits to the invoice, then click Save.
Note: If you have multiple open estimates for a customer, you can add them all together at once. However, it’s important to consider whether your customer prefers separate invoices for each estimate.
Once an estimate has been added to an existing invoice, you should stay updated on all pending estimates. QuickBooks allows you to track potential revenue and follow up on opportunities by reviewing open estimates.
To keep your sales pipeline flowing smoothly, here’s how you can efficiently review your open estimates:
Review Open Estimates
- Access Sales and click on All Sales to access the page.
- From there, open the Filter dropdown menu.
- Choose Estimates from the Type dropdown list.
- Click Apply to confirm your selection.
Run a report after reviewing open estimates for a detailed breakdown. Tracking progress helps you manage potential income. The steps are as follows:
- Access Reports.
- Search for and open the Estimates by Customer report.
- Choose your preferred date range and click on Run Report.
You’ll see details such as the customer’s name, the estimated number, its status, and the associated amount. As you review your open estimates, delete any that you no longer need to keep your records organized.
Delete an Estimate
If you’ve accidentally created an estimate, you can easily remove it by following these steps:
- Access Sales and click on All Sales.
- Find and open the estimate you wish to delete.
- Click on More.
- Select Delete, then confirm by clicking Yes.
You can quickly create a quote in QuickBooks by entering the client’s details, itemizing the services or products, and generating a professional document ready for approval.
Conclusion
In conclusion, creating an estimate and converting it into an invoice in QuickBooks Online makes managing your business finances much simpler. Providing estimates helps you build trust and set expectations with clients by giving a clear picture of the costs and scope of the project. QuickBooks makes it easy to create and customize estimates, and then convert them into invoices once your client approves them.
It saves you time as well as reduces errors, keeping your financial records organized. With QuickBooks, you can focus on delivering high-quality services, instead of juggling multiple tasks. You can manage your estimates and invoices more efficiently and smoothly with the help of this tool.
You can create an estimate in QuickBooks Desktop by simply entering the project details, and the software will create a comprehensive estimate for you. If you want to know more or need any assistance get in touch with our QuickBooks experts.
Frequently Asked Questions
To manually convert an estimate, transfer the project details from your estimates to an invoice template. If you’re practicing progressive billing and only invoicing for part of a project, include only the specific line items and costs you wish to bill for at the moment.
1. Access the Sales section and click on All sales.
2. Locate the estimate you wish to convert.
3. In the Action column, choose Convert to invoice.
4. If necessary, make any adjustments to the invoice.
5. Finally, click Save to complete the process.
1. Go to Settings by clicking on the gear icon.
2. Select Account and Settings.
3. Choose the Sales tab.
4. In the Progress Invoicing section, click Edit.
5. Toggle on the switch for “Create multiple partial invoices from a single estimate.”
6. When prompted to update your invoice template, select Update.
7. Click Save, then Done.
To complete the remaining 50% of the initial conversion:
1. Open your QuickBooks Online (QBO) account and click on the (+) New icon, then select Invoice.
2. Choose the customer’s name from the Customer drop-down menu.
3. Locate the estimate transaction in the Add to Invoice section on the right, then click Add.
4. Enter the remaining estimate amount and click Copy to invoice.
5. Click Save to finalize.
Upon generating your report, you’ll notice that the invoice amounts are now reflected under Accounts Receivable (A/R).
To convert an estimate to an invoice:
1. Go to the Sales section and click on All sales.
2. Find the estimate you want to convert.
3. In the Action column, select Convert to invoice.
4. Make any needed adjustments to the invoice.
5. Click Save to finish the conversion.
To Create an Estimate:
1. Click on + New, then select Estimate.
2. Choose a customer or add a new one.
3. Add products or services.
4. Adjust quantities or amounts.
5. Customize details and status.
6. Click Save when ready.
To Create an Estimate:
1. Go to Estimates / Create Estimates.
2. Choose a customer or add a new one.
3. Fill in the date and estimate details.
4. Select the items for the estimate.
5. If needed, create a discount item:
a. Go to Item List.
b. Add a new item with type “Discount.”
c. Enter discount details and save.
