

Managing multiple projects at once can quickly become overwhelming for business owners, freelancers, and accounting professionals. From tracking budgets and deadlines to monitoring income and expenses, it’s easy to lose sight of profitability without the right tools in place. This is where QuickBooks comes in handy. Both QuickBooks Online and Intuit Enterprise Suite offer powerful project management features that allow you to bring all the details together in one place.
When you create projects in QuickBooks Online, you gain better control over how your work is organized. You can assign transactions, track time, and generate reports that clearly show whether a project is profitable or needs adjustments. For businesses that use Intuit Enterprise Suite, the functionality extends even further with advanced options for job costing, resource allocation, and in-depth financial tracking.
The best part is that the setup process is designed to be simple, even for users who are new to project management tools. By creating projects, you’re not only staying organized but also setting up your business for smarter decision-making. In this blog, we’ll guide you step by step through the process so you can easily create and manage projects in QuickBooks Online or Intuit Enterprise Suite.
11 Steps to Create a New Project in QuickBooks Online or Intuit Enterprise Suite
Getting started with projects in QuickBooks doesn’t have to be complicated. Both QuickBooks Online and Intuit Enterprise Suite provide a structured way to organize your work, track expenses, and monitor profitability in real time. By setting up projects in QuickBooks Online, you can easily connect transactions, assign tasks, and keep every detail of a project in one centralized space. Before discussing the steps, let’s discuss the prerequisites as well.
Prerequisites to Create a Project in QBO or Intuit Enterprise Suite
Before you begin setting up projects in QuickBooks Online or Intuit Enterprise Suite, it’s important to make sure a few key prerequisites are in place. These requirements will ensure that the project feature works smoothly and that you get the most out of its functionality.
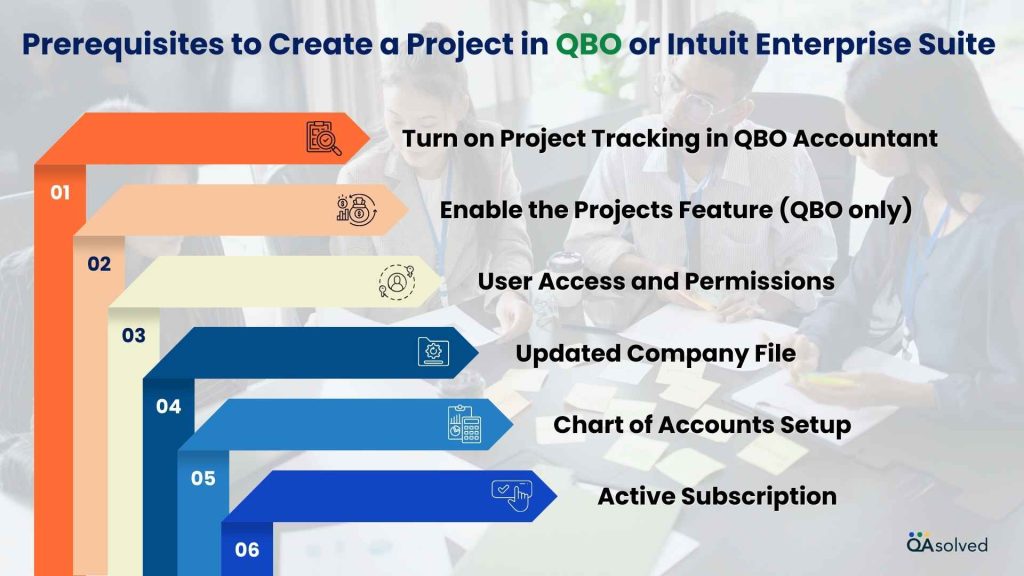
- Turn On Project Tracking in QBO Accountant: If you’re using QuickBooks Online Accountant, go to Account & Settings and turn on Use project financial tracking.
Note: Once you turn this on, you can no longer turn it off.
- Enable the Projects Feature (QBO Only): In QuickBooks Online, go to Account & Settings > Advanced and turn on Organize all job-related activity in one place.
- User Access and Permissions: Ensure you have the right level of permissions. Admin users or those with access to projects can create and manage them.
- Updated Company File: For Intuit Enterprise Suite, make sure your company file is updated to the latest version to avoid errors when creating projects.
- Chart of Accounts Setup: Verify that your chart of accounts is properly configured so income and expenses flow correctly into project reports.
- Active Subscription: Confirm that your QuickBooks Online or Enterprise plan supports project tracking features.
So, before you move forward with creating a new project, make sure these prerequisites are completed. Once these basics are in place, you’ll be ready to start setting up projects in QuickBooks Online or Intuit Enterprise Suite with confidence.
Steps to Create a New Project in QuickBooks Online
- Open QuickBooks and go to the Projects menu.
- Click on New Project to begin creating a project.
- In the Project Name field, enter the name of your project.
- Select a client from the Customer dropdown. This will automatically populate the customer’s email, billing address, and shipping address. If this information isn’t already saved, you’ll need to enter it manually.
- Update or add a project-specific email address if needed.
- Enter the Start Date and End Date to define the project’s timeline.
- Choose a Project Status from the dropdown menu to indicate its current stage.
- Use the Notes field to add any additional details about the project.
- In the Billing Address section, review or update the information specific to this project.
- If the Shipping Address differs from the billing address, uncheck the “Same as billing address” box and enter the correct shipping details.
- Once all details are filled in, click Save to create your project.
Next Steps
After creating a project, it will initially appear empty and won’t show any meaningful information. To start tracking income, expenses, and other details, you need to add or assign transactions to the project. You can do this by selecting the Add to project dropdown and linking the relevant transactions.
So, these are the prerequisites and steps that can help you to create and turn on projects in QuickBooks Online. Moving ahead, let’s discuss how to use reports to track your project profitability and progress.
How to Use Reports to Track Your Project Profitability and Progress?
Keeping track of project finances is key to understanding profitability and progress. QuickBooks Online (Plus or Advanced) and Intuit Enterprise Suite offer project-specific reports that provide clear insights into income, expenses, and overall performance.
If your projects involve employees, QuickBooks Online Payroll Premium or Elite adds advanced time-tracking features like time-off requests, mobile entry, and scheduling to help manage labor costs effectively.
By running these reports, you can monitor project performance, make informed decisions, and ensure every project stays on budget and profitable. Here are the steps to run project reports and see available project reports.
5 Steps to Run Project Reports
Running project reports helps you gain a clear view of your project’s financial performance and progress. By following a few simple steps, you can quickly generate reports that track income, expenses, and overall profitability, making it easier to manage projects efficiently and make informed business decisions.
- Open QuickBooks.
- Navigate to Projects and click on All Project List.
- Choose the project you want to review.
- Go to the Project Reports tab.
- Select a specific report for the chosen project or choose to view Reports for All Projects to get a broader overview.
Now, let’s see the available project reports.
| Report Name | Description |
| Estimated Costs/Income | An estimate of what you plan to spend and earn on a project or multiple projects. |
| Actual Costs/Income | The actual expenses and income for a project or all projects. |
| Work in Progress | Easily track how much you’ve spent so far compared to your budgeted estimate. |
| Estimate and Progress Invoicing | Easily see how much you’ve earned so far versus your projected income. |
| Project Profitability Summary | Track project profitability with a detailed report that highlights revenue, costs, and overall results. |
| Project Status | View a summary of ongoing projects with updates on progress, milestones, notes, and timelines. |
| Project Costs Detail | Stay informed about project expenses to manage effectively with a complete overview. |
| Project Costs by Vendor and Project | Monitor project expenses, manage vendors effectively, and keep costs under control. |
| Open Balances by Customer and Project | Manage outstanding balances and follow up on invoices for better cash flow. |
| Time by Employee and Project | Manage employee time allocation across projects to boost efficiency and productivity. |
| Profit and Loss by Project | Check project profit and loss to measure overall performance. |
| Unbilled Time and Expenses by Project | Track all chargeable time and project-related expenses in one place. |
| Change Order Report | Review and track project changes with Change Orders across all phases. |
| Unallocated Project Amounts | Monitor unassigned and partially assigned transactions, grouped by type and date. |
| Cost to Complete by Project | Project your final costs using the most up-to-date, real-time expense data. |
| Committed Cost by Project | View all pending costs that are planned but not yet incurred for a project. |
| Unpaid Bills by Project and Vendor | Easily view all unpaid vendor bills tied to each project. |
Benefits of Setting Up Projects in QuickBooks Online
Setting up projects in QuickBooks Online offers a structured way to organize your work, track income and expenses, and monitor overall project performance. It helps businesses stay organized, improves visibility into financials, and makes it easier to assess profitability for each project. Here are some advantages of setting up projects in QuickBooks Online.
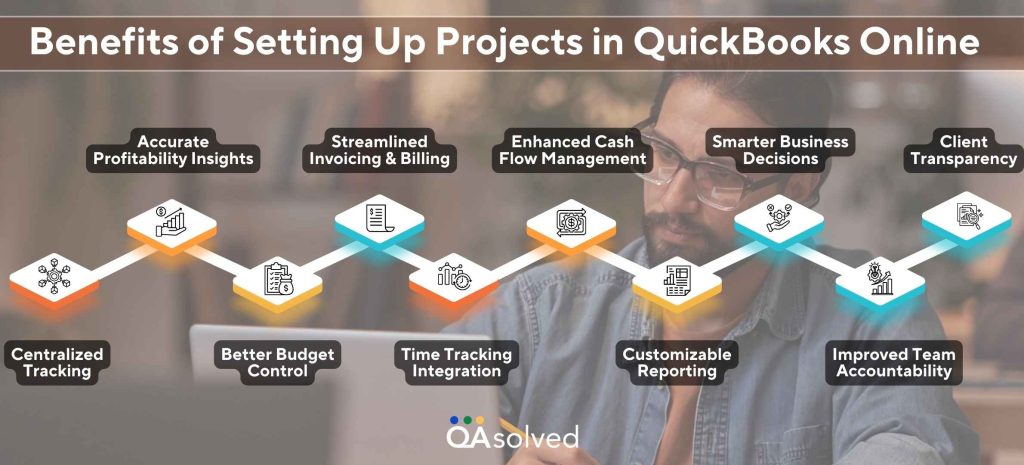
- Centralized Tracking – Set up a central tracking system in which all project-related transactions, such as income, expenses, invoices, and payments, can be tracked.
- Accurate Profitability Insights – Analyze revenue against project costs in order to determine whether your business is operating at a profit or loss in real-time.
- Better Budget Control – Ensure that real-time spending is monitored so that overruns can be avoided and adjustments can be made before the costs go out of hand.
- Streamlined Invoicing and Billing – Provide clients with a more accurate bill by tying time, expenses, and materials directly to the projects they’re working on.
- Time Tracking Integration – The ability to assign employee hours to specific projects, making it easier to track labor costs and bill them correctly.
- Enhanced Cash Flow Management – Ensure that you are on top of your receivables and payables for each project, improving your financial standing.
- Customizable Reporting – To compare the performance of different jobs and identify trends across different projects, you can use detailed project reports.
- Smarter Business Decisions – Make better business decisions by identifying your most profitable clients, services, or projects, allowing you to refine your business strategy.
- Improved Team Accountability – Manage tasks, keep track of time, and monitor contributions in order to hold your team more accountable for the work they do.
- Client Transparency – Offer clients accurate statements and updates so that they can build trust and build stronger relationships with the company.
As a result of leveraging these benefits, QuickBooks Online makes sure that project management and accounting are not only integrated, but that they go hand in hand to enable businesses to grow profitably as well.
Summary
In a nutshell, setting up projects in QuickBooks Online is a powerful way to organize your work, track expenses, and gain clear insights into each project’s performance. By carefully following the steps to create projects and assigning transactions, you can ensure that all project-related financial data is captured accurately. Leveraging tools like the QuickBooks Online project profitability report allows you to monitor income, expenses, and overall profitability, helping you make informed decisions and optimize resource allocation. Whether you’re managing small client jobs or complex projects, setting up projects in QuickBooks Online gives you the structure and visibility needed to stay on top of your business and achieve better financial outcomes.
Frequently Asked Questions
QuickBooks Enterprise:
– Desktop accounting software for large businesses.
– Offers advanced inventory, reporting, and user permissions.
– Focused on accounting and payroll, managed on-premises or hosted.
Intuit Enterprise Suite:
– Cloud-connected platform integrating QuickBooks Enterprise with extra tools.
– Includes project management, multi-location tracking, and enhanced reporting.
– Designed for enterprise-level visibility and collaboration.
1. Create or Open the Invoice:
– Go to Sales > Invoices.
– Click New Invoice or open an existing one you want to link to a project.
2. Select the Customer/Project:
– In the Customer dropdown, select the customer associated with the project.
– Once you select the customer, a Project dropdown will appear. Choose the relevant project from the list.
3. Add Items/Services:
– Add the products or services to the invoice as usual. Each line item will now be linked to the project.
4. Review & Save:
– Double-check all details, including rates, quantities, and project association.
– Click Save and Send or Save and Close.
Deleting a Project:
1. Go to Projects from the left-hand menu.
2. Select the project you want to delete.
3. Click the More dropdown at the bottom right, then select Delete.
4. Confirm the deletion.
Important Notes:
– Deleting a project removes all associated transactions (invoices, expenses, and time entries).
– If you only want to hide a project without losing data, you can mark it as Inactive instead.
1. Sign in to your QuickBooks Online account.
2. In the upper-right corner of the screen, click on your company name or the gear icon next to it.
3. From the dropdown list of companies linked to your account, select the company you want to switch to.
4. QuickBooks Online will open the selected company, and you can start working in it immediately.
Note: You must have access to both companies under the same Intuit account to switch between them.
