
Running a business is no easy task, it involves juggling multiple responsibilities, from managing bill payments and tracking income to meeting important deadlines. If you’re an entrepreneur who finds yourself entering the same transaction every week or month, you’re certainly not alone. Whether it’s a recurring rent payment, a monthly software subscription, or an invoice for a regular customer, handling these tasks manually can be both time-consuming and prone to errors.
That’s where QuickBooks comes in to simplify your workflow. As one of the most trusted accounting solutions for small businesses and entrepreneurs, QuickBooks Online helps you automate routine tasks and reduce manual data entry. Instead of re-entering the same details over and over again, you can create recurring transactions in QuickBooks Online to save time and minimize the risk of errors.
Whether it’s recurring invoices, bills, or expenses, QuickBooks allows you to set them up once and let the system handle the rest—giving you more time to focus on growing your business. If you also need help to create recurring transactions in QuickBooks Online, then you have landed on the right page. In this blog, we are going to help you with the steps that will teach you how to set up recurring invoices in QuickBooks Online. So, let’s dive in!
What are Recurring Transactions in QuickBooks?
QuickBooks recurring transactions are templates for regular financial entries, such as rent payments, subscription fees, utility bills, loan repayments, or client invoices. Instead of reentering the same transaction each time, QuickBooks can automatically create and, if desired, send or record the transaction on a set schedule (daily, weekly, monthly, etc.).
Recurring transactions typically fall into three categories:
- Scheduled – Created and saved automatically at regular intervals without manual intervention.
- Reminder – QuickBooks prompts you to review and approve transactions.
- Unscheduled – Saved as a reusable template without a set schedule; you can use it manually when needed.
Recurring transactions simplify workflows, reduce errors, ensure timely payments or invoicing, and improve cash flow. Do you know which QuickBooks Online transactions can be made recurring? Let’s take a look at that.
Also Read: How to Set Up Recurring ACH Payments in QuickBooks?
Which QuickBooks Online Transactions Can Be Made Recurring?
In QuickBooks Online, several types of transactions can be made recurring to help automate repetitive entries.
Here’s a list of transactions you can set up as recurring:
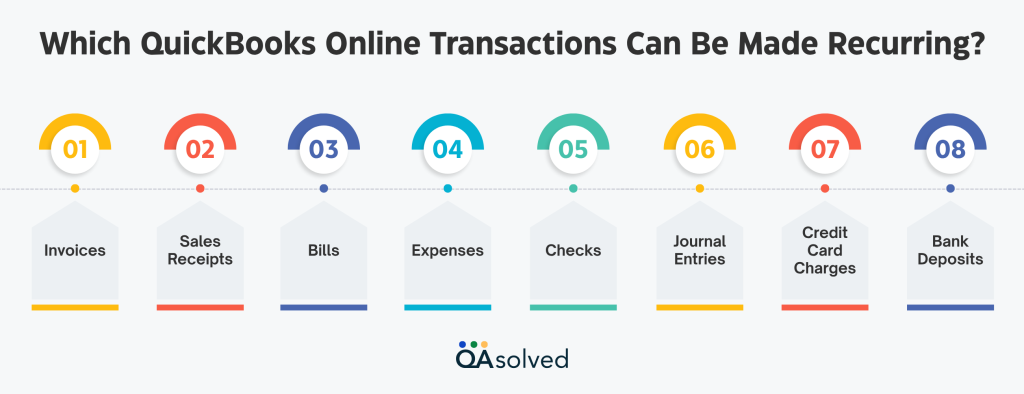
- Invoices: Automatically bill your customers for repeat services or products.
- Sales Receipts: Ideal for recording regular payments from customers when payment is received at the time of sale.
- Bills: Schedule recurring payments to vendors (e.g., rent, utilities, subscriptions).
- Expenses: Useful for tracking ongoing business costs like software subscriptions or recurring fees.
- Checks: If you pay vendors or employees with paper checks on a regular basis.
- Journal Entries: Automate recurring accounting adjustments or allocations.
- Credit Card Charges: Perfect for repeat charges on company cards, such as monthly advertising fees.
- Bank Deposits: For predictable income, like regular payments from a client or partner.
By using the “Create recurring transactions in QuickBooks Online” feature, you can streamline your accounting processes and ensure nothing falls through the cracks. Now, let’s take a look at how one can make recurring transactions in QuickBooks Online.
Steps to Create Recurring Transactions in QuickBooks Online
In QuickBooks Online, you can create templates for recurring transactions such as expenses, invoices, and estimates. Bill payments and time activities are the only transaction types that cannot be made recurring.
Tip: Recurring sales receipts, automatic charges for clients, or autopay for recurring invoices can streamline credit card payments.
Requirements
These steps are for the updated QuickBooks Online interface.
Create A New Recurring Transaction From Scratch
Here’s a simple overview on how to make recurring transactions in QuickBooks Online:
- Select Recurring Transactions from Transactions.
- Hit New.
- Select the type of transaction you want to set up and click OK.
- Choose a name for your template.
- Decide what type you want:
- Scheduled: Sends transactions automatically according to a set schedule. You can use it for rent, loan payments, or depreciation.
- Reminder: You set a schedule, but can review and send manually if necessary.
- Unscheduled: Keeps the transaction without a schedule, so you can reuse it later.
- Select the option to allow online payments if you are using Merchant Services with Scheduled or Reminder invoices.
- Determine whether unbilled charges should be included in invoice templates and whether automatic invoice emails should be sent.
- Click Save template after filling out the necessary details.
Note: Draft invoices created with recurring templates are kept until they are reviewed and finalized.
Use A Recurring Transaction Without A Set Schedule
A recurring unscheduled transaction must be manually generated each time it occurs, especially when you use it as a template.
- Go to Transactions and select Recurring Transactions.
- In the Action column, click Use under the template you want to use.
- Fill out the transaction details as usual.
Make Any Transaction A Base Template For A Recurring Transaction
a. Make An Existing Non-Invoice, Non-Estimate Transaction Recurring
- Open the transaction you want to repeat.
- At the bottom of the form, click “Make Recurring” (or “Enable Recurring Payments” if available) to turn it into a recurring template.
Note: You can’t make an existing estimate recurring, but you can create a new recurring estimate from scratch.
b. Make An Existing Invoice a Recurring Transaction
- Start by creating a new invoice or opening an existing one.
- Click on the Manage icon, then choose Scheduling.
- Enable the Make Invoice Recurring option and click OK.
- Enter the necessary details for the recurring invoice.
- Finally, select Save template to apply the changes.
Duplicate an Existing Template
As a user, knowing how to make recurring transactions in QuickBooks Online is important but knowing the steps to duplicate the existing template is always a plus. Let’s take a look at the steps:
- Click on the Settings gear icon.
- Under the Lists section, choose Recurring Transactions.
- In the Action column, open the Edit dropdown and select Duplicate.
- All settings will be copied to the new template, except for the title.
So, these are the steps that can help you create recurring transactions in QuickBooks Online. In case you’re unable to do so, then the best option is to connect with our experienced QuickBooks Online Experts for immediate assistance.
Benefits of Creating Recurring Transactions in QuickBooks Online
Setting recurring invoices, bills, or expenses can save you a lot of time if you enter them regularly. However, you might wonder, which QuickBooks Online transactions can be made recurring? It turns out there are quite a few! You can automate many of your routine tasks with QuickBooks Online, from invoices to bills to journal entries to expenses. In addition to simplifying your workflow, this also reduces the chances of errors and missed payments.
Here are some of the key benefits:
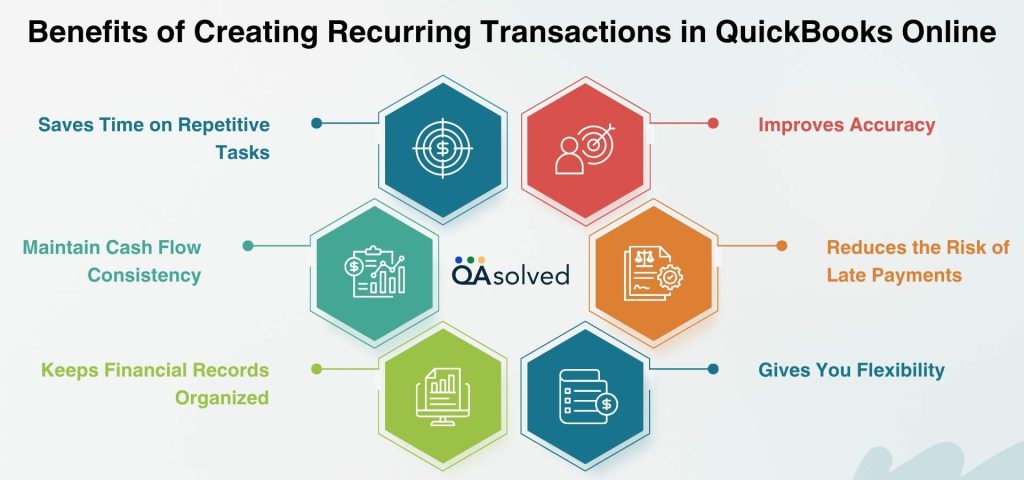
1. Saves Time on Repetitive Tasks
QuickBooks automates the process of creating invoices, bills, or journal entries once a week or month instead of having to enter them manually every time. Once set up, recurring transactions run automatically, freeing you up to focus on other aspects of your business.
2. Improves Accuracy
Invoice automation reduces the chances of typos, missed entries, or forgetting to send an invoice. The recurring transaction template keeps everything consistent, including amounts, dates, customer info, and descriptions.
3. Maintain Cash Flow Consistency
Recurring invoices and bills can help you predict your income and expenses more accurately. Maintaining your cash flow and planning ahead helps you stay on top of things.
4. Reduces the Risk of Late Payments
The less likely you are to miss due dates, the more likely you are to have your recurring bills or payments sent automatically. Keeping good relationships with vendors and preventing late fees is important.
5. Keeps Financial Records Organized
Recurring transactions keep your books up to date, especially for regular, expected entries. Maintaining clean records makes things much easier when it comes time to review reports, file taxes, or meet with your accountant.
6. Gives You Flexibility
Recurring transactions in QuickBooks can be configured in a variety of ways. Do you want them to post automatically? Do you need a reminder first? Would you like to review before saving? The schedule you choose is up to you.
With recurring transactions, you’re building a smoother, more efficient financial workflow, saving you time, reducing stress, and promoting better decisions.
Summary
In QuickBooks Online, recurring transactions simplify and automate accounting tasks. It helps you avoid missed payments and delayed invoicing, both of which can impact your cash flow, by automating your financial records. Recurring transactions in QuickBooks Online are customizable: you can schedule them to be sent automatically for fixed payments like rent or subscriptions, set reminders to review and approve transactions before they’re sent, or create unscheduled templates to quickly create complex transactions at any time.With this flexibility, you can tailor your bookkeeping to meet both your business needs and workflow, enhancing efficiency and control.
By providing predictable cash inflows and outflows, recurring transactions improve your financial forecasting and budgeting. Additionally, they support smoother business operations by providing timely invoices and payments to clients and vendors.
Frequently Asked Questions
1. Select the transaction you want to repeat (e.g., invoice, bill).
2. Click Edit > Memorize [Transaction] or press Ctrl + M.
3. Setup options include:
– Add to Reminder List
– Do Not Remind Me
– Automatic Entry
4. Decide on the schedule (frequency, start date, number of occurrences).
5. To save, click OK.
1. Select + New> Invoice.
2. Click “Make recurring” at the bottom of the invoice.
3. Set the template details as follows:
– Choose the name, the type (Scheduled, Reminder, Unscheduled), and the frequency.
– Confirm customer information and add start/end dates.
4. Set up payment options (optional).
5. Hit “Save template.”
These transactions can be recurring in QuickBooks Online:
1. Invoices
2. Sales receipts
3. Expenses
4. Bills
5. Checks
6. Journal entries
7. Credit memos
8. Deposits
9. Transfers
10. Purchase orders
Bill payments, time activities, and estimates cannot be recurring.
1. Select Settings from the upper-right corner.
2. In the Lists column, select Recurring Transactions.
3. Choose the recurring transaction you would like to edit.
4. Choose Edit from the dropdown in the Action column.
5. Adjust as necessary:
– Template name
– Type (Scheduled, Reminder, Unscheduled)
– Intervals and frequencies
– Details about the customer/vendor, payment method, etc.
6. Then click Save template.
The classes feature in QuickBooks Online is ideal for tracking broad business segments such as departments, locations, or product lines, helping you create detailed reports and profit breakdowns. Using tags, you can label transactions for things like marketing campaigns or projects, allowing granular tracking. You can use classes for structured categories and tags for customizable, detailed tracking. For comprehensive insights, many businesses use both.
