
QuickBooks has long been the go-to accounting software for small and medium-sized businesses (SMBs). Whether you manage a small business or a growing company, QuickBooks simplifies the complexities of financial management, allowing you to focus on growth. With a user-friendly interface, QuickBooks facilitates businesses with streamlined invoicing, expense tracking, payroll, and tax preparation. The entire finance and accounting industry is experiencing major transformation, and the QuickBooks Data Migration Tool acts like a cherry on top of the cake.
QuickBooks Migration Tool is a powerful tool designed to help SMBs move financial data seamlessly between platforms. Moving your financial data can feel like moving into a new home, everything needs to be in place, secure, and accessible. QuickBooks Data Migration Tool simplifies the process of transferring financial records, customer information, transactions, and reports from one system to another.
Whether you’re upgrading QuickBooks, switching accounting software, or moving to QuickBooks Online from Desktop, this tool simplifies the entire process of data migration for you. In this blog, we will try and explain why QuickBooks Data Migration Tool is an essential resource for CPAs and businesses of all sizes and verticals.
The Migration Tool: An Overview
QuickBooks Data Migration Tool allows users to seamlessly move financial data between platforms or versions of QuickBooks. Businesses can use it when moving from QuickBooks Desktop to QuickBooks Online, switching from another accounting software, or upgrading to a newer version of QuickBooks. By automating the process, critical data like transactions, customer and vendor information, accounts, and reports can be transferred accurately without having to be manually entered.
A migration tool allows businesses to maintain financial records while transitioning to a more efficient or updated system, minimizing errors, data loss, or duplications. CPAs and small businesses and their internal accounting team especially benefit from this tool because it saves them time, reduces migration risks, and ensures continuity in financial reporting and tracking.
Why is Migration Tool Essential for CPAs and Small Businesses?
QuickBooks Data Migration Tool simplifies the process of transferring financial data between platforms, offering significant benefits for accountants and CPAs. Automating data entry, ensuring accuracy, and reducing errors, saves time and ensures financial record integrity. In addition, the tool provides a secure environment for migrating sensitive information, making compliance easier. Moreover, it simplifies the transition to QuickBooks Online or other advanced versions for professionals managing multiple clients.
QuickBooks Data Migration Tool also allows them to focus on providing insightful financial analysis and support. Accountants can also use the tool to help clients access new features and collaborate more effectively, improving overall quality and efficiency.
Also Read: Why is QuickBooks Cloud the Most Preferred Choice for CPAs?
8 Key Advantages of the QuickBooks Migration Tool
The QuickBooks Migration Tool offers significant advantages to CPAs and small business owners looking to streamline their accounting processes. This tool simplifies the complex task of moving financial data from one system to another, ensuring accuracy, security, and efficiency throughout the transition. The following are the benefits of the same:
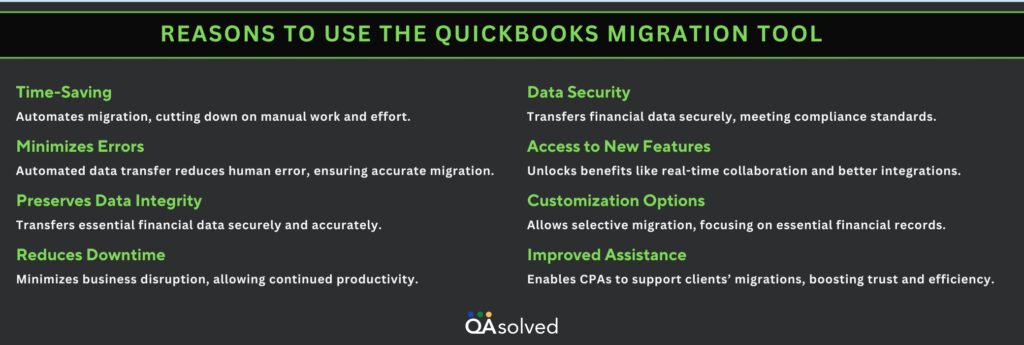
The QuickBooks Data Migration Tool simplifies the often complex process of switching platforms, ensuring accuracy, security, and efficiency.
Who Can Benefit from the QuickBooks Migration Tool?
The QuickBooks Migration Tool is ideal for a range of users, including:
- Micro, Small, and Medium-Sized Businesses (MSMEs): Need to upgrade or switch platforms without losing financial information.
- Accountants and CPAs: Trying to manage client transitions to QuickBooks Online or newer versions while saving time and ensuring accuracy.
- Business Owners: Upgrading their accounting system to enhance functionality and mobility.
- IT and Financial Consultants: Making the transition from other accounting software to QuickBooks as smooth and error-free as possible.
- Bookkeepers: Managing data migration and ensuring financial information is maintained during software transitions for clients.
In short, anyone looking for an efficient, reliable way to transfer financial data within QuickBooks or from other platforms can benefit from this tool. Now let us understand the essential requirements for conveniently using the QuickBooks Data Migration Tool.
Core Requirements for QuickBooks Data Migration Success
The following are the requirements for successfully using the QuickBooks Data Migration Tool:
- Compatible QuickBooks Versions: Ensure both QuickBooks versions are compatible (e.g., moving from QuickBooks Desktop to QuickBooks Online).
- Stable Internet Connection: A reliable Internet connection to ensure seamless data transfer during cloud-based migrations.
- System Requirements: Your computer should meet the system requirements for the version of QuickBooks you’re migrating to, including operating system compatibility.
- Backups of Financial Data: To prevent data loss, make sure you have a complete backup of your financial data before you start the migration process.
- Access to Admin Credentials: To authorize the migration, you’ll need administrative access to both the old and new QuickBooks accounts.
- Updated Software: To avoid compatibility issues, ensure QuickBooks software is updated to the latest version before migrating.
With QuickBooks Data Migration Tool, you can ensure a smoother and more successful migration process by meeting these requirements.
Why Shifting to QuickBooks Online via Migration Tool is Important?
The discontinuation of several QuickBooks Desktop versions has made migrating to QuickBooks Online increasingly important for businesses. Intuit will cease supporting older desktop products as it phases out support, security patches, and customer support. Data security risks, compliance issues, and operational inefficiencies can result from this.
QuickBooks Online offers businesses features such as cloud-based accounting, real-time collaboration, automatic updates, and better integration with third-party apps. The ability to access financial data from anywhere and on any device is essential in today’s remote and mobile work environments. By moving to QuickBooks Online, you keep your business future-proof as QuickBooks is gradually moving away from the desktop version for seamless operations. With QuickBooks Online, you can enjoy multiple advanced features, including:
- Cloud-Based Access: Access your accounting anywhere, on any device, with real-time updates.
- Automatic Backups and Updates: No more manual updates or worrying about data loss; everything is automatically saved and updated.
- Real-Time Collaboration: Communicate with your accountant or team in real-time, without exchanging files or traveling together.
- Integrations with Third-Party Apps: Integrate with third-party apps such as PayPal, Shopify, and others.
- Mobile App Functionality: Manage expenses, send invoices, and check your financial status on the go with the QuickBooks mobile app.
- Advanced Reporting: Create customized financial reports that will help you make informed decisions quickly.
Migrating now not only puts your business ahead of the competition but also increases efficiency and flexibility.
7 Easy Steps to Set Up QuickBooks Migration Tool
First, download and install the QuickBooks Migration Tool. Here’s how to download, install, and set it up.
- Use your admin ID and password to log in to QuickBooks.
- Allow the system to copy your data easily by granting access.
- Click on the migration tool to open it.
- To access the tool, enter your admin password.
- To begin the migration process, click Start or Run.
- Files will then be copied and transferred to the flash drive by the tool.
- During the data transfer, your data won’t be wiped or formatted. Click the Delete tab if you wish to remove the transferred data.
Conclusion
To conclude, the QuickBooks Data Migration Tool can be used by businesses and accounting professionals to transfer financial data seamlessly from one platform to another. Through automation and efficiency, it reduces the risk of errors and maintains data integrity during migration. Businesses can leverage this tool to ensure a smooth transition to QuickBooks Online or a newer version, enabling them to access enhanced features and better support as the financial management landscape evolves.
It’s the perfect time to migrate to a cloud-based solution as cloud-based solutions become increasingly critical-especially as many QuickBooks Desktop versions are being phased out. Do not hesitate to reach out to our experts if you’re considering moving to QuickBooks Online or if you need assistance with the migration process. We’re ready to assist you through every step of the migration process, ensuring that your transition is successful and tailored to your business’s specific needs. Don’t let the future of accounting scare you! Let us help you navigate this crucial change with confidence!
Frequently Asked Questions
The time for the QuickBooks migration tool varies, typically taking hours to a few days based on data size and complexity.
Three ways to migrate data to QuickBooks Online: QuickBooks Migration Tool, manual data entry, and third-party apps.
The easiest way to migrate data to QuickBooks Online depends on your specific needs and may involve using the QuickBooks Migration Tool, third-party apps, or manual entry.
Consider moving away from QuickBooks when your business grows, has industry-specific needs, operates internationally, requires extensive integration, or needs advanced reporting and analytics.
