
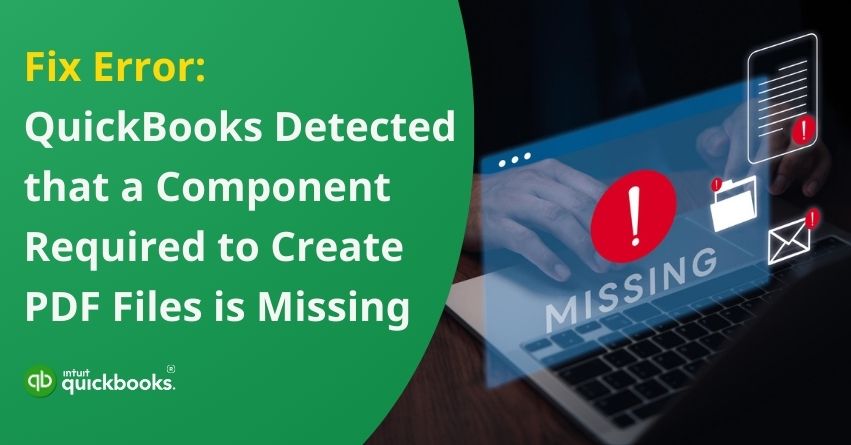
QuickBooks is a trusted accounting software used by millions of businesses to streamline their financial tasks, from generating invoices to managing reports. However, users sometimes encounter a frustrating roadblock known as the QuickBooks Missing PDF Component error. This issue typically arises when trying to email or save documents like invoices, purchase orders, or reports as PDFs. A common message you might see is: “QuickBooks detected that a component necessary to create PDF files is missing.” This not only disrupts your workflow but can also delay important communications and affect productivity.
This error usually stems from issues with components that QuickBooks depends on for PDF functionality, such as problems with the Microsoft XPS Document Writer, corrupted installation files, or Windows compatibility conflicts. To maintain smooth operations, it’s important to understand the root causes and know how to troubleshoot them. In this blog, we’ll explain why QuickBooks needs these components, explore the early signs and common causes of the missing pdf component in QuickBooks, and provide step-by-step solutions to fix it.
Common Signs of QuickBooks PDF Component Missing Issue
Before facing the QuickBooks pdf component missing issue, Users may notice several signs. Here are some of the signs that can help a user to easily detect missing pdf component error in QuickBooks Desktop:
1. Error Message on Attempting PDF Actions
When you create, print, or email an invoice, report, or any document as a PDF, an error message appears:
“QuickBooks detected that a component required to create PDF files is missing.”
2. Failure to Email Forms Directly from QuickBooks
Invoices, estimates, and statements cannot be emailed because QuickBooks cannot generate the PDF file required.
3. QuickBooks Freezes or Crashes When Creating PDFs
Trying to save or print a PDF document may result in the application freezing, hanging, or even crashing.
4. Blank or Incomplete PDF Files
A PDF file created from a form appears blank, corrupted, or missing critical data when saved as a PDF.
5. Missing “Save as PDF” Option
QuickBooks users may find that the “Save as PDF” and “Print to PDF” options are unavailable.
6. Windows Error Messages Linked to Printer Drivers
Creating PDFs may result in errors such as “Printer not activated Error code 20“ or issues related to the Microsoft XPS Document Writer.
7. Slow or Delayed Response When Generating PDFs
When QuickBooks attempts to open a print or save dialog, it may take a very long time, which indicates a problem with its PDF creation module.
8. Issues After a Windows Update or QuickBooks Update
An upgrade of Microsoft Windows, QuickBooks, or a change in the configuration of the system might cause this problem to appear.
9. QuickBooks PDF Converter Missing or Not Working
The QuickBooks PDF Converter may not appear or show an error when selected in the Printer Setup window.
If you start noticing issues with creating or emailing forms in QuickBooks, it could be an early warning of a missing PDF component QuickBooks problem.
Causes Behind QuickBooks Missing PDF Component Error
Quickbooks missing pdf component error can occur in both Windows 10 and Windows 11. There are several factors that directly contribute to the trigger of missing pdf components in QuickBooks Desktop. Here are some of the possible causes that trigger this issue:
1. Missing or Damaged Microsoft XPS Document Writer
QuickBooks creates PDF files using the Microsoft XPS Document Writer. QuickBooks cannot generate PDFs if this feature is missing, corrupted, or disabled on your computer.
2. Corrupted QuickBooks Installation Files
When attempting to create a PDF, QuickBooks may fail if installation files, such as those for the PDF and printing components, are damaged or incomplete.
3. Problems with the QuickBooks PDF Converter
QuickBooks uses a built-in PDF Converter (essentially a printer driver) to generate PDF documents. This error can occur when a PDF Converter is missing, outdated, or malfunctioning.
4. Windows Operating System Issues
Having incompatible or missing system updates, problems with Windows’ printing services, or file corruption can prevent QuickBooks from generating PDFs.
5. Damaged Printer Drivers or Print Spooler Service
QuickBooks creates and manages PDF files by communicating with printer drivers. Creating a PDF can fail if the printer drivers are outdated or corrupt, or if the Print Spooler service (which manages print jobs) is not functioning.
6. User Account Control (UAC) Settings
A restrictive User Account Control setting may prevent QuickBooks from accessing required components to create PDFs.
7. Antivirus or Firewall Interference
QuickBooks can be blocked from accessing system resources needed to create PDF files if antivirus software is overprotective or firewalls are incorrectly configured.
8. Incomplete or Failed QuickBooks Updates
QuickBooks updates that failed to install correctly or were interrupted could leave certain components either missing or incorrectly configured.
9. Permissions Issues
QuickBooks user accounts may not have the permission to interact with system resources required for PDF generation if they do not have sufficient administrative privileges.
Understanding these causes helps in quickly identifying why the QuickBooks missing PDF component error occurs, making it easier to apply the right fix. Now, let’s take a look at the solutions to troubleshoot this error, once and for all.
Solutions to Fix QuickBooks Missing PDF Component Issue
Facing missing pdf component error in QuickBooks versions was once considered a major roadblock. But with time, QuickBooks has come up with a range of solutions that can help you eliminate the threat of this error.
Here are some solutions that can help you fix missing pdf component in QuickBooks Desktop:
Solution 1: Install the Latest QuickBooks Desktop Updates
- Go to the QuickBooks Download and Updates webpage/
- Select your QuickBooks product from the drop-down menu.
- Enter the required information, such as Version, Country, and Product Details.
- Go to the Search page and click on it.
- Select Get the Latest Updates and download the update file.
- Once the file is downloaded, run the installer to complete the update process.
Solution 2: Update and Fix Adobe Acrobat Reader
QuickBooks can have problems with PDF creation if Adobe Acrobat Reader is outdated or corrupted. Follow these steps to resolve this:
Step 1: Check for Updates
- Open the Windows Start menu and type “Adobe”.
- Access Adobe Acrobat Reader.
- Select Check for Updates from the Help menu.
- Follow the prompts to install any available updates.
Step 2: Repair Adobe Acrobat Reader
- Close all open applications on your computer.
- Press Windows + R to open the Run dialog box.
- Then type appwiz.cpl and press Enter.
- Select Uninstall/Change from the right-click menu of Adobe Acrobat Reader.
- Click Next, then select Install to repair the installation.
- To complete the repair, click Finish.
Solution 3: Enable the Microsoft XPS Document Writer
QuickBooks’ missing PDF component error can often be resolved by activating the Microsoft XPS Document Writer. The steps are as follows:
- Press Windows + R to open the Run dialog box.
- Type appwiz.cpl and press Enter to open Programs and Features.
- Choose Turn Windows features on or off from the left-hand menu.
- Select Microsoft XPS Document Writer and check the box next to it.
Solution 4: Run the QuickBooks Print & PDF Repair Tool
A QuickBooks Print and PDF Repair Tool is designed to fix common printing and PDF-related problems. You can use it as follows:
- Install the QuickBooks Tool Hub from the official Intuit website.
- Open the QuickBooks Tool Hub application.
- Select Program Problems from the menu.
- Click on QuickBooks PDF & Print Repair Tool and allow it to complete the repair process.
- Try saving or printing a PDF file again to see if the problem has been resolved.
Solution 5: Reset TEMP Folder Permissions
QuickBooks errors related to PDFs can be fixed by changing the permissions of the TEMP folder. The steps are as follows:
- Press Windows + R, then type %TEMP%, and hit Enter.
- Choose Properties from the right-click menu of an empty space in the Temp folder.
- Go to the Security tab.
- Verify that all listed users and groups have Full Control permissions.
Solution 6: Set a Default PDF Viewer Program
QuickBooks’s missing PDF component error can be resolved by assigning a default PDF viewer. How to do it:
- Access Windows Settings.
- Go to Apps > Default Apps.
- Look for the .pdf file type at the bottom of the page.
- Choose a default program, such as QuickBooks PDF Viewer or another installed pdf reader.
- To confirm the change, click Switch Anyway if prompted.
Solution 7: Test, Adjust, and Reinstall Microsoft XPS Document Writer
It involves testing the functionality of the Microsoft XPS Document Writer and reinstalling it if necessary. Depending on your Windows version, the steps may differ slightly.
Step 1: Test the XPS Document Writer Outside of QuickBooks
The following steps will assist you in diagnosing and potentially fixing the QuickBooks issue “Missing PDF Component”:
- Select Print from the File menu.
- Choose Microsoft XPS Document Writer from the list of printers, then click Print.
- Save the file with an .XPS extension to a location that’s easy to find, such as your desktop.
- Open the .XPS file from the desktop:
- Reinstall the Microsoft XPS Document Writer if you encounter an error or the file cannot be opened.
- In the case of no error appearing but the file not saving or being missing, it may be due to a permissions or security issue. The QuickBooks Component Repair Tool may help resolve this issue.
- Reinstallation is recommended if the Microsoft XPS Document Writer is not visible or printing fails.
Step 2: Reinstall Microsoft XPS Document Writer
If necessary, follow these steps according to your Windows version:
For Windows 8:
- Click on the Start menu and select the Control Panel.
- Select Devices and Printers.
- Right-click Microsoft XPS Document Writer and choose Remove device.
- Click Yes to confirm the action.
- Select Add a printer from the toolbar.
- Choose Add a printer to a network or a local computer.
- Under Use an existing port, select PORTPROMPT: (Local Port) and click Next.
- You can select Microsoft from the list of manufacturers, then choose Microsoft XPS Document Writer v4, and click Next.
- Choose Replace the current driver and click Next.
- If “v4” is present in the printer name field, remove it.
- Uncheck the option to make XPS your default printer, then click Finish.
For Windows 7/Vista:
- Go to the Devices and Printers section of the Start menu.
- Select Remove Device for Microsoft XPS Document Writer.
- Confirm the removal by clicking Yes.
- Select Add a printer from the toolbar.
- Choose Add a local printer.
- Choose Use an existing port and select XPS Port: (Local Port).
- Under manufacturers, select Microsoft, then choose Microsoft XPS Document Writer v4, and click Next.
- To complete the installation, click Next and choose to replace the existing driver.
Solution 8: Adjust Security Software Settings
In QuickBooks, XPS document creation may be hampered by certain antivirus programs and firewalls, causing PDF errors. You can resolve this problem by configuring the security software to allow XPS processing or adding QuickBooks and related services to an exception list.
So, these are the best solutions that can help you eliminate QuickBooks pdf component missing error.
Conclusion
Running into the QuickBooks missing PDF component error can be frustrating, but thankfully, it’s usually easy to fix once you understand the cause. Whether it’s updating QuickBooks, enabling the Microsoft XPS Document Writer, or adjusting your security settings, the solutions outlined above can get you back on track quickly. By taking a few simple steps, you can restore QuickBooks’ full PDF functionality and keep your business operations running smoothly.
In case you’re unable to fix this error despite going through all these solutions, then it would be ideal to contact our QuickBooks experts for immediate and advanced troubleshooting.
Frequently Asked Questions
If you’re facing this error, it is very easy but a time-taking process to eliminate QuickBooks missing pdf components in Windows 11 and 10. Mentioned above are some of the ideal solutions that can help you eliminate this error.
Here are the five solutions that can effectively assist you in troubleshooting QuickBooks pdf component issue in 2021 and 2022 versions:
1. Reset TEMP folder permissions.
2. Adjust and reinstall Microsoft XPS document writer.
3. Run the QuickBooks print and pdf repair tool.
4. Update and fix the Adobe Acrobat Reader.
5. Install latest QuickBooks Desktop updates.
To import a PDF into QuickBooks, you can either upload it as a supporting document or convert it into a compatible format like CSV or QBO. For QuickBooks Online, convert your bank statement PDF to a QBO file and upload it via the Banking section. In QuickBooks Desktop, you can use the File Import tool or the Receipt Management feature to upload PDF files.
The message “QuickBooks detected that a component required to create PDF is missing” means that QuickBooks is unable to generate or save PDF files, like invoices, reports, or forms, because a necessary software component (such as the Microsoft XPS Document Writer or PDF converter) is either not installed, corrupted, or not functioning properly.
Creating a PDF on QuickBooks is easy! All you need to do is navigate to the Transaction List tab and locate the estimate or invoice you wish to download or print, then click on Edit. To print the document, select the Print and download option and follow your usual printing steps. If you’d prefer to save it as a PDF, click the Download icon, choose a location on your computer, and then hit Save.
