

Do you need to manage transactions in different currencies? Managing a business with international customers and vendors can be challenging, especially when handling multiple currencies. QuickBooks Online makes this easier with its multicurrency feature. This feature allows you to track transactions, invoices, and expenses in different currencies, giving you a clear and accurate view of your finances.
In this article, we’ll walk you through the how to setup and use multicurrency in QuickBooks Online to manage your business transactions.
Let’s get started and make handling multiple currencies a breeze!
Why Setting up Multicurrency is Important?
If you deal with international clients or suppliers, managing multiple currencies can be a real headache. Keeping track of exchange rates, ensuring accurate financial reporting, and making sense of your financial health becomes much more complex. This is where the multicurrency feature in QuickBooks Online comes in handy. It allows you to seamlessly handle transactions in various currencies, providing a clear picture of your finances no matter where your clients or suppliers are.
By using Multicurrency, you can:
- Simplify Financial Management: Automatically convert foreign transactions to your home currency, saving time and reducing errors.
- Improve Accuracy: Daily exchange rate updates ensure that your financial reports are always accurate.
- Enhance Reporting: Generate detailed reports by currency, giving you better insights into your international operations.
Before diving into the setup process, there are a few things you need to check.
Points to Consider Before Activating the QuickBooks Multicurrency Feature
When enabling the QuickBooks Multicurrency feature, it’s crucial to note that it cannot be turned off once activated. Thus, it’s essential to understand all the implications and requirements before enabling this functionality. Additionally, it’s recommended to create a company file backup to safeguard your data. Here are several key considerations:
- You won’t be able to select multiple customers in the invoices for the Time and Expenses window.
- Information exchange with QuickBooks Desktop for Mac is not supported, and copying the company file might be restricted.
- Once the feature is turned on, some functionalities, such as the income tracker, insights, and bill tracker, will be unavailable.
- In QuickBooks Accountant, batch entry of invoices and batch delete or void transactions may no longer be possible.
- Online payments for multiple currencies in invoices will cease to function.
- Simple Start users do not have access to the Multi-currency feature.
- QuickBooks Desktop add-ons, such as Fixed Asset Manager and Statement Writer, only operate using U.S. Currency, and activating the multi-currency function does not affect them.
Note: One currency can be allocated to different accounts, such as clients, suppliers, and accounts on your chart of accounts (like bank accounts, credit card accounts, and accounts receivable). You must create a new account for each currency you use in transactions.
Ready to get started? Follow these simple steps to set up multicurrency in QuickBooks Online.
Steps to Setup Multicurrency
1. Activating the Multicurrency Feature on Your System
When you first set up QuickBooks, it assigns you a home currency. If you need to change it, follow these steps:
- Go to Settings, then select the Account and Settings option.

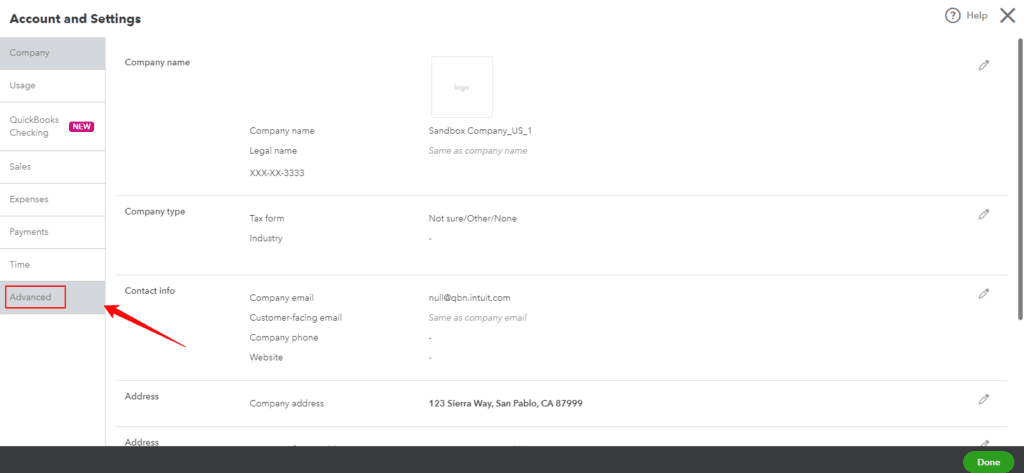
2. Choose the Advanced tab.
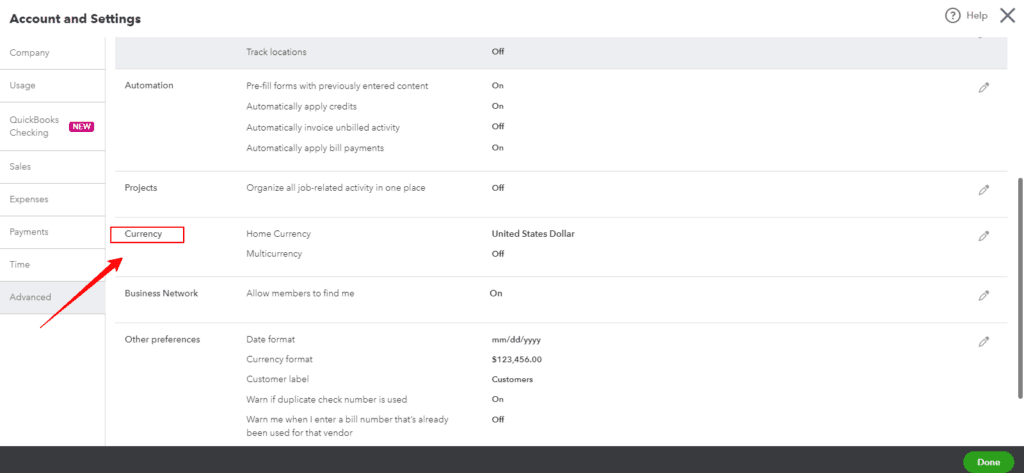
3. Click Edit under the Currency section.
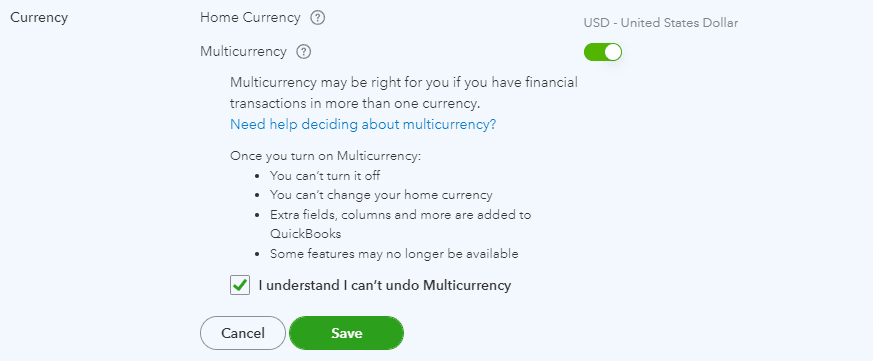
4. From the Home Currency drop-down list, choose your preferred currency.

5. Check the Multicurrency checkbox, acknowledging that this action is irreversible.
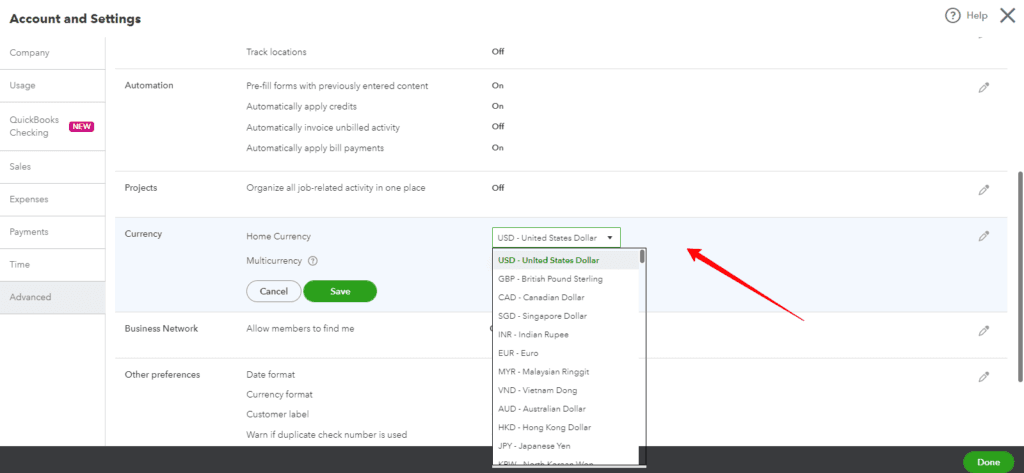
6. Finally, click Save to apply the changes.
7. Once you access the Manage Currencies window, you’ll be directed to the Currencies page, which provides the tools to manage all your currencies effectively.
2. Adding or Deleting Currencies in QuickBooks
If you need to add or delete foreign currencies, follow these steps:
To Add Currencies:
- Access Settings and select Currencies. (This option is accessible only after you’ve enabled the Multi-Currency feature).
- Click on Add currency.
- Choose the New currency from the Add Currency dropdown menu.
- Select the Add option to confirm.
To Delete Currencies:
Note: You can only delete a currency if no transactions are associated.
- Go to Settings and select Currencies.
- Click the small arrow icon under the Action column, then select Delete.
- Confirm the deletion by clicking Yes.
3. Including Foreign Currency Accounts in the Chart of Accounts
If foreign currency accounts are not listed in the Charts of Accounts, follow these steps to create them:
- Go to Settings and select the Chart of Accounts.
- Click on New.
- Select bank and credit cards after choosing Select category.
- Enter the Category name and Choose the appropriate Account Type.
- Choose the Currency from the dropdown menu.
- Describe when you’ll begin tracking business transactions and the amount in your account on that date, including the Starting date.
- Click Save after filling out the Description field.
Account balances will be displayed in the assigned currency within the Chart of Accounts once the account is created.
Note: You cannot change the currency of an account once a transaction has been posted.
4. Linking a Bank Account to Foreign Currency Transactions
Linking a Bank Account that uses foreign currencies allows you to add transactions in those currencies to QuickBooks Online smoothly. Follow these steps to accomplish this:
- Access Transactions and select Bank Transactions.
- Find the transaction details and select Add from the For Review tab
- In the currency tab, enter the foreign amount or the exchange rate provided by your bank.
QuickBooks Online will automatically calculate the total amount, and the transaction will be displayed under the Bank Description or Detail fields, reflecting how your bank presented it on your statement using the amount and currency.
Split Transactions
When dealing with different currencies in your financial transactions, it’s essential to keep things organized. You can split your deposits and expenses into different categories (like groceries, rent, or travel expenses) and assign taxes to them. However, here’s the catch: you can’t split a single transaction into multiple parts if it involves different currencies. In other words, if you paid for something in both US dollars and euros, you can’t neatly divide that transaction into separate categories.
5. Exchange Rate Work
The exchange rate in QuickBooks represents the number of home currency units needed to equal 1 foreign currency unit. QuickBooks uses these rates for foreign currency transactions.
Let’s understand how QuickBooks applies an exchange rate to foreign currency invoices; here’s an example:
- Foreign currency: Canadian dollar (CAD)
- Home currency: US dollar (USD)
- Exchange rate: 1 Canadian dollar equals 0.79 US dollars (1 CAD = 0.79 USD)
6. Using a different Currency to Deposit Funds at a Bank
To deposit an invoice payment to your bank account in the same currency:
- Click + New and select Transfer.
- Fill in the fields:
- Transfer Funds From: The account from which you are taking money.
- Transfer Funds To: Account to which money is being transferred.
- Choose a currency. Enter the exchange rate if not already set.
- Transfer Amount: Enter the payment amount. This value will depend on the currency and exchange rate.
- Please input the payment amount for the invoice in the Transfer Amount field.
- Click Save and close.
7. Use a Different Currency to Pay Employees
To pay employees in a different currency, follow these steps:
Step 1: Register your Employees as Vendors
- Go to Payroll > Employees and select the employee you wish to pay in a different currency.
- Go to Expenses > Vendors.
- Click New Vendor and enter the employee’s information.
- Select the appropriate currency from the Currency dropdown.
- In the display name, add the currency, then hit Save.
Step 2: Provide your Employee with Payment
- Press + New and choose Expense.
- Select the vendor you created using your employee’s details from the Payee dropdown.
- Choose the account you use to track payroll spending from the Category selection.
- Hit Save.
8. Customer or Vendor Currency Change
Step 1: Inactive your Vendor or Customer
To make a Customer Inactive, follow these steps:
- Proceed to Sales and then select Customers.
- Find the customer whose currency you want to alter, then pick them.
- To capture all of their details, click Edit.
- To view the Customers list again, enter Save.
- After locating the same customer, select Make inactive from the Action menu and click Yes to confirm.
To Inactivate a Vendor, follow these steps:
- To access vendors, first, navigate to expenses.
- The seller whose currency you wish to convert should be located and selected.
- Record all of their details by clicking Edit.
- Get back to the Vendors list by clicking Save.
- Locate the identical supplier, choose Make inactive from the Action selection, and click Yes to confirm.
Step 2: Create a New Customer or Vendor
New Customer Creation:
- Select Sales and then Customers.
- Choose “New customer” and enter the data you have already entered into the forms.
- From the Currency dropdown, select a currency.
- Click Save after adding the currency to their display name.
Vendor Creation:
- Navigate to Vendors, then Expenses.
- After selecting “New vendor,” insert the previously stated data.
- From the Currency selection, choose a currency.
- Click Save after adding the currency to their display name.
Conclusion
Setting up and using multicurrency in QuickBooks Online is crucial for businesses with international clients and suppliers. It simplifies managing transactions in different currencies and ensures accurate financial reporting.
The setup involves activating multicurrency, adding and assigning currencies, and managing transactions and exchange rates. With multicurrency, you can easily create invoices, record expenses, and handle currency payments. You should regularly update exchange rates and generate reports to maintain financial accuracy. If you have any further questions, please call our QuickBooks Online experts at +1-888-245-6075.
Frequently Asked Questions
1. Access the Settings.
2. Click on the Chart of Accounts.
3. Choose New.
4. Choose the relevant Account Type and Detail Type from the Account dialog.
5. Give the new account a name, and feel free to add a description.
6. Choose the currency assigned to the account from the Currency dropdown menu.
To keep track of bills and spending from several sources, use the batch transactions tool: Choose Batch transactions after selecting New +. Choose Bills or Expenses from the dropdown menu under Select transaction type.
Note: Only one type of transaction can be entered at a time, either bills or expenses.
A single Intuit account can be used for more than one company. You can access each company file using the exact sign-in details, even though each requires a separate paid subscription. This enables you to easily transition between businesses, improving your ability to handle everything.
To transact in international currencies, use Multicurrency in QuickBooks Online Essentials, Plus, and Advanced.
If you have enabled multicurrency, you can add a customer to QuickBooks and select their currency. This enables you to log transactions using the money that they pay you.
1. Click Settings, then choose Chart of Accounts.
2. Choose New.
3. Type the name of the account.
4. After selecting an Account type, use the dropdowns to choose the Detail type.
5. Check to see if this account is a subaccount. After making it one, select the Parent account under which this subaccount should be.
6. Select a bank, asset, credit card, liabilities, or equity account; in the As of field, put the commencement date and the opening balance.
7. To provide other details about this account, provide a description.
8. Click Save.
