
Have you ever found yourself wishing for a quick and easy way to jot down a reminder or client detail while working in QuickBooks Online? If yes, then QuickBooks Online Notes is a must-have for you. Whether it’s jotting down a follow-up call, a customer discount, or a vendor issue, keeping track of such details is crucial when you’re managing a business. Thankfully, QuickBooks Online makes this simple with its built-in Notes feature.
Think of it as your digital sticky note system, but it is far more organized and efficient. The Notes feature allows you to add context-specific messages directly within QuickBooks Online. You can attach them to customer profiles, vendor records, and individual transactions, ensuring that nothing important slips through the cracks. So, instead of sifting through old emails or scrambling to remember who said what, everything is saved right where you need it when you need it.
What makes this feature even more powerful is its ability to improve collaboration across your team. Everyone stays on the same page with easy-to-access notes linked to key financial data. It helps prevent miscommunication, supports better decision-making, and ultimately streamlines your business operations.
In short, whether you’re tracking payments, managing client relationships, or just trying to stay organized, using notes in QuickBooks Online is a simple but effective way to add more structure to your workflow. In this blog, we’ll guide you through how to add and use notes in QuickBooks Online, so you can work smarter, communicate better, and keep your business running smoothly, without ever missing a beat.
Benefits of Using Notes in QuickBooks Online
For an entrepreneur or even a CPA, it’s quite common to lose track of important details because they are often juggling between different clients, vendors, and even day-to-day business transactions. This is exactly where QuickBooks Online notes come in handy. QuickBooks allows you to capture key information in real-time, right where you need it. It can improve communication across the team, bring clarity, and save time.
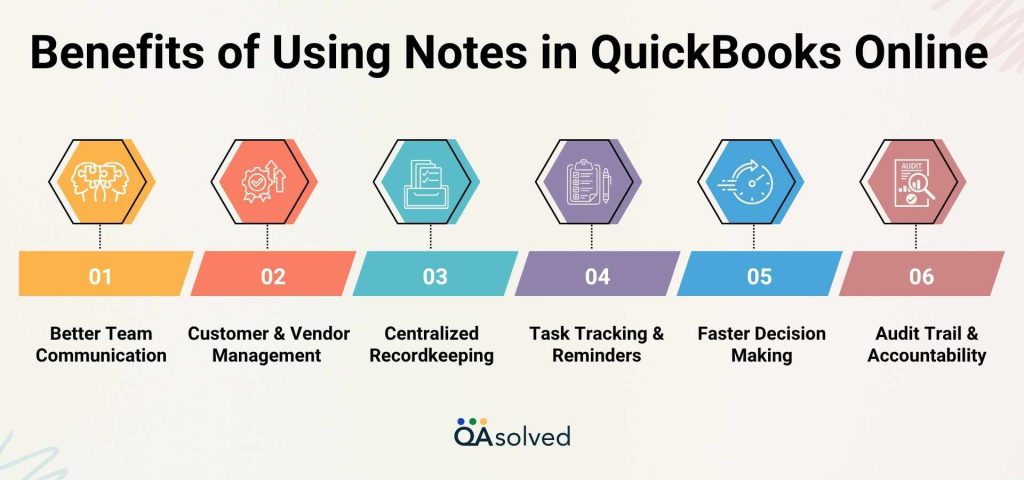
1. Better Team Communication
Staying aligned is easier with notes. Everyone can access the same information by recording updates in one place – reducing miscommunication and unnecessary follow-ups.
2. Improved Customer & Vendor Management
Add notes about client preferences, vendor terms, or service issues. Maintaining strong business relationships is made easier when you personalize your interactions.
3. Centralized Recordkeeping
Organize invoices, payments, and conversations directly within the platform – no more navigating spreadsheets.
4. Task Tracking & Reminders
Set internal reminders for yourself or your team using notes, such as when to follow up on a payment or finish a task.
5. Faster Decision Making
Documenting all relevant details and making them conveniently accessible allows you to make informed business decisions more quickly.
6. Audit Trail & Accountability
A clear trail of actions and decisions can be created by attaching notes to customer or transaction records, which is helpful when conducting audits or resolving disputes.
Whether you’re aiming to stay organized, be more proactive, or keep your team in the loop, the Notes feature in QuickBooks Online can make a big difference. By utilizing this simple yet powerful tool, you can enhance daily productivity, maintain better clarity across your tasks, and ensure important details never get overlooked. It’s a small step that leads to smoother workflows and more effective communication.
In the next section, we’ll show you exactly how to add a note in QuickBooks Online so you can keep important details organized and accessible right where you need them.
Steps to Add and Use Notes For Customers, Vendors, Employees, and Contact List Reports in QuickBooks Online
Now that you know how useful notes can be for organizing important information, let’s discuss how to use them effectively. It’s easy to add notes, whether you’re tracking follow-ups, documenting customer conversations, or reminding your team. Here are the steps to add and use notes in QuickBooks Online for customers, vendors, employees, and contact list reports:
Tip: You can also add customer notes directly through the QuickBooks Online mobile app.
1. Add Notes For Customers
For a customer’s profile, you can use two different types of notes. Here are both the types:
- Simple Notes: They appear on the customer’s profile page and on invoices.
Note: You can include up to 4,000 characters in a simple note. - Date Stamped Notes: These are recorded in the order they’re added to a customer’s profile. They are useful for keeping track of time-specific updates and follow-ups.
A. How to Add Simple Notes for Customers?
- Select Customers from Customers & leads.
- Choose a customer from the list.
Note: You can add a customer, if they’re not in the list. - Click Add notes. A customer window appears.
- Select the Notes and attachments from the dropdown menu.
- Fill out the customer’s information.
- Add an attachment if necessary.
Note: You can also delete the attachment. - Upload files or documents that support the note.
- Click the Save button.
B. How to Edit or Modify Simple Notes for Customers?
- Select Customers from Customers & leads.
- Choose a customer from the list.
- Click on the pencil icon in the customer’s profile.
- Customer appears in the window.
- Choose Notes and attachments from the drop-down menu.
- Select Save after making the changes.
C. How to Add or Create Date-Stamped Notes for Customers?
- Access Customers & leads, then click on Customers.
- Now, choose a customer from the list.
Note: You can add a customer, if they’re not in the list. - Select + Add note from the Notes tab.
- Enter the customer’s information after adding a title.
- Finally, choose a post.
Note: Add a star icon next to the notes that are most important to you. Having them in this format makes it easier to access them in the future.
D. How to Edit or Delete Dated-Stamped Notes for Customers?
- Select Customers under Customers & leads.
- Choose a customer from the list.
- Go to the ellipsis icon on the note you want to edit.
- To edit the note, select Edit.
- Changes can be made, then select Post.
- To remove the note, select Delete.
- Click Delete in the pop-up window that appears.
Note: When you delete a particular note, you also automatically remove all comments within it.
E. How to Add, Edit, or Delete Comments to a Date-Stamped Note?
- Firstly, go to Customers & leads, then choose Customers.
- Now, choose a customer from the list.
- Add your comment to the note you choose.
- Add a comment and enter the information.
- Select Post and proceed.
- Edit a comment to make changes.
- Then select Post to save the changes.
- Select Delete to remove a comment.
- Choose Delete from the window that appears.
Note: This action deletes the comment only. It leaves the note intact.
So, this is how you can add, edit, and delete notes for customers in QuickBooks Online. Let’s now cover both vendors and employees before wrapping it up quickly.
2. Steps to Add Notes for Vendors
Here are the steps to add notes for vendors in QuickBooks Online:
- Select Vendors from Expenses.
- Choose a vendor from the list.
- Click Add Notes. A Vendor window appears.
- Select the Notes and attachments from the dropdown.
- Provide your vendor’s information.
- Add attachments if necessary.
Note: You can also delete the attachment. - Add those files and documents that support the notes feature in QBO.
- Save the file.
A. How to Edit Notes for Vendors?
- Select Vendors from Expenses.
- Choose a vendor from the list.
- In the vendor profile, click the pencil icon.
- The Vendor window appears.
- Select Notes and attachments from the dropdown menu.
- Hit Save after making the changes.
So, these are the steps to add and edit notes for a vendor in QuickBooks Online.
Also Read: Clean Up QuickBooks Lists: Customers, Vendors, and Employees
3. Steps to Add Notes for Employees in QuickBooks Online
Before adding notes for your employees in QuickBooks Online, you should be aware of the fact that if your payroll is active, the Notes field won’t be available.
- Select Employees under Payroll.
- Choose an employee from the list.
- Click on the Notes tab.
- Then, select Add notes. The Add notes window appears.
- Enter the details for your employee, then click Save.
A. How to Edit Notes for Employees?
- Choose Employees from the Payroll menu.
- Now, choose an employee.
- Click on the Notes tab.
- Select the pencil icon.
- Then, the Add Notes window will appear.
- Finally, click on Save after making the required changes.
4. Steps to Add Notes in Your Contact List Report
- Click on Reports.
- Use the drop-down menu to select a report name.
- Choose either Customer Contacts or Vendor Contacts.
- Click on Columns.
- In the Columns window, select Note from the “Select columns to add to the report.” list.
Note: Only the simple notes appear in the Note column. - Enter Save.
Note: To save a new report, select Save As. Enter the new report name in the Report name, then hit Save.
As your business grows, these small yet powerful tools become increasingly important in maintaining clear and consistent communication. It’s a simple step that can lead to better customer relationships and smoother workflows if you add, update, and review notes regularly. Using these steps, you can efficiently manage customer notes, ensuring that important details are never lost. In case you’re having any trouble while executing these steps, then connect with our QuickBooks Online Experts.
Summary
Mastering how to add and use notes in QuickBooks Online can significantly support you to manage your business well. What may seem like a small feature has the power to drive better organization, team collaboration, and customer communication, all from within the same platform you already use to run your accounting and financial tasks. From adding a quick reminder for a follow-up call to attaching a client-specific comment on an invoice or even recording internal updates for your team, notes in QuickBooks Online are designed to keep everything connected and accessible.
More than just digital sticky notes, these entries create a centralized communication hub that brings clarity to your records and transparency across your operations. They help reduce misunderstandings, prevent duplicate efforts, and provide a detailed trail of actions that can be revisited anytime. And when used consistently, they save time and simplify your daily workflows.
So, start making the most of this feature today. Keep your processes streamlined, your team well-informed, and your business relationships strong.
Frequently Asked Questions
Yes, QuickBooks Online includes a dedicated Notes section where you can store important information related to customers, vendors, and employees. To access it, simply click on the Notes tab. From there, you can either choose Add notes to create a new entry or click the Edit (pencil) icon to update an existing note. Enter your details in the Notes field and hit Save to keep the information stored within the profile.
To view a customer note in the QuickBooks Online mobile app (added from the web version), follow these steps:
1. Tap the Menu, then select Customers.
2. Choose the customer’s name from the list.
3. Go to the Details tab and scroll down to the Note field.
Here, you’ll find any notes associated with that customer profile.
To change the default message on invoices in QuickBooks Online, follow these steps:
1. Go to Settings (gear icon) and select Account and settings.
2. Navigate to the Sales tab, then click on Messages.
3. Click the pencil icon to edit.
4. Choose the sales form you want to customize (e.g., Invoices, Estimates).
5. Enter your preferred default message in the message field.
6. Click Save to apply your changes.
This allows you to personalize the message that appears on all your future invoices, helping you maintain a consistent and professional tone with clients.
To add a custom message to a specific invoice in QuickBooks Online, open the invoice and locate the “Message on invoice” section. Simply type your desired message in this field before sending the invoice. If you’d like to set a default message for all invoices, go to Settings > Custom Form Styles, choose the invoice template you want to edit, and click on the Emails tab. From there, update the “Message to customer” field with your preferred default message, then save the changes.
To add a note to an invoice in QuickBooks Desktop, use the “Note to customer” field at the bottom of the invoice form. Here’s how:
1. Open the invoice you want to update.
2. Scroll down to the bottom of the invoice window.
3. Find the “Note to customer” field.
4. Type your message or note in this section.
5. Click Save to apply the changes.
Alternatively, you can customize the invoice template to include a footer message area, which can also be used for adding recurring notes or standard messages to all invoices.
