
The QuickBooks unable to sync license error shows up when the software is unable to verify your license details with Intuit’s servers. When this validation process fails, QuickBooks cannot confirm whether your product is activated or authorized, which leads to the error message, “There was a problem while synchronizing QuickBooks license data with Intuit.” Once this appears, the software may stop loading essential features, fail to update, block access to company files, or restrict all online services.
In many cases, QuickBooks may repeatedly freeze, crash, or display the warning until the underlying issue is fixed. This problem typically arises from damaged or corrupted license components, incorrect system or network settings that interfere with Intuit’s servers, or unstable connectivity that interrupts the verification process.
The good news? Every major cause has a clear fix. In this blog, we are going to highlight the best solutions and steps to fix QuickBooks license data sync issue. So, let’s begin.
5 Key Factors That Interrupt QuickBooks License Data Sync
A QuickBooks license sync error can be triggered by several system-level or connectivity-related hurdles that disrupt the communication between your device and Intuit’s verification servers. Here are some common factors that are responsible for QuickBooks license data sync issue:
- Missing or Corrupted License File: A corrupted EntitlementDataStore.ecml file is one of the most frequent triggers and often blocks proper license validation.
- Upgrade Conflicts or System Mismatches: If QuickBooks was upgraded but the system environment didn’t match the updated requirements, license syncing may fail unexpectedly.
- Security Software Blocking Access: Security tools can block QuickBooks ports and prevent access to Intuit licensing servers, disrupting the verification process entirely.
- Connectivity or Network Interruptions: Unstable internet or incorrect Windows connection settings can interrupt communication with the license server during sync attempts.
- Damaged Files or Configuration Errors: Damaged QuickBooks components, outdated Windows settings, or mismatched program files can also cause a sync of interruption during authentication.
So, these are the five major factors that commonly cause QuickBooks license not syncing. Each of these issues can disrupt the communication between your QuickBooks application and Intuit’s licensing servers, preventing proper authentication. Now that we have covered the causes, let’s move to the solutions that can help you eradicate this issue once and for all.
7 Solutions to Fix the QuickBooks License Sync Issue
Resolving the QuickBooks license sync error requires addressing the system, network, and file-related problems that prevent QuickBooks from validating its license with Intuit’s servers.
Solution 1. Rename the EntitlementDataStore.ecml File
If QuickBooks can’t validate your license, resetting the entitlement file often restores the sync.
- Press Windows + R to open the Run command.
- Then, copy and paste the path: C:\ProgramData\Intuit\Entitlement Client\v8 and click or press Enter.
- Now, right-click on the EntitlementDataStore.ecml file and click on Rename.
- Change it to: EntitlementDataStore.ecml.OLD
- Relaunch QuickBooks and re-register when prompted.
Note: The Entitlement Client folder is hidden. Enable viewing of hidden files or use Windows search to locate it before proceeding.
Solution 2. Fix the Issue Using QuickBooks Database Server Manager
To resolve the unable to sync QuickBooks license issue, you can use QuickBooks Database Server Manager and establish a stable connection between the server and your desktop application. Here are the steps:
- Install or launch QuickBooks Database Server Manager.
- Open QuickBooks Database Server Manager (QBDSM) and go to the Search tab. Click Start and type Services.
- Locate the service named QuickBooksDBXX (replace XX with your QuickBooks version).
- Launch the QuickBooksDBXX service.
- Go to the General tab and check the current status. If the service is running, select Stop.
- Set the Startup type to Automatic.
- Under Logon, choose Local System Account.
- Navigate to the Recovery tab and set the service to Restart on the first, second, and subsequent failures.
- Return to the General tab and click Start to restart the Database Manager.
Solution 3. Check and Repair Internet Connection Settings
Since QuickBooks relies on internet validation, correcting your connection settings may fix the sync issue.
- In QuickBooks, go to Help and click on the Internet Connection Setup option.
- Now, click on the Use my computer’s Internet connection settings.
- Once you’re done with this, select Advanced Connection Settings.
- Here, you will get Internet Options on the display.
- Review the Internet Options displayed and click on Finish or Save.
If you’re still failing to resolve QuickBooks License sync errors, move to the next solutions.
Solution 4. Verify Your Product & License Keys
Incorrect or mismatched license details can stop QuickBooks from syncing, so confirming them is essential.
- Open QuickBooks.
- Press F2 (opens Product Information).
- The Product Information window will appear on your screen.
- In this window, check your Product Name and License Key.
- You can also see the release date, which is displayed at the end of your product name.
If numbers mismatch, you must re-enter the correct details. We suggest you stay equipped with your QuickBooks license number and product key to resolve this and a few more common errors.
Solution 5. Use QuickBooks File Doctor (For Network Issues)
Network-related problems can block license validation, and File Doctor helps detect and repair these automatically.
- Download and open QuickBooks Tool Hub.
- Go to Company File Issues.
- Select Run QuickBooks File Doctor.
- Allow it to scan and automatically repair network-related sync issues.
Note: Once the system detects the issue, it will ask you to continue the prompts or will automatically fix the QuickBooks unable to sync license issue.
Solution 6. Manually Configure the Firewall
If your firewall is blocking QuickBooks, allow the required ports and program files to restore license sync. Here are the steps
- Click the Start button and type Firewall.
- Open Advanced Settings in the Firewall window.
- Navigate to Ports, then right-click on Inbound Rules to proceed with the configuration.
- Next, select the TCP option and enter the following ports.
- QuickBooks 2019: 8019, XXXXX (where XXXXX is the port shown in QuickBooks Database Server Manager)
- QuickBooks 2018: 8019, 56728, 55378–55382
- QuickBooks 2017: 8019, 56727, 55373–55377
- After completing the port entry, click Next.
- Give the rule a name and select Finish to save it.
- Finally, repeat the same process for Outbound Rules to complete the setup.
Solution 7. Perform a Clean Install of QuickBooks
A clean install helps replace damaged programs or license components that prevent QuickBooks from syncing your license correctly. By reinstalling the software and refreshing the license data, you restore proper communication with Intuit’s servers and eliminate lingering file corruption.
There are 2 ways to implement this solution:
1. Uninstall and Reinstall QuickBooks
Uninstalling and Reinstalling the software remains one of the most effective solutions for users to eliminate a wide range of errors. Start by uninstalling QuickBooks from the Control Panel and removing leftover installation folders. Then download the latest setup file from Intuit’s website and reinstall the software. This ensures all corrupt files are replaced with fresh, clean versions.
Note: Before uninstalling, make sure to back up your company files to prevent any data loss.
2. Use QuickBooks Clean Install Tool for Windows
For deeper cleanup, run the QuickBooks Clean Install Tool. It automatically renames old installation folders and clears damaged components that may not be removed during normal uninstallation. After the tool completes the cleanup, reinstall QuickBooks to restore a fully clean and error-free environment.
Note: Ensure you have your license key and product details handy, as you’ll need them when reinstalling QuickBooks after the clean install.
Symptoms of the QuickBooks Unable to Sync License Issue
Across major QuickBooks support sites, users report several consistent signs of a QuickBooks license data sync issue. These problems usually appear when QuickBooks can’t verify its activation details, leading to errors like QuickBooks license sync error or QuickBooks license not syncing. Here are the indications that can help you address and fix the problem quickly.
- QuickBooks Crashes on Launch: The application may close immediately if essential license files are damaged or installation components are corrupted.
- Frequent Error Pop-Ups: You may see repeated alerts stating that QuickBooks cannot verify your license with Intuit’s servers.
- Freezing or Unresponsive Screen: QuickBooks may freeze or stop responding when it fails to load critical license data during startup or use.
- Unable to Connect to Intuit Servers: You may face sign-in issues, subscription verification failures, or trouble accessing online services due to connectivity errors.
- Third-Party Sync Issues: Payroll, banking, or other connected apps may stop syncing properly or only transfer partial data.
- Limited Access to Company Files: Certain features or financial data may become temporarily unavailable until QuickBooks successfully validates your license.
Conclusion
Fixing the QuickBooks unable to sync license issue mainly involves restoring proper communication between your system and Intuit’s licensing servers. Once you repair the damaged license files or correct any system and network blocks, QuickBooks can usually refresh its activation data without further problems. After completing the steps, simply restart the software and check the sync again.
In most cases, the error disappears immediately because QuickBooks can finally verify your license correctly. If the issue continues, it often means something else like outdated settings, firewall restrictions, or missing updates is still interfering, and reviewing those areas or contacting support can help you identify and resolve the remaining cause.
Frequently Asked Questions
To reactivate your QuickBooks Desktop license, follow these steps:
1. Open QuickBooks Desktop.
2. Go to the Help menu.
3. Select Activate QuickBooks.
4. Click Begin Registration.
5. Enter your validation code when prompted.
6. Select Next to complete the activation process.
This will successfully reactivate your QuickBooks Desktop license.
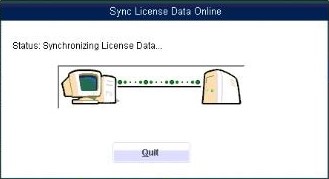
You may encounter the sync license data online error in QuickBooks Desktop if your licensing information is damaged or if your firewall settings are blocking QuickBooks from connecting to Intuit’s servers. Keep in mind that the Entitlement Client folder is hidden by default, so you may need to enable hidden files or use Windows search to locate it before troubleshooting.
You can move QuickBooks Desktop to another system using the QuickBooks Migrator Tool. Here’s how:
1. Start by preparing your QuickBooks Desktop and system for the Migrator Tool.
2. Review how the tool works so you understand what data and settings will be transferred.
3. On your old computer, open QuickBooks and go to the File menu.
4. Select Utilities, then choose Move QuickBooks to another computer.
5. Simply follow the on-screen instructions to complete the transfer process.
This will securely move your QuickBooks program and license to the new computer.
This usually happens when QuickBooks can’t sync your license with Intuit’s servers. Outdated settings, damaged entitlement files, or blocked internet connectivity can trigger repeated license verification prompts.
If Chrome keeps turning sync off whenever you close the browser, you can adjust your settings to fix it. Follow these steps:
1. Open Google Chrome on your computer.
2. Click the More (three dots) icon in the top-right corner and choose Settings.
3. Go to Privacy and Security, then select Site Settings.
4. Open Additional content settings.
5. Select On-device site data.
6. Enable the option Allow sites to save data on your device.
This ensures Chrome can retain your data and keep sync enabled.
