

Taking upfront deposits is something most businesses do, whether you’re in construction, consulting, event planning, or creating custom orders. A deposit not only locks in a customer’s commitment but also gives your business the cash it needs to cover initial expenses or get ready for delivery. That said, if deposits aren’t tracked properly, they can throw off your financial reports and cause accounting headaches.
In accounting terms, deposits are considered liabilities because they represent money you owe to your customers until the goods or services are delivered. You shouldn’t recognize these funds as revenue until the sale is complete. This is where QuickBooks Desktop and QuickBooks Online come in, making it easy to set up, record, and manage deposits. By creating the right accounts, tracking deposits accurately, and applying them to invoices at the right time, you stay compliant, maintain clear financial records, and provide your customers with a transparent view of their payments.
In this blog, we’ll walk you through everything you need to know about managing deposits in QuickBooks Desktop and Online. From setting up accounts to recording deposits and applying them to invoices, we’ll show you how to save time, cut down errors, and keep your financial data accurate, whether you’re handling your own books or managing multiple clients. So, let’s begin with it.
7 Benefits of Managing Upfront Deposits in QuickBooks
Managing upfront deposits in QuickBooks helps businesses stay organized and maintain accurate financial records. It ensures deposits are tracked correctly, applied to invoices when needed, and reflected properly in reports. Here are some major benefits of managing upfront deposits in QuickBooks Desktop and Online.
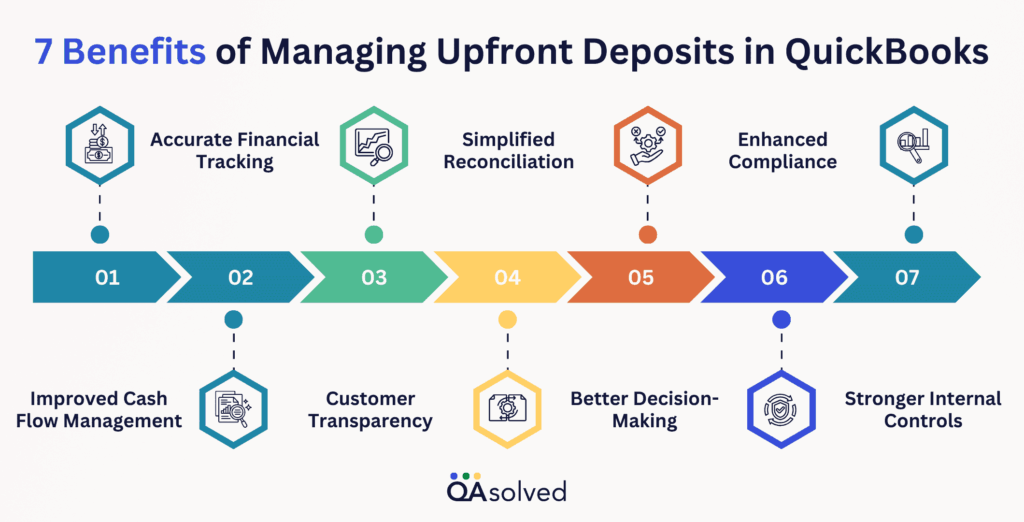
1. Accurate Financial Tracking
Tracking deposits as liabilities until a sale is completed prevents your income from overstating, keeping your financial reports accurate. This accuracy helps you avoid costly mistakes during tax season and provides a true picture of your company’s financial health.
2. Improved Cash Flow Management
Upfront deposits give your business immediate access to funds, and QuickBooks tracks them properly so you can plan expenses and future projects. With better visibility of available cash, you can budget confidently and reduce financial stress.
3. Customer Transparency
Clearly showing customers how their advance payments are applied builds credibility with them. This transparency not only strengthens relationships but also minimizes disputes or misunderstandings down the line.
4. Simplified Reconciliation
Correctly entered deposits make reconciling your bank accounts and financial records much easier, saving you time and reducing errors. It also reduces the likelihood of discrepancies that can delay closing your books each month.
5. Better Decision-Making
Monitoring future obligations and making informed decisions is easier when you keep a clear record of all outstanding deposits. This insight allows you to anticipate cash needs, prioritize projects, and allocate resources strategically.
6. Enhanced Compliance
Properly managing upfront deposits ensures that you are following accounting standards by not prematurely recognizing income. This compliance keeps you audit-ready and avoids potential regulatory or tax issues.
7. Stronger Internal Controls
Setting up a consistent process in QuickBooks creates accountability and reduces the risk of mishandling funds. A reliable workflow also makes it easier for multiple team members or accountants to stay aligned.
So, effectively managing upfront deposits in QuickBooks brings multiple benefits, from accurate financial tracking and improved cash flow to stronger customer trust and enhanced compliance. Now, let’s take a look at the steps that can help you to set up, record, and manage upfront deposits in QuickBooks Desktop and Online effectively.
Steps to Set up, Record, and Manage Upfront Deposits in QuickBooks Desktop
Setting up, recording, and managing upfront deposits correctly is essential for keeping your accounting accurate and organized. QuickBooks Desktop provides tools that make this process straightforward, helping you track deposits as liabilities, apply them to invoices when appropriate, and maintain clear financial records. If you’ve ever wondered how to use upfront deposits in QuickBooks, the following step-by-step instructions will guide you through everything you need to know.
Step 1: Set Up An Account For Upfront Deposits Or Retainers
Before accepting upfront deposits or retainers, you first need to create a current liability account for them. This is important because these deposits are considered liabilities, not income, even though the funds are deposited into your bank account.
Here are the steps to create a liability account:
- Choose a Chart of accounts from Transactions.
- Select New from the pop-up menu in the Chart of Accounts window.
- Select Other Current Liability as the account Type.
- Enter a name for the account (for example, Upfront Deposit) in the Name field.
Note: Create the account with an opening balance of zero, unless you need to include existing deposits or retainers that you’re already tracking. - Enter OK.
After creating the account, you’ll need to set up an item that can be used to record upfront deposits or retainers.
Step 2: Create An Upfront Deposit Item
To record upfront deposits or retainers in QuickBooks Desktop, you first need to create an item for these transactions, linking it to the liability account you previously set up to ensure deposits are recorded correctly.
Follow the steps below to create an item:
- Select Item List from the Lists menu.
- From the Item List window, right-click and select New.
- Select the purpose of the deposits you collect from the Type drop-down menu.
Choose Service if you are collecting upfront deposits for products, or Other Charge if you are collecting upfront deposits for services. - Enter a descriptive name in the Item Name/Number field—for example, ‘Upfront Deposit.’
- Choose the Upfront Deposit liability account you created from the drop-down menu.
- Hit OK.
Now you can keep track of upfront deposits and retainers you accept with this item.
Step 3: Record Upfront Deposits or Retainers You Receive
Whenever a customer provides an upfront deposit or retainer, make sure to record the transaction in QuickBooks Desktop. Here are the steps to record upfront deposits or retainers you receive:
- Select Enter Sales Receipts from the Customers menu.
- Select the customer or job from the Customer:Job drop-down list.
- If the Deposit To field is displayed, choose the account where the funds should be deposited. If the field does not appear, the payment will be recorded as Undeposited Funds and can be deposited later.
- Choose a payment method.
- Fill in relevant information, such as the Sale No. and Date.
- Select the Upfront Deposit item from the Item drop-down list in the Detail section.
- Specify the amount of the deposit or retainer in the Amount field.
- Hit Save and close.
Note: Deposits and retainers are recorded as liabilities.
Step 4: Create Invoices
After receiving a retainer or upfront deposit, you’ll need to generate an invoice for the related product or service. Here’s how to create an invoice:
- Select Create Invoices from the Customers menu.
- Click on the drop-down list Customer:Job and then choose the customer or job.
- Fill out the form with relevant information like Date, Invoice #, Bill to/Sold to, and Terms.
- Select the items for the sale (products or services) in the Detail section.
- Hit Save and close.
Step 5: Apply Upfront Deposits or Retainers to Invoices
Once you’ve delivered the product or service tied to a customer’s upfront deposit or retainer, it’s time to apply that payment to their invoice. Doing so ensures the deposit is moved out of the liability account and correctly recognized as income. You can handle this in two different ways:
A. Enter the upfront deposit or retainer as a line item on the invoice.
B. Apply the upfront deposit or retainer as a credit.
A. Enter Upfront Deposits or Retainers as Line Items
When applying an upfront deposit or retainer to a customer’s invoice, you can add it as a line item, which reduces the total invoice amount by the deposit. To do this, follow these steps to enter the deposit or retainer directly on the invoice:
- Open the customer’s invoice.
- Choose the Upfront Deposit item you created previously from the Item drop-down list in the Detail section.
- In the Amount column, enter the deposit amount you want to apply.
- Click Save & Close.
The deposit will now show up on the invoice as a line item, lowering the total amount due. If the deposit covers the full invoice amount, the transaction will be marked as paid.
B. Apply Upfront Deposits or Retainers as Credits
A customer’s deposit or retainer can also be applied as a credit against their invoice. Using this method, the deposit is treated as a payment, reducing the balance due. To apply an upfront deposit or retainer as a credit:
- Choose Create Credit Memos/Refunds from the Customers menu.
- From the Customer:Job drop-down, select the customer or job.
- Select the Upfront Deposit item from the Item list in the Detail section.
- In the Amount field, enter the deposit or retainer amount.
- Click Save & Close.
- In the Available Credit pop-up, choose Apply to an invoice, then click OK.
- Select the invoice to which you want to apply the deposit or retainer, and then click Done.
The deposit is now applied as a credit, lowering the balance due on the customer’s invoice.
Now, let’s see how you can manage upfront deposits or retainers in case a customer has cancelled a job.
How to Manage Upfront Deposits or Retainers When a Job is Canceled?
When a customer cancels a job for which you’ve received an upfront deposit or retainer, the deposit is no longer treated as a liability. How you handle these canceled deposits depends on your business process, and typically you have two options for managing them:
A. Retain All or A Part of the Deposit
B. Refund the Full Deposit to the Customer
Here are the steps for both the options:
A. Retain All or Part of an Upfront Deposit or Retainer
QuickBooks Desktop lets you record a customer’s deposit directly if you decide to keep it after a job or order is canceled. To record a retained deposit:
- Create an invoice for the customer.
- Select the appropriate items from the Item drop-down list for the canceled job or project in the Detail section.
- On the next available line, select the Upfront Deposit item you previously created.
- In the Amount field, enter the portion of the deposit you are keeping as a negative value.
- (Optional) Add a note in the Description field to make this transaction easier to identify in reports.
- Click Save & Close.
As a result, you will record a portion of the deposit as income, while the remaining balance will be refunded to the customer.
B. Refund An Upfront Deposit or Retainer
After a job or order is canceled, you can refund the full deposit or retainer to the customer directly in QuickBooks Desktop. To process a refund:
- Select Create Credit Memos/Refunds from the Customers menu.
- From the Customer:Job drop-down, choose the customer or job.
- Select the Upfront Deposit item you previously created from the list of items in the Detail section.
- In the Amount field, enter the refund amount.
- Click Save & Close.
- Choose Give a refund from the Available Credit pop-up, then click OK.
- Select the original deposit account from the Account drop-down list, then click OK.
- (Optional) Choose how you want to refund the customer using the Issue this refund via drop-down menu.
- Click Save & Close.
Also Read: How to Create and Apply a Credit Memo in QuickBooks?
How to Record a Retainer or Deposit in QuickBooks Online?
Some businesses collect retainers or deposits before providing services, then use those funds to pay invoices. In QuickBooks Online, you can set up a deposit or retainer process where the money is recorded as a liability, showing it doesn’t belong to you yet. When you invoice the customer and apply the deposit, the liability is converted into income.
Follow the given below steps to successfully record a retainer or deposit in QuickBooks Online:
Step 1: Create a Liability Account
The first step is to set up a liability account to keep track of the retainers you receive from your customers.
- Click the Settings, then choose the Chart of Accounts.
- Select New.
- From the Account Type dropdown, choose Other Current Liabilities.
- From the Detail Type dropdown, select Trust Accounts – Liabilities.
- Enter a name for the account (for example, Trust Liabilities) or use the suggested name.
- Choose a start date from the When do you want to start tracking your finances from this account dropdown.
- Click Save and Close.
Step 2: Create a Retainer Item
Here are the six steps that can help you create a retainer item in QuickBooks Online:
- Click the Settings, then select Products and Services.
- Choose New.
- In the Product/Service information panel, select Service.
- Enter a name for the item (for example, Retainer).
- From the Income account dropdown, select the liability account you created in Step 1.
- Click Save and Close.
You can now choose the retainer item when creating an invoice or sales receipt to record a deposit or retainer payment.
Step 3: Create a Trust Liability Bank Account (Not Required Always)
Step 3 isn’t required for everyone. Only follow it if you hold customer retainers and deposits in a separate trust account. If you keep these funds in your regular operating account, you can skip this step. When in doubt, choose the approach that best reflects how you manage the money in real life.
Here are the steps to create a trust liability bank account:
- Click the Settings, then choose the Chart of Accounts.
- Select New.
- From the Account Type dropdown, choose Other Current Liabilities.
- From the Detail Type dropdown, select Trust Accounts – Liabilities.
- Enter a name for the account (for example, Trust Liability Bank Account) or use the suggested name.
- Choose a start date from the When do you want to start tracking your finances from this account dropdown.
- Click Save and Close.
Step 4: Create Sales Receipt or Invoice for Deposits or Retainers
After setting up the accounts and creating the retainer or deposit item, you’re ready to start recording the deposits or retainers by creating Sales Receipts. If you’d rather invoice customers for deposits or retainers instead of receiving the payment upfront, you can skip ahead to Option 2.
Option 1: Create a Sales Receipt
- Click + New and choose Sales Receipt.
- Select the Customer from the dropdown list.
- In the Deposit To dropdown, choose the account where the funds will be held—this could be your separate trust liability account, your main operating account, or another designated account.
- In the Product/Service column, select the Retainer or Deposit item you created.
- Enter the amount received for the retainer or deposit in the Rate or Amount column.
- Click Save and Close.
Option 2: Invoice Customers for Deposits or Retainers
As an alternative to creating Sales Receipts (Option 1), you can record deposits by invoicing customers. Here’s how to do it:
Note: If you’re using cash basis reporting, deposits or retainers won’t appear as received until the invoice is fully paid. Consult your accountant for a possible workaround, such as recording a journal entry.
- Click + New and choose Invoice.
- Select the Customer from the dropdown list.
- In the Product/Service column, choose the Retainer or Deposit item you previously set up.
- Enter the deposit or retainer amount in the Rate or Amount column.
- Click Save and Close.
Step 5: Turn Retainers Into Credits on Invoices
When billing a customer for services, you can apply a previously received retainer or deposit as a credit on their invoice, effectively using it to cover part or all of the payment.
- Create an invoice for your customer that includes the services or products provided.
- On the last line of the invoice, select the Retainer or Deposit item in the Product/Service field.
- Enter the retainer amount as a negative value to deduct it from the invoice. Note that the retainer cannot exceed the invoice total—an invoice can have a zero balance but not a negative one.
- Click Save and Close.
This reduces the balance in your liability account and applies the credit to your customer’s invoice, converting the deposit or retainer into income. The funds are now officially yours.
Step 6: Transfer Funds from Your Trust Liability Account to Your Operating Account
If you’re holding retainers or deposits in a separate trust liability account, you can transfer the funds to your operating bank account once the retainer has been converted into income. Here are the steps:
- Click + New and choose Transfer.
- In the Transfer Funds From dropdown, select your trust liability bank account.
- In the Transfer Funds To dropdown, choose your operating bank account.
- Enter the amount that was received as payment for the invoice.
- Click Save and Close.
This step-by-step guide shows you how to record retainers or deposits in QuickBooks Online. From setting up liability accounts and creating retainer items to issuing sales receipts or invoices and applying deposits as credits, following these steps ensures accurate tracking, compliance, and smooth management of customer funds.
Summary
Managing upfront deposits and retainers effectively is crucial for maintaining accurate financial records and ensuring smooth business operations. Whether you’re in construction, consulting, event planning, or providing custom products and services, collecting deposits helps secure customer commitment while providing essential cash flow for initial expenses. However, without proper tracking and accounting, deposits can distort financial statements and create complications during tax season.
Using QuickBooks Desktop or QuickBooks Online, businesses can streamline the process of handling upfront deposits. By setting up dedicated liability accounts, creating retainer or deposit items, and recording deposits accurately through sales receipts or invoices, you ensure compliance with accounting standards. Additionally, applying deposits as credits against invoices allows for clear visibility into income and liabilities while maintaining transparency with customers.
Ultimately, mastering the process of recording, applying, and managing deposits not only reduces errors but also strengthens financial control, improves cash flow planning, and builds trust with customers. With these practices in place, your business can operate confidently and maintain accurate, reliable financial records year-round.
Frequently Asked Questions
Deposits are considered liabilities because they represent money collected in advance for goods or services you haven’t yet delivered. Accounting for them properly prevents overstating income and ensures accurate financial reporting.
You can track the amount of retainers or deposits held for each customer using the Balance Sheet report. Follow these steps:
1. Open the Balance Sheet report and set the Report period to All Dates, then click Run report.
2. In the Liabilities section, locate your trust liability account.
3. Click the amount shown for the account to open the Transaction Report for that account.
4. Select Customize.
5. In the Customize Report panel, go to Rows/Columns.
6. From the Group by dropdown, select Customer.
7. Click Run report to see deposits or retainers organized by customer.
This method gives you a clear view of how much retainer or deposit is held for each customer.
Step 1: Create a Liability Account
1. Go to Settings > Chart of Accounts > New.
2. Choose Other Current Liabilities and name it Customer Prepayments.
Step 2: Create a Prepayment Item
1. Go to Settings > Products and Services > New > Service.
2. Name it Customer Prepayment and link it to the liability account.
Step 3: Record the Prepayment
1. Go to + New > Sales Receipt.
2. Select the customer and choose Customer Prepayment as the item.
3. Enter the amount, payment method, and deposit account, then save.
Step 4: Apply to Invoice
1. When you invoice the customer, go to + New > Receive Payment.
2. Select the customer and apply the prepayment to reduce the balance.
1. Go to + New > Bank Deposit.
2. Select the bank account where you want to deposit the money.
3. In the Received From field, choose the customer, vendor, or owner.
4. Select the Payment Method (cash, check, etc.).
5. In the Account field, choose the appropriate account (for example, Owner’s Equity for owner contributions, or Opening Balance Equity for initial deposits).
6. Enter the amount and date.
7. Click Save and Close (or Save and New).
1. Customer Payments: Categorize as income or Accounts Receivable.
2. Prepayments/Deposits: Use a liability account (e.g., Customer Deposits).
3. Owner Contributions: Categorize under Owner’s Equity/Investment.
4. Loans: Record as a liability (Loan Payable).
5. Refunds/Reimbursements: Categorize back to the original expense account.
6. Miscellaneous: Use Other Income only if no other category applies.
