
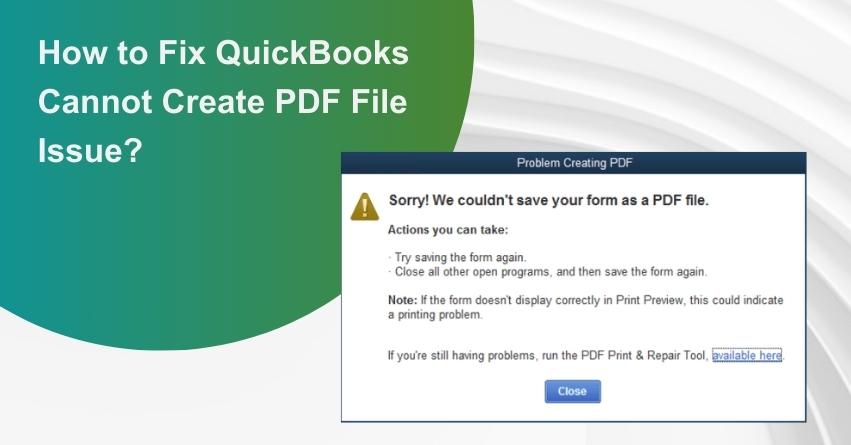
Encountering issues with QuickBooks unable to create PDF files can disrupt your workflow and hinder record-keeping. The error message displays: “Your forms were not sent because QuickBooks could not create the necessary PDF file” or “QuickBooks could not save your form as a PDF file.”The error occurs when there are issues with PDF file creation, emailing, or printing within QuickBooks. It can also occur when you try to access PDF files after refreshing Windows 10 or Windows 11.
QuickBooks offers a built-in PDF printer feature allowing users to conveniently save financial statements, reports, and forms as PDF files. These PDF files are compact and compatible with various devices. Additionally, users can protect sensitive information with passwords and directly send files via email from QuickBooks. While third-party PDF printers like Adobe PDF are available, they often require more time and effort.
In this article, we’ll provide you with comprehensive details on resolving the QuickBooks cannot create PDF file issue. We’ll explore the reasons behind the error and guide you through effective solutions, ensuring that you can effortlessly create those essential PDF files without a hitch.
QuickBooks Cannot Create PDF File Issue: Explained
Encountering QuickBooks unable to create PDF errors is akin to stumbling upon a perplexing maze of PDF file mailing and printing issues. This hurdle can disrupt your workflow when attempting to generate, email, or print a report in QuickBooks. The frustration doesn’t stop there; this problem may rear its head after refreshing Windows 10 or Windows 11 and subsequently accessing PDF files. Even when navigating through Windows and adding the Microsoft XPS report essayist to the system configuration, you may find yourself face-to-face with the same issue. To complicate matters further, it intertwines itself as a default port named PORTPROMPT. Let’s unravel the intricacies of this challenge and explore effective solutions to regain seamless control over your QuickBooks PDF creation.
Understanding the Importance of QuickBooks PDF Functionality
The QuickBooks PDF feature plays a pivotal role in enabling users to generate sales invoices and efficiently manage payment data at a later stage. Particularly crucial for small and mid-sized organizations, this functionality ensures accurate tracking of business expenditures. QuickBooks simplifies the process of creating and printing invoices, making it an indispensable tool for businesses. Hence, it becomes imperative to promptly address and fix the QuickBooks Unable to Design PDF error to maintain the seamless flow of these essential operations.
Causes of QuickBooks Unable to Create PDF Issue
Have you ever found yourself amid frustration while attempting to send an invoice to a customer in QuickBooks, only to be thwarted by the dreaded ‘QuickBooks unable to create PDF’ error? Fear not, as this vexing issue is not insurmountable and can indeed be resolved. This particular QuickBooks error tends to rear its head when you’re trying to email, create, or print a report, often leading to sudden QuickBooks closures or the display of an error message.
Let’s delve into the intricacies of why this error occurs:
- Lost PDF File Component: QuickBooks may encounter an error when it’s unable to complete a task due to a missing part, specifically the lost PDF file component.
- Failure to Save Form as PDF: The error might stem from QuickBooks neglecting to save a form as a PDF, disrupting the seamless workflow.
- Non-functional Print Driver: A non-functional print driver can contribute to the ‘QuickBooks unable to create PDF’ conundrum, causing interruptions in the printing process.
- Issues with QuickBooks PDF Converter: When there’s no direct print capability from the QuickBooks PDF Converter, errors may surface, impeding the generation of PDF files.
- Printer Connectivity Problems: Connectivity issues with the printer, preventing the successful saving of reports as PDFs, can be a significant factor in encountering this error.
- QuickBooks Unrecoverable Errors: Specific QuickBooks unrecoverable errors, such as 14982, 15064, 06798, 50172, or 14983, 96787, may contribute to QuickBooks Desktop hanging and the PDF converter showing as offline.
In the following sections, we’ll unravel the underlying causes and guide you through effective solutions to reclaim control over your QuickBooks PDF processes.
7 Methods to Resolve QuickBooks Cannot Create PDF Issue
Encountering the ‘QuickBooks Unable to Create PDF’ issue can be a roadblock in your financial workflow, but fear not – you can take matters into your own hands by following the steps below before seeking assistance from a QuickBooks expert.
Method 1: Scanning Internet Files
To begin, consider scanning your internet files and implementing the following measures:
- Clear Browser Cookies and Temporary Files: Start by deleting all cookies and temporary internet files in your browser.
- Internet Explorer Users – Add Intuit as a Trusted Site: If you’re using Internet Explorer, ensure to add Intuit as a trusted site to address the ‘QuickBooks Unable to Create PDF’ issue.
- Update Encrypted Page Settings in Internet Explorer: Internet Explorer users should update encrypted page settings for smoother functionality.
- Switch to Adobe PDF Handler (For Firefox Users): If you’re using Firefox with the integrated PDF handler, consider switching to the Adobe PDF handler.
- Print Image and Use Another Browser: After making these adjustments, try printing an image and explore the issue using a different browser.
- Disable Pop-up Blocker: Disable the pop-up blocker to ensure seamless PDF creation.
- Set Adobe Acrobat/Reader as Default App on Mac: For Mac users, set Adobe Acrobat or Reader as the default application for opening PDF files.
- Save Files After Clicking Print: Users can opt to save files after clicking on the Print button. Ensure Adobe Reader or Acrobat is set as the default app for opening PDFs.
- Avoid Internet Explorer Acrobat Plug-in: It’s advisable to steer clear of the Internet Explorer Acrobat plug-in for a smoother experience.
Method 2: Verifying Reconcile Window Presence
If you find yourself in a situation where opting for the banking menu freezes QuickBooks, while the PDF functions continue to operate smoothly, it’s crucial to ensure the reconcile window is listed. Follow the steps outlined below to proceed:
- Confirm Reconcile Window Listing: Begin by verifying that the reconcile window is correctly listed in the Windows menu.
- Close All Windows: Proceed to choose the “Close All” option to clear any open windows.
- Restart Reconcile Process: Conclude the process by initiating the reconciliation once again, ensuring a seamless and uninterrupted workflow in QuickBooks.
Method 3: Fine-Tuning Windows User Permissions for XPS Document Writer
In the quest to resolve PDF creation issues in QuickBooks, managing Windows user permissions for the XPS document writer can be a crucial step. Here’s a detailed guide to navigating through this process:
- Access the Printer’s Control Panel: Start by opening the control panel for your printer.
- Right-click on Microsoft XPS Document Writer: Right-click on the Microsoft XPS document writer and confirm your ability to print to your XPS.
- Printer Properties and Security Options: Proceed to the printer properties and click on the security option.
- User Cluster and Add Tab: Look for the user cluster, press the ‘add’ tab, and type in “everyone.” Click on the ‘check names’ option, followed by clicking ‘OK.’
- Set Permissions and Confirm: Click on the ‘Print’ option, checkmark the row with the ‘Allow’ column, and click ‘OK.’
- Navigate to C:\Windows\system32\spool: Head to the C:\Windows\system32\spool and right-click on the printer’s option. Click on the security tab.
- Edit and Add Local Service: Click on ‘Edit’ and then ‘Add.’ Enter “local service” and ensure it has full control. Click ‘OK.’
- Windows Permissions for Common Files: Ensure the correct permissions are set by right-clicking on the printer’s option and clicking on the security tab.
- Enter Local Service with Full Control: Click on ‘Edit’ and ‘Add,’ then enter “local service” and ensure it has full control. Click ‘OK.’
- Open QuickBooks and Create a PDF: With these adjustments in place, open QuickBooks and proceed to create a PDF file.
Method 4: Crafting a Fresh Template for QuickBooks Forms
Revamp your QuickBooks experience by creating a brand-new template for your forms. This method involves the following steps:
- Generate a New Template: Kickstart the process by crafting a fresh template for your form.
- Extend the Revamp to Transactions: Take it a step further by creating a new template not only for the form but also for the associated transactions.
- Modify the Template: Make necessary modifications to the template to align it with your requirements.
- Initiate PDF File Creation: Once your template is revamped, proceed to create the PDF file seamlessly.
Method 5: Streamlining PDF Creation by Bypassing the Print Spooler
In your journey to resolve PDF creation challenges in QuickBooks, bypassing the print spooler can offer a viable solution. Here’s a step-by-step guide to seamlessly navigate through this method:
- Access Printer Control Panel in Windows: Start by opening the printer control panel in your Windows system.
- Bypass the Print Spooler: Initiate the process by bypassing the print spooler.
- Right-click on Microsoft XPS Document Writer: Right-click on the Microsoft XPS document writer and select it from the list of printers.
- Printer Properties and Advanced Settings: Once selected, access the printer properties and click on the advanced tab.
- Choose “Print Directly to the Printer”: Within the advanced settings, opt for the “Print directly to the printer” option.
- Save Changes: Confirm your selection by clicking ‘OK’ to save the changes made.
- Close Printer Properties: Conclude the process by closing the printer properties window.
Method 6: Utilizing System File Checker to Rectify MSXML 6.0
Addressing issues with MSXML 6.0 in QuickBooks involves running the System File Checker. Here’s a step-by-step guide tailored to different Windows versions:
For Windows 8:
- Access Windows Start Menu: Initiate the process by clicking on the Windows Start tab.
- Enter and Right-Click Command: Enter the command and right-click on it.
- Run as Administrator: On the bottom bar, click on the option to run as an admin.
- Run QuickBooks as Admin: Run QuickBooks as an administrator, enter the admin password, and click ‘OK.’
- Type SFC/Scan Now: Execute the system file checker by typing SFC/Scan now.
For Windows 7 and Windows Vista:
- Click on Windows Start: Begin by clicking on the Windows Start tab.
- Access All Programs and Accessories: Choose ‘All Programs‘ and press on ‘Accessories.’
- Run Command Prompt as Admin: Right-click on the command prompt and choose ‘Run as admin.’
- Enter Admin Password: Enter the admin password when prompted.
- Type in SFC/Scan Now: Complete the process by typing in SFC/Scan now.
Method 7: Utilize the QuickBooks PDF and Print Repair Tool
Addressing QuickBooks PDF and print issues calls for a strategic approach, and the QuickBooks PDF and Print Repair Tool can be your go-to solution. Here’s a step-by-step guide to make the most of this tool:
- Download and Run QuickBooks Print and PDF Repair Tool: Kick off the process by downloading and running the QuickBooks Print and PDF Repair Tool.
- Perform PDF File Tasks: Execute tasks related to .pdf files to ensure comprehensive troubleshooting.
- Reboot the System: After completing the tasks, reboot your system for the changes to take effect.
- Print the XPS Document Author and Save it as a PDF: Confirm the ability to print the XPS document author and save it as a PDF file.
- Save XPS Document Author with Elements: Utilize XPS document author elements to save the XPS document author as a PDF file.
- Open Notepad and Type In: Open Notepad and type in some text to continue the troubleshooting process.
- Move File and Hit Print: Move the file and click on the print tab.
- Choose the XPS Document Author and Print: Select the XPS document author and click on the print tab.
- Select Desktop Within: Navigate to the desktop and choose the appropriate options.
- Check XPS Document on Desktop: Head to the desktop and verify if you can read the XPS document as intended.
Conclusion
These outlined steps offer a straightforward resolution for rectifying the QuickBooks Unable to Create PDF Error. In case of any assistance requirements, reach out to toll-free contact number at +1-888-245-6075.
Our support channels operate round the clock, ensuring continuous availability. Our seasoned technical team is ready to comprehend your issue promptly and deliver effective solutions. Beyond resolving the error, they are committed to offering valuable tips and tricks to prevent future errors, enhancing your overall QuickBooks experience.
Frequently Asked Questions
Several factors contribute to this issue, including problems with the PDF converter activation, device readiness, unrecoverable errors, printer-related issues, unresponsiveness of QuickBooks, and more.
Start by scanning internet files, managing Windows user permissions for the XPS document writer, utilizing the QuickBooks PDF and Print Repair Tool, and addressing program glitches through the QuickBooks Tool Hub. Comprehensive solutions are available depending on the specific cause of the issue.
Yes, error codes like 41, 30, and 20 are often linked to activation problems with the QuickBooks PDF converter.
Navigate to the printer’s control panel, right-click on the Microsoft XPS document writer, add “everyone” in the user cluster, set permissions, and confirm full control for local service.
If the DIY solutions don’t resolve the issue, contacting QuickBooks technical support is recommended. Dial the Toll-Free number +1-888-245-6075 for 24/7 assistance and prompt solutions, including valuable tips to prevent future errors.
Easy repairs for QuickBooks Missing PDF Component Error:
1. Begin by restarting your system. If issues persist, proceed to reset the permissions of the temporary folder.
2. Reset Temporary Folder Permissions as the second step in troubleshooting.
3. Confirm the feasibility of printing to XPS (applicable specifically to problems related to email and PDF saving).
Once the QuickBooks software is installed, users can navigate to the ‘File’ menu and choose ‘Print’. From there, select ‘QuickBooks PDF Converter’ as the printer, and then click ‘Print’. This will automatically convert the document into a PDF format.
To repair the company file using the rebuild data tool, follow these steps:
1. Go to the File menu and hover over Utilities, then choose Rebuild Data.
2. Choose OK to proceed.
3. Allow the tool to repair your file.
4. Once the tool finishes, click on OK.
5. Return to the File menu.
6. Let the tool check your file for any data issues.
From the Transaction List tab, find and select the sales form you want to download or print. Select Print or Preview, then select Print or Preview again. If you want to print the estimate or invoice, select Print and print as you normally do. Or to save as a PDF, select Download.
1. From the Start menu, go to Settings.
2. In the Settings, move to the Default apps.
3. Now, choose the option to Choose default apps by file type.
4. Next, opt for .pdf and hit Choose a Default.
5. Opt for the PDF viewer.
1. Restart QuickBooks and your computer
2. Update QuickBooks
3. Check PDF settings in QuickBooks
4. Verify the XPS Document Writer
5. Repair or reinstall the XPS Document Writer
6. Check for PDF-related software conflicts
7. Update or reinstall Adobe Reader
8. Check for Windows updates
1. Open QuickBooks
2. Access the Invoice
3. Select the Invoice
4. Print the Invoice
5. Choose PDF Printer
6. Adjust Settings (Optional)
7. Save as PDF
8. Verify PDF
The error message “QuickBooks cannot complete the current action due to a missing component: PDF” typically indicates that there’s an issue with the PDF converter or components required for QuickBooks to generate PDF files.
Follow these steps:
1. In Outlook, select multiple emails.
2. Choose Print from the File menu.
3. Under Printer Options, select Adobe PDF as the active printer.
4. Using the preview, adjust the formatting of your PDF as desired.
5. Click on Print.
6. Choose the location where you want to save your PDF.
7. Select OK.
1. Update QuickBooks
2. Restart QuickBooks and Your Mac
3. Check for macOS Updates
4. Verify PDF Settings in QuickBooks
5. Reset Printing Preferences
6. Reinstall the PDF Converter
7. Check Permissions
8. Repair Disk Permissions
9. Verify Printer Settings in macOS
10. Check for Third-Party Software Conflicts
1. Restart QuickBooks
2. Update QuickBooks
3. Repair QuickBooks Installation
4. Check PDF Settings
5. Reinstall PDF Component
6. Check Compatibility
7. Update Windows
8. Check for Conflicting Software
9. Check Printer Settings
1. Restart QuickBooks and Your Computer
2. Update QuickBooks
3. Repair QuickBooks Installation
4. Check Printer Settings
5. Check QuickBooks PDF Converter
6. Reinstall QuickBooks PDF Converter
7. Check for Printer Driver Issues
8. Run QuickBooks as Administrator
9. Check System Permissions
