
QuickBooks Desktop users might face difficulties when trying to print or export documents to PDF. These issues disrupt workflows and hinder productivity. Whether grappling with formatting discrepancies, printer misconfigurations, or other technical glitches, these issues can impede the smooth operation of QuickBooks Desktop. In situations where sharing and printing documents are crucial, fixing problems with creating PDFs and printing from QuickBooks Desktop is essential.
This article discusses common PDF and print issues in QuickBooks Desktop and offers practical solutions to help you troubleshoot errors and improve your experience.
Common Causes of QuickBooks PDF and Printing Errors
The Print and PDF errors can occur due to several reasons:
- Incorrect programming of the print configuration.
- Connection issues between the framework and the printer.
- Malfunctioning of the print driver.
- Loss of the PDF file.
- Issues with the PDF converter.
- Use of an outdated version of QuickBooks software.
Key Considerations Before You Start Troubleshooting
Before delving into significant solutions, it’s crucial to examine some essential pointers. Let’s explore these:
- Ensure that you correctly turn on the printer.
- Verify if the printer can print from another program. If it works, the problem might not be with QuickBooks.
- Try restarting your system, as this may resolve the issue.
- You might encounter Windows Error or QuickBooks Error dialogs and printer error dialogs.
- Sometimes, you can print reports but not transactions. To fix this, try changing the form’s template. Remember, corrupted templates can’t be fixed, so try using different ones.
System Requirements for QuickBooks Print and PDF Repair Tool
- Your system should have at least 1GB of RAM and 512MB of hard disk space.
- We recommend using a screen resolution of at least 1024*768.
- Ensure that your system’s processor speed is not slower than 266 MHz.
- You can use any version of Windows as the operating system.
- A stable internet connection on your system is essential.
What Errors Can the QuickBooks Print and PDF Repair Tool Resolve?
Here are the errors that can be fixed by the Print and PDF Repair tool:
- Connection issue with selected printer, Microsoft XPS Document Writer on XPS port
- Printing failure; unable to print to the printer
- QuickBooks error: Missing PDF file component prevents action completion
- QuickBooks is unresponsive; freezes during the operation
- PDF Converter offline; unable to print directly
- The device is not ready; cannot save as a .pdf file
- Failure to save forms or reports as .pdf in QuickBooks
- QuickBooks freezes during account reconciliation
- Print Driver Host for 32-bit Applications stopped working
- Unrecoverable error occurred
- QuickBooks PDF Converter Activation Error -20, -30, or -41
- Error 1722 or 1801 during PDF Converter installation
- Issues printing transactions or reports
- Reconcile window disappears or fails to appear
Solutions to Fix PDF and Print Problems with QuickBooks Desktop
Here are 4 solutions to address and resolve issues related to fixing PDF and print problems in QuickBooks Desktop.
Solution 1: Run the QuickBooks PDF & Print Repair Tool from the QuickBooks Tool Hub
Step 1: Download and Install the QuickBooks Tool Hub
The QuickBooks Tool Hub assists in resolving common errors. Make sure that the QuickBooks is closed before using the tool hub. For optimal performance, we recommend utilizing Tool Hub on Windows 10, 64-bit systems.
- Close QuickBooks.
- Download the latest version (1.6.0.8) of the QuickBooks Tool Hub. Save the file where you can easily locate it, such as your Downloads folder or Windows desktop.
Note: If Tool Hub is installed, you can check its version by selecting the Home tab. The version will be displayed at the bottom. - Open the downloaded file (QuickBooksToolHub.exe).
- Follow the on-screen instructions to install the tool and accept the terms and conditions.
- Once the installation is done, double-click the icon on your Windows desktop to launch the tool hub.
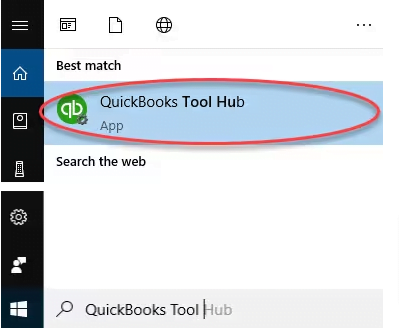
Note: If you are unable to locate the icon, search for QuickBooks Tool Hub in Windows and choose the application.
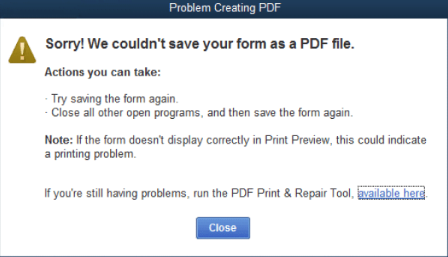
Step 2: Run the QuickBooks PDF & Print Repair Tool
- Choose Program Issues from the QuickBooks Tool Hub.
- Choose the QuickBooks Print & PDF Repair Utility. Running this will take approximately one minute.
- From QuickBooks Desktop, print, email, or save as a PDF again.
Solution 2: Restart and Reset your Temporary Folder Permissions
Step 1: Restart your system
If restarting your computer doesn’t resolve the problem, consider resetting the permissions for your temporary folder.
Step 2: Reset your temporary folder permissions
- To access the RUN command, press the Windows key + R.
- Enter %TEMP% and press Enter.

- To access the Properties, right-click on an empty section of the temporary folder.
- Choose Security and verify that every group and user name has Full Control.
- Save the file as a PDF in QuickBooks once more after adjusting the permissions to Full Control.
Step 3: Verify if you can print to your XPS (only applicable for Save as PDF and Email issues)
QuickBooks utilizes components of the XPS Document Writer, a Microsoft Windows product, to save files as PDFs. Test whether you can print to your XPS Document Writer to ensure its functionality within QuickBooks.
- Open Notepad.
- Next, Type “Test“.
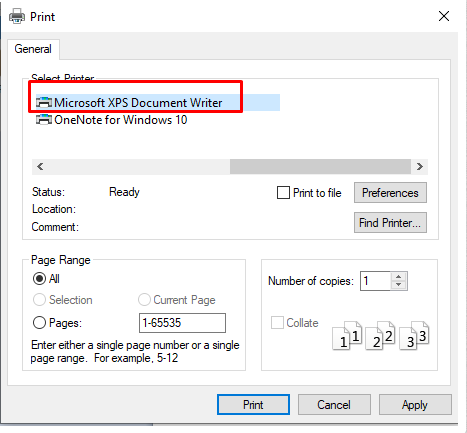
- Select “File” and then “Print“.
- Choose the XPS Document Writer from the list of printers, and then click “Print”.
- Type a filename and save it to your desktop.
- Go to your desktop and view the XPS document you printed from Notepad.
If you’re unable to print to your XPS printer or your actual printer outside of QuickBooks, it’s recommended to seek assistance from our QuickBooks Desktop Support.
Solution 3: Create a new template or form
- Create a new template for your form.
- Modify the template applied to your transaction.
- Create your PDF document.
Solution 4: Update the properties of the Print Spooler service.
- Right-click on Start, choose Run, and type Services. MSc, and click OK.
- Look for the Print Spooler feature.
- Select Properties by right-clicking on the Print Spooler service.
- Select Automatic under Startup type, then click Apply andOK.
- To start the Print Spooler service, right-click on it and select Start.
A PDF should be able to be saved or sent by email.
Reconcile Window Disappears or Doesn’t Show
The reconcile window may appear off-screen if QuickBooks appears to lock up after you choose to reconcile from the Banking menu but PDF functions continue to function.
- Review all currently open windows to check if your reconcile window is included.
- Close all windows and start the reconciliation process again.
Test, Reinstall, and Adjust Permissions for XPS Document Writer
Note: Keep in mind that these recommendations are for Windows, not Terminal Services.
You must get in touch with QuickBooks experts if you are unable to print to your XPS printer outside of it.
Note: Here are some troubleshooting steps to explore with a professional:
1. Verify that XPS Services are Enabled
- Press the Windows key + R.
- Type “optionalfeatures” and select Enter.
- Locate Microsoft XPS Document Writer and ensure that the checkbox next to it is selected.
- Click OK to save the changes.
2. Test the Functionality of the XPS Document Writer by printing a document outside of QuickBooks
3. Edit Security Software Settings
Check the settings of your security software, such as Norton Antivirus or McAfee Firewall, as they might block the creation of .xps files. Ensure that .xps files are not being blocked by adjusting the settings accordingly.
4. Adjust Windows User Permissions for the XPS Document Writer
If a Windows user lacks permission to print to the XPS Document Writer, QuickBooks cannot convert the file to a .pdf. You may require Administrator Rights to adjust these permissions.
Conclusion
In summary, resolving PDF and printing issues in QuickBooks Desktop involves a thorough examination and troubleshooting of potential causes, including checking printer connectivity, ensuring system compatibility, and verifying template integrity. This process can enhance the functionality of your printing and PDF features. Additionally, a thorough understanding of the provided system specifications can guide you in resolving this error effectively. If you encounter any further difficulties, feel free to contact us at the toll-free number: +1-888-245-6075.
Frequently Asked Questions
Confirm that your printer is accurately configured within QuickBooks by navigating to the “File” menu, and then selecting “Printer Setup” to ensure the appropriate printer is chosen for every form or report you intend to print. Additionally, ensure that you have installed the latest updates and patches for your QuickBooks Desktop version.
Indeed, you can recover all your deleted and lost PDF files using a PDF repair tool. This tool is primarily utilized for this specific purpose.
1. Go to File.
2. Choose Printer Setup.
3. Click the Form Name drop-down arrow, then choose a transaction.
4. Click the Printer name drop-down arrow, then choose a printer.
5. Click OK.
1. Choose “File” from the top menu, then pick “Printer Setup.”
2. From the Form Name menu, select “Check/Paycheck.“
3. Choose “Voucher” for the check style.
4. Click “Align.”
5. Print a sample and compare it with your pre-printed checks.
6. Adjust the horizontal and vertical settings using the sample’s grid, then click “OK.”
7. Print another sample by clicking “Align” again.
8. Compare this sample with your paycheck stock and make any needed alignment adjustments.
9. Repeat steps 4 through 8 until the alignment is perfect.
Yes, review the printer setup within QuickBooks Desktop, ensure that the correct printer is selected for each form or report, and check the alignment settings for printing checks or other documents.
