

Managing opening balance in QuickBooks is vital for maintaining accurate financial records and ensuring smooth accounting processes. An opening balance in QuickBooks refers to the amount in your account at the beginning of a new financial period or year. This is the first entry a company makes when it begins operations or after the end of the year. Knowing how to enter and edit these balances is essential for effectively managing your accounts and tracking outstanding invoices.
Having a well-organized and accurate chart of accounts is crucial for precise financial management. Each account impacting your Balance Sheet must have an opening balance, as this establishes the account’s starting point.
To get started, have your bank statement handy to determine your starting balance. In this article This article we’ll focus on the steps for how to enter an opening balance in QuickBooks Desktop, ensuring you have a clear guide to get started. But before that, let us understand why managing opening balance in QuickBooks is imperative for businesses of all sizes and verticals.
Let’s Understand why Opening Balance is Essential
Open balance is the actual account balance of your bank account, credit card, vendors, or customers’ balance before you started using a particular accounting methodology. Starting out with the incorrect open balances would result in inaccurate accounting reports and statements that may lead a business to face legal charges.
Opening balance reflect your company’s financial status as of the day before you begin using any accounting software. Accurate opening balance is essential because your financial reports won’t accurately represent your financial position without them. Even in QuickBooks, your financial data should mirror your bank and credit card accounts. When setting up a new account, choose a start date and enter the balance from your real-life account for that date. This becomes your opening balance.
For an easy start date, use the day you opened a new bank account or the start date of your next bank statement if the account is older. Always refer to your bank statement in order to find the accurate balance for the chosen date.
Note: QuickBooks records all your opening balances in an Opening Balance Equity account. This feature allows you to review and verify the entries easily at any time.
Let’s now understand how to enter opening balance in QuickBooks Desktop!
To Enter Opening Balance, you’ll need:
- A list of outstanding customer and vendor invoices and credit notes.
- Your closing trial balance from the previous accounting period.
- Your bank statements.
- A list of unrepresented bank items from your previous system, like uncleared checks, still needs to appear on your bank statement.
Where Can You Find Them?
You can find your open balance in QuickBooks by checking the Opening Balance Equity account in the Chart of Accounts. Additionally, you can view individual account registers or run reports like the Balance Sheet and Trial Balance to see the opening balances.
Types of Open Balances
Opening balance is the starting point for a business’s accounts at the beginning of a financial period or when setting up new accounting software. They represent the balances of assets, liabilities, and equity accounts as they stand at a specific point in time. Here are the main types of opening balances:
1. Customer Open Balance:
These are amounts that your customers owe you for products or services that you provided. Unpaid invoices need to be tracked and collected.
2. Vendor Open Balance:
You owe your vendors for goods or services received. Unpaid bills need to be managed and paid.
3. Bank and Credit Card Accounts:
These are the starting balance for your bank accounts and credit cards. When you begin tracking accounts in your accounting system, they reflect the balance on that day.
Benefits of Managing Open Balance in QuickBooks
There are multiple benefits of managing your opening balance in QuickBooks. Here are some of them:
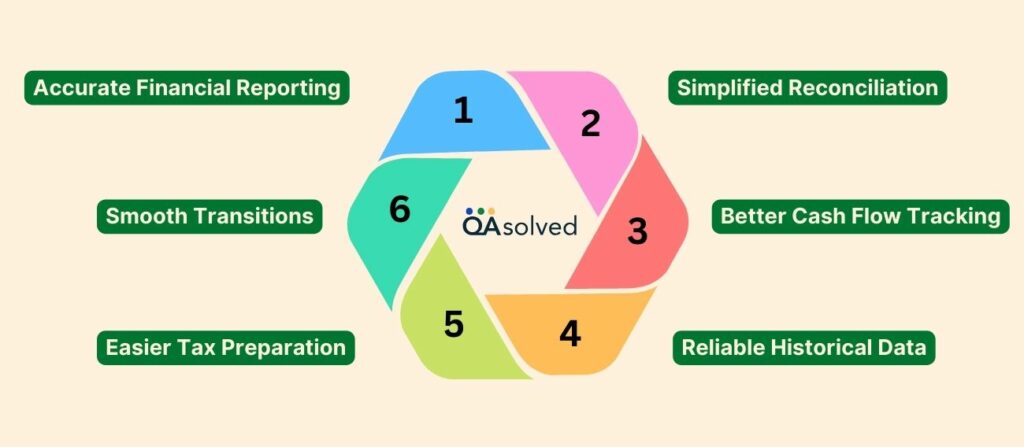
- Accurate Financial Reporting – Reflects your true financial position from day one.
- Simplified Reconciliation – Makes reconciliations easier by aligning QuickBooks records with bank statements.
- Better Cash Flow Tracking – Monitors outstanding invoices and bills for better cash flow management.
- Reliable Historical Data – Enables informed decision-making based on a consistent financial history.
- Easier Tax Preparation – Reduces errors in reporting and simplifies tax preparation.
- Smooth Transitions – Ensures seamless data transfer from previous systems.
Account management is simplified when open balance is managed correctly, leading to clearer, more reliable financial records. Moving ahead, let’s now discuss the steps to manage opening balance in QuickBooks effectively.
Points To Consider Before Moving Forward
- Consult an accounting professional before entering opening balance in QuickBooks.
- Only enter an opening balance if you have one before the QuickBooks start date for accurate tracking.
- Use General Journal Entries (GJE) from the previous year’s Balance Sheet when starting a new company. Key points:
- Offset with the Opening Balance Equity account.
- For year-start balance, use retained earnings, not income/expenses.
- Separate journal entries for each accounts payable/receivable transaction.
- Include vendor/customer names for AR, sales tax, and AP entries.
- Choose Inventory Adjustment for inventory-related entries.
Steps to Manage Opening Balance for Accounts in QuickBooks
Here are the steps to manage opening balance:
Step 1: Enter an Opening Balance
Linking your bank and credit card accounts to QuickBooks will automatically download your past transactions up to a specific date and calculate your opening balance. If you prefer not to connect your account, you can manually enter the opening balance as follows:
- Access Settings ⚙ and pick Chart of Accounts.
- Click on New and set up your account.
- Your bank or credit card balance should be entered in the Opening Balance field. The exact amount should be known.
- Pick the date you want to track in the As of field.
- Optionally, you can include details about the account in the Description field.
- Click Save to complete the setup.
This way, QuickBooks will accurately reflect your financial status from the chosen start date.
Edit QuickBooks Starting Balance
To add transactions older than your current opening balance, you’ll need to update the start date and balance. This prevents QuickBooks from counting transactions twice and sets a new starting point.
Here’s how to do it:
- Choose Chart of Accounts from Settings.
- Find the account in question and click on View Register.
- Locate the opening balance entry. Note: Display the oldest entries first in the date column.
- Click on the opening balance entry.
- Adjust the date and amount as needed. To make further changes, select Edit.
- Click Save to finalize your adjustments.
Depending on the type of account, follow these steps:
a. Bank or Credit Card Accounts
You can input an opening balance for a newly created bank account or one you’ve used for some time.
- Retrieve your bank statements or log in to your bank’s website.
- Go to the Company menu in QuickBooks Desktop and click on Chart of Accounts.
- Click anywhere in the Chart of Accounts and select New.
- Click Continue after selecting Bank or Credit Card.

5. Assign a name to your account. Use unique names if you have multiple accounts with the same bank or type of account.
6. Complete the remaining data fields.
7. Click on Enter Opening Balance. If you need to edit your opening balance later, the button will change to Change Opening Balance.


It depends on how you plan to handle past transactions what you enter as the opening balance:
- Summarize Past Transactions: If you don’t want to enter older transactions, use the ending balance and date from your latest bank statement. This summarizes past transactions, and you’ll track new ones going forward. Then click OK.
- Detailed Past Transactions: If you want to enter past transactions, choose a date older than your oldest transaction. Enter this date in the Ending date field and the corresponding balance in the Ending balance field. Hit OK to avoid double-counting past transactions.
8. When finished, enter Save & Close.
Pay any Outstanding or Pending Bills:
Whether your bank or credit card account has pending transactions, you have nothing to worry about. Once your bank statement is available and the pending transactions have cleared, you can update your opening balance entry.
Here’s how:
- Obtain your bank statement or log in to your bank’s website.
- In QuickBooks, head to the Company menu and opt for Chart of Accounts.
- Locate the account and hit Edit.
- Click on Change Opening Balance.
- Adjust the amount and date.
- Finally, Record to save.
b. Asset, Liability, and Other Types of Accounts
An opening balance can be entered for a new or existing bank account.
Note: Balance Sheet accounts, such as Fixed Assets, Equity, Long-Term Liabilities, Other Assets, Other Current Assets, and Other Current Liabilities, should be entered with attention.
- Log in to your bank’s website or gather your bank statements.
- Next, access the Company menu and choose Chart of Accounts.
- Go to Chart of Accounts and click New.
Choose from Fixed Asset, Loan, or Equity. Other account types can be selected from the Other Account Types drop-down menu. Click Continue to proceed.

5. Name your account. If you have several accounts of the same type or with the same bank, assign unique names to distinguish them easily.
6. Complete the remaining data fields. Click on Enter Opening Balance. If you need to edit it later, the button will change to Change Opening Balance.
Your opening balance depends on how you want to handle past transactions:
- If you choose not to enter transactions before the opening balance date in QuickBooks, input the ending balance and date from your most recent bank statement. Click OK. This action will consolidate all previous transactions, allowing you to start recording new transactions from that point forward.
- Determine the earliest date you want to include. Select a date older than your oldest transaction in QuickBooks. Your opening balance will encompass everything before this date. Input this date in the Ending date field and enter your account’s balance for that date in the Ending balance field. Enter OK. This approach ensures past transactions aren’t counted twice.
7. Click Save & Close to record the opening balance.
The Opening Balance can also be Entered as a Journey Entry:
Instead of the standard method, you can enter the opening balance through a journal entry.
- Access the Company menu and then Make General Journal Entries.
- Enter the date of your choice for the opening balance in the journal entry.
- From the Account drop-down menu, select the account for the opening balance.
- Enter the balance for that date:
- Asset: Enter the amount in the Debit column.
- Liability and Equity: Enter the amount in the Credit column.
- Next, select Opening Balance Equity from the Account drop-down.
- Enter the same amount in the opposite column (if you entered the first amount in Credit, enter this one in Debit, and vice versa).
- Enter Save & Close at the end.
Make additional journal entries to account for items like accounts receivable, accounts payable, sales tax payable, and any other elements not covered in the initial entry.
If there’s a remaining balance in the Opening Balance Equity account, it needs to be transferred to other equity accounts or retained earnings.
c. Income and Expense Accounts
There’s no need to enter opening balance for income or expense accounts. These accounts are only used to track your earnings and expenditures.
d. Customer or Vendor Balance in Accounts Payable and Accounts Receivable
If customers or vendors have unpaid balance before your opening balance date, enter each unpaid invoice or bill. This will set your Accounts Payable and Accounts Receivable opening balance.
Step 2: Check the Opening Balance Entry
Once you enter the opening balance, check your account register to ensure accuracy. The Opening Balance Equity account should have a zero balance.
- Proceed to the Lists menu and click Chart of Accounts.
- Find and open the Opening Balance Equity account.
- Verify that the account balance is 0.00.
If it’s not, note down the remaining balance. Then, run a Balance Sheet Report for the previous year.
- Head to Reports and choose Company & Financial.
- Opt for the Balance Sheet Standard.
- From the Dates dropdown, choose Last Fiscal Year.
- Look for the Retained Earnings balance under the Equity section.
- Compare the opening balance equity account’s remaining balance to the previous year’s retained earnings balance.
If they match, your accounts are balanced. If they don’t, contact your accountant to correct the discrepancy.
Tips and Tricks for Opening Balance in QuickBooks
- Verify past transactions are accurately recorded.
- Maintain separate accounts for different transaction types.
- Reconcile your bank account.
- Record past transactions in order.
- To ensure correct entries, use a trial balance report.
- Review and adjust balance regularly.
- Maintain records for all past transactions.
- Back up your data before making any changes.
Wrapping Up
To keep your finances in order, it’s crucial to know how to enter and edit opening balance in QuickBooks. You can ensure your opening balance is accurate by following the steps in this article. Maintaining open balance, handling outstanding invoices, and regularly checking your accounts will help prevent discrepancies. Your financial health can be easily tracked and reconciled with QuickBooks. It’s best to consult an expert if you want to manage open balance in QuickBooks. For immediate assistance, get in touch with our experts.
Frequently Asked Questions
1. To access the + New menu, log in to your QuickBooks Online (QBO) account.
2. Select “Journal entry.”
3. Choose Accounts Receivable (A/R) in the first line’s ACCOUNT field.
4. In the DEBITS column, enter the amount, and in the NAME column, choose the customer’s name.
5. Choose an offset account (often an expense account) and enter the amount in the CREDIT column on the next line.
6. Choose Save and Close.
1. Modify the opening balance.
2. Click Settings, then choose Chart of Accounts.
3. After finding the account, choose View Register.
4. Locate the initial balance entry. Sort the date column such that the oldest entries appear first as a tip.
5. Choose the entry for the starting balance.
6. Modify the amount after editing the date.
7. Hit Save.
If the balance is positive, you must credit the opening balance equity account and debit the owner’s retained earnings or equity account. If the balance is negative, you must credit the owner’s retained earnings or equity account and debit the opening balance equity account.
You’ll need your bank statements, your closing trial balance from the previous accounting period, and a list of all outstanding vendor and customer invoices and credit notes to input your opening balances. A list of the bank items from your prior accounting system that are not represented must also be provided.
1. Select Reports from the left menu on your QBO account.
2. Go to the Standard tab after selecting Reports.
3. Find the Customer Balance Detail and click on it.
4. Establish the Aging technique and Report period.
5. Hit “Run report.”
