Table of Contents
Toggle- Getting Started with Quicken for Windows
- 1. Activate your Quicken Membership
- 2. Set up your Quicken Profile
- 3. Set up your First Account
- 4. Set your Quicken Preferences
- 5. Take a Tour of Quicken
- 6. Update your Accounts
- 7. Categorize your Transactions
- 8. Set up your Bills and Income Reminders
- 9. Create a Budget
- 10. Use the Home Tab
- 11. Use Quicken on your Phone, Tablet, or the Web
- Getting Started with Quicken for Mac
- 1. Installing the App
- 2. Activate your Quicken Membership
- 3. Upgrading from Quicken for Mac 2015, 2016, or 2017
- 4. New User or Upgrading from Quicken for Windows, Quicken for Mac 2007, or from a different Personal Finance Product
- How to Uninstall Quicken for Windows?
- How Uninstall Quicken for MAC?
- Conclusion
- Frequently Asked Questions
Are you just beginning your Quicken journey and require assistance setting up your account? Then, you’ve landed in the right place. Whether you’re using a Windows PC or a Mac, Quicken offers powerful tools to help you manage your finances. Setting up Quicken on your system is the first step towards gaining control over your finances.
In this article, we will walk you through the entire process, from downloading the application to setting up your Quicken account and uninstalling the same.
Let’s get started!
Getting Started with Quicken for Windows
1. Activate your Quicken Membership
a. If you’re Purchasing Quicken from Quicken.com:
- To buy a Quicken subscription from Quicken.com, you must make a new Quicken ID.
- If you already have an ID, use your existing ID.
- Keep it safe as this ID will be used to activate your Quicken account.
- Sign in to your account using your Quicken ID.
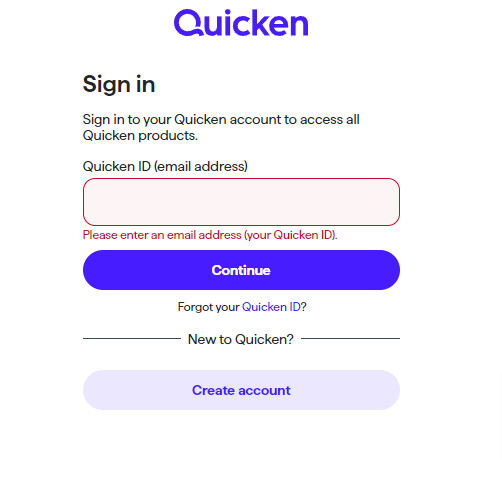
- Finally, this activates your membership.
b. If you’re Purchasing from a Retailer (not Quicken.com) – a Boxed Version or Download
- Open Quicken.com
- Go to the Download option, and click on Download.
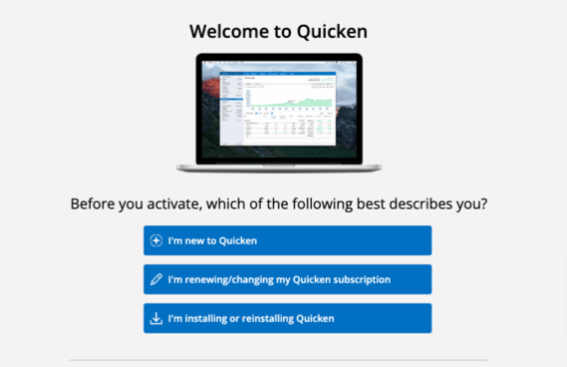
3. Install Quicken on your computer.
4. Sign in or make your Quicken account to set up your profile.
Note: Use the same ID to log in, if you have used the Subscription Release of Quicken earlier.
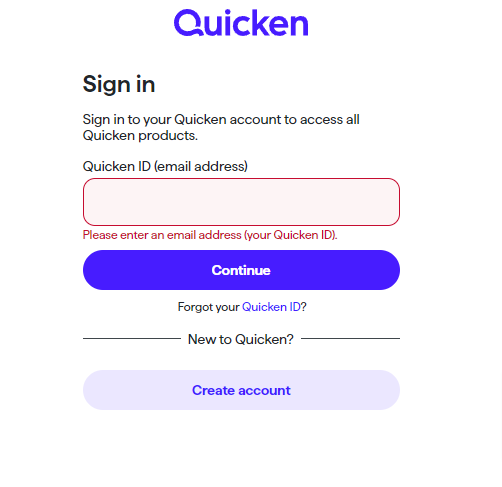
- Follow the on-screen instructions and enter your 16-digit activation code when prompted.
to resolve your query in no-time.
2. Set up your Quicken Profile
- After activating your Quicken Membership, update your profile and Click Continue.
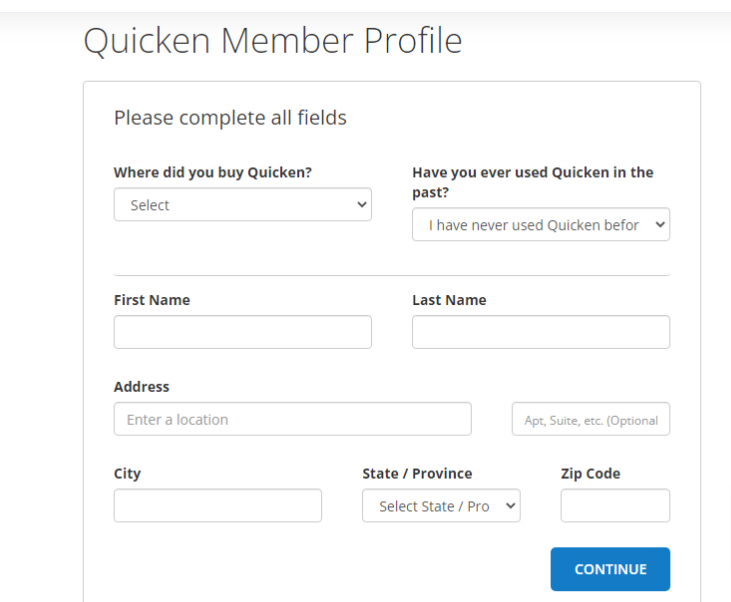
- When prompted, choose whether to synchronize Quicken data with your mobile device or the Quicken web application.
- Opt for Use Mobile & Web and provide a user-friendly file name if you intend to sync multiple Quicken files to your mobile device.
- If uncertain about syncing to mobile or web immediately, select Don’t use mobile & web and configure mobile and web sync later.
3. Set up your First Account
To incorporate an account, simply inform Quicken of your banking and investment institutions. Quicken will then establish a connection with your bank, retrieve your transactions, and generate a spending report. Adding an account also grants you the capability to create reports on income, expenditure, taxes, and investment performance based on the downloaded transactions.
To initiate this process, click on Add Account. Alternatively, you can skip this step and add your first account later by selecting the Complete Guide to Getting Started with Quicken for Windows icon on the Home page.
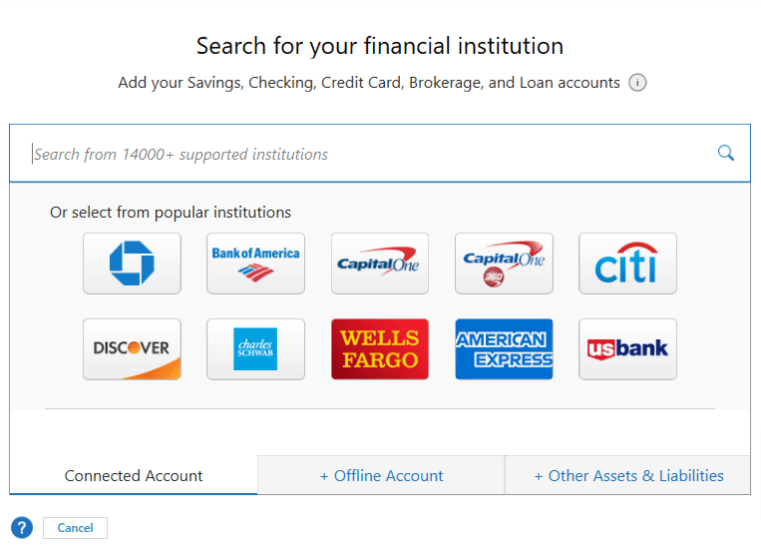
- Enter or select the name of your financial institution (if you have multiple institutions, you can add more accounts later).
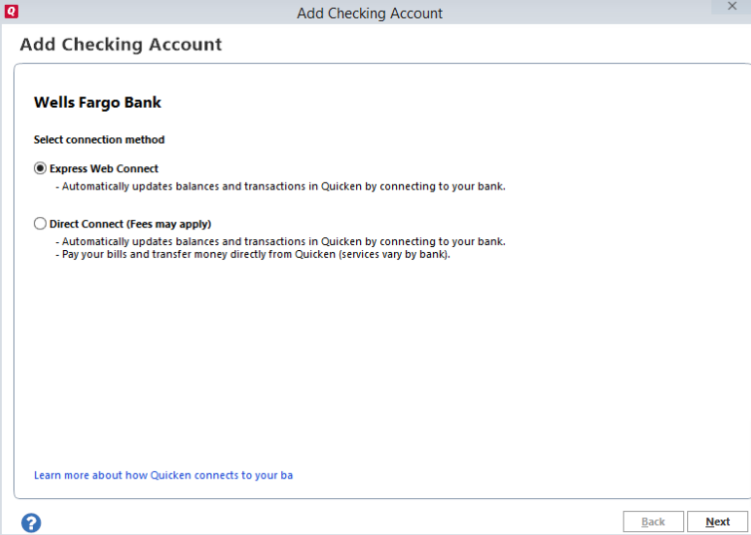
2. If there are multiple connection options available for your financial institution, Quicken will guide you through selecting your preferred method. Direct Connect may be available if supported by your bank, but it’s worth noting that fees may apply. Consult your bank to set up your account for Direct Connect.
3. Input your bank’s sign-in details, typically the same login credentials used for your bank’s website.
4. If you prefer Quicken to store this information for future use (to avoid manual entry when updating your accounts), check the Save this Password option. Upon selecting this option for the first time, Quicken will establish a Password Vault where you can securely store all your banking passwords if desired. You’ll be prompted to create a separate password for this vault. Opting to save all passwords enables you to update all your accounts with a single click.
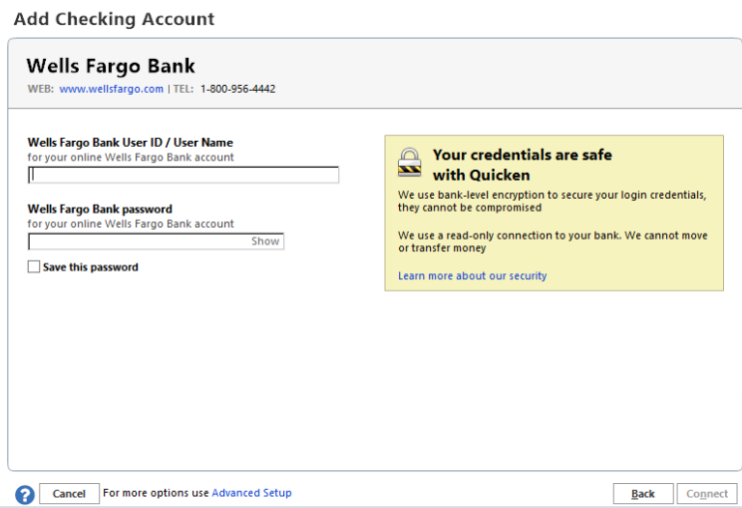
5. Select Connect.
6. Optionally, you can assign a nickname to your account. If there are accounts you prefer not to include in Quicken, choose Ignore instead of Add.
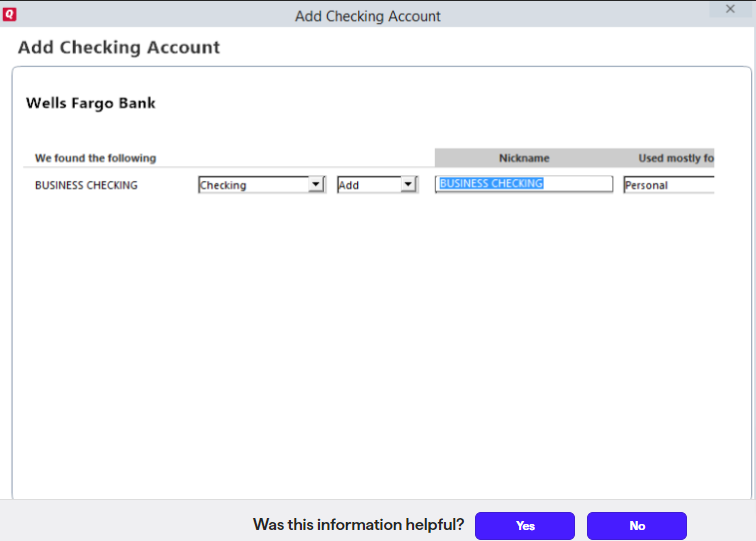
7. Click Next and then Finish. Quicken will proceed to add your accounts and download transactions.
Note: Quicken can only retrieve 30-90 days of transactions, as per your bank’s provisions. If you require additional transaction history, kindly get in touch with your bank to ascertain if this option is available.
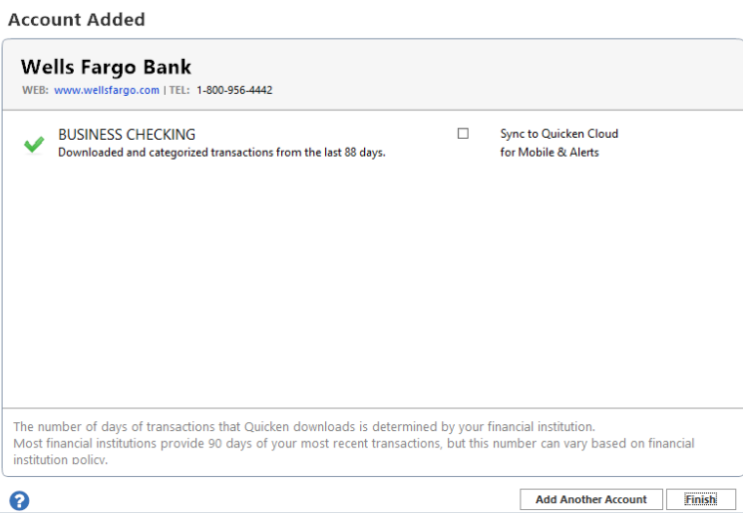
8. Great job! You’ve successfully added your first Quicken account!
9. To add more accounts, click on the plus icon (+) on the Home page, or navigate to Tools > Add Account. If you choose not to add more accounts now, that’s perfectly fine. You can always add more later.
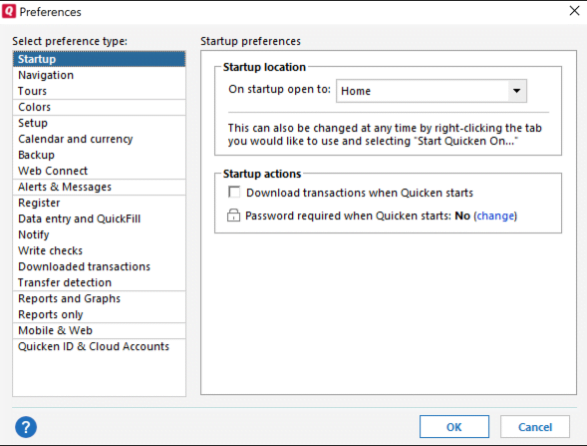
4. Set your Quicken Preferences
5. Take a Tour of Quicken
Quicken aims to simplify your daily tasks as much as possible. Here’s a brief overview of the components and tools you’ll frequently use.
Panels
| The account bar showcases all the accounts you’ve integrated into Quicken. |
| A register presents a record of transactions linked to an account within Quicken. |
| The menu bar exhibits tabs for accessing various features within Quicken. |
Icons
| Add Account | Adds new Quicken accounts. |
| Update Accounts | Downloads New transactions. |
| Manage Accounts (left) | Launches the Account List, providing access to edit your account details and implement other modifications. |
| Actions (right) | Opens a menu with options, reports, and tasks associated with the account register you are now working with. |
| Reminder | Reminders are displayed in the register for this account. This enables you to observe the impact on your account balances. |
| The ? Icon | Opens a new window with the Quicken Help. |
| The ^ Icon | Displays or hides the main tabs and toolbar. |
Basic Tasks
| To access an account’s registration, click on its name in the account bar. |
| To enter a new transaction manually, click a blank line, or click a transaction in a register to make modifications. |
| To see all of the transactions made in every account in Quicken, click All Transactions. |
| Select the tabs to explore tools and features categorized according to typical financial activities. |
| To find out more about using Quicken, click Help. |
| Click on the Transactions tab located in the upper right corner of the Quicken register window. |
6. Update your Accounts
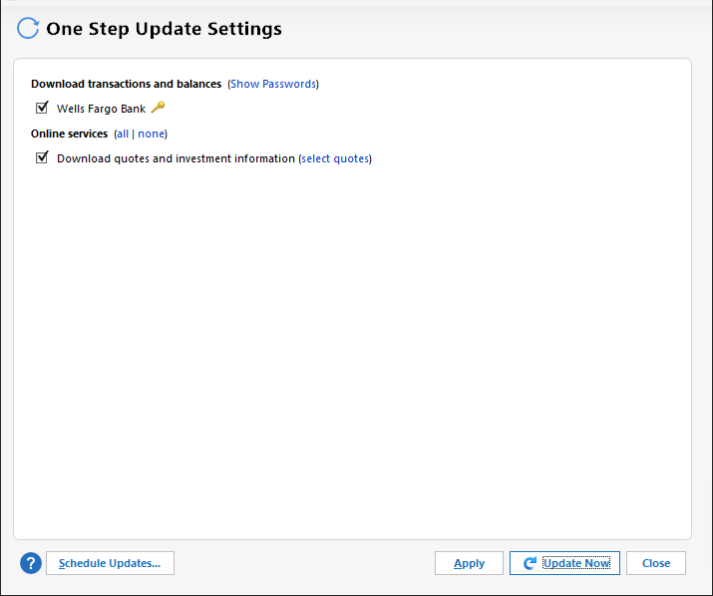
Now that you’ve established an account, maintaining up-to-date transactions is essential. To update your Quicken accounts:
Note: If you opted to save your password during the account setup, you’ll only need to enter the Password Vault password.
Click on Update Now. Quicken will retrieve all new transactions and refresh your account balances.
7. Categorize your Transactions
Categorizing transactions helps track spending habits, and Quicken does most of this automatically. It assigns categories based on where you spend, like labeling a Kroger purchase as Food & Dining: Groceries. While usually accurate, sometimes it needs correction, such as for rent or pet supplies from Kroger. You can adjust categories easily on the Spending tab.
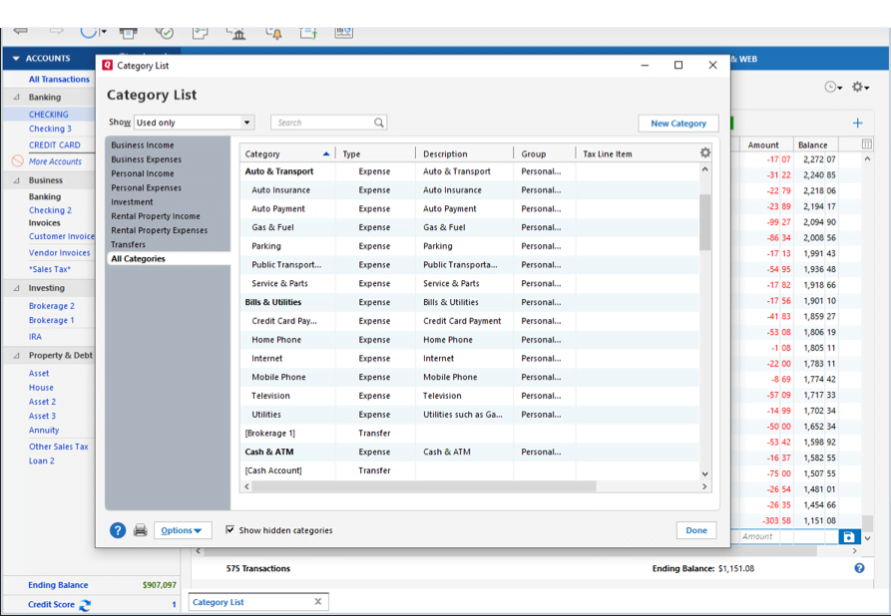
If you can’t find the category you need, opt for the New Category.
8. Set up your Bills and Income Reminders
Aside from monitoring spending, Quicken simplifies the spending process, and we say that in a positive light!
Chances are, you have regular monthly bills. By informing Quicken about your recurring expenses and expected income, it can remind you of upcoming bills and forecast your future account balances. This feature helps you steer clear of late fees and overdraft charges.
Here’s how it works:
- Go to the Bills & Income tab.
- Click on Get Started within the Bills tab.
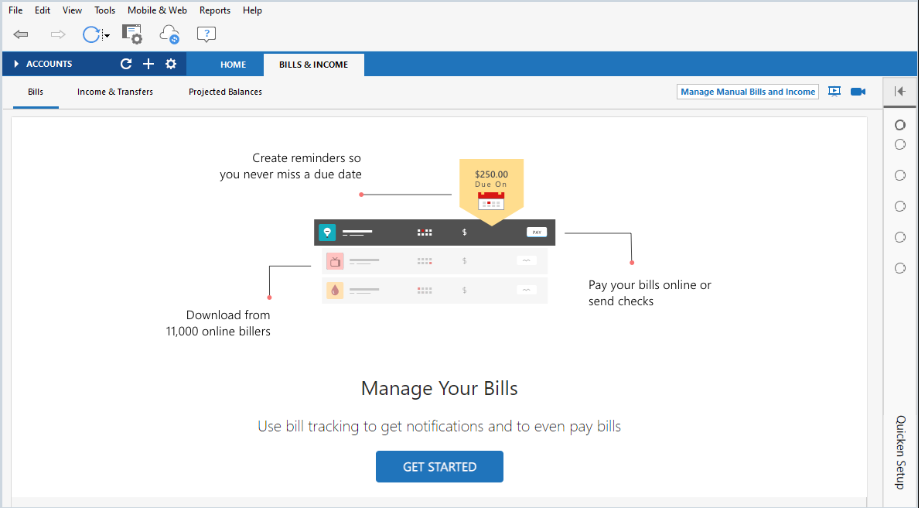
3. Choose ‘Online bill’ from the pop-up.
4. Select your biller and enter your credentials.
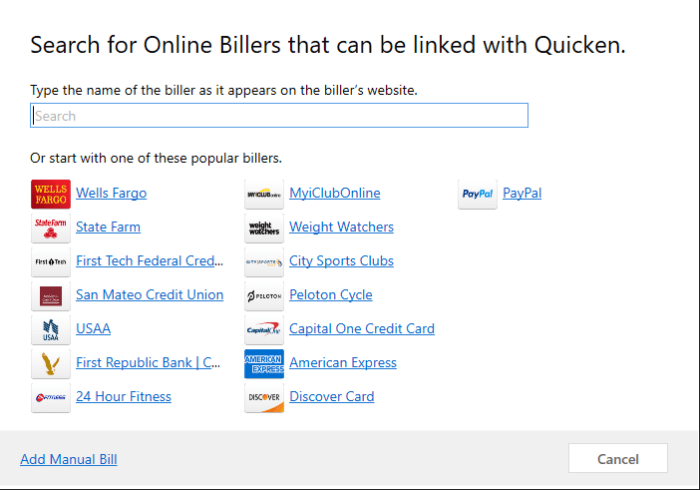
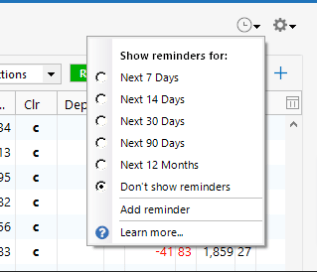
5. After setting up reminders for bills or income, you can display them in your register.
6. Click on the clock icon at the top of the register to show reminders and assess their impact on your account balance.
9. Create a Budget
If you’ve been setting up Quicken while following this article, you now have a clear view of your spending, upcoming bills, and income. This sets the stage for Quicken’s next major benefit: helping you align your spending with your income. You can easily track if you’re staying within your budget or going over using the Home tab.
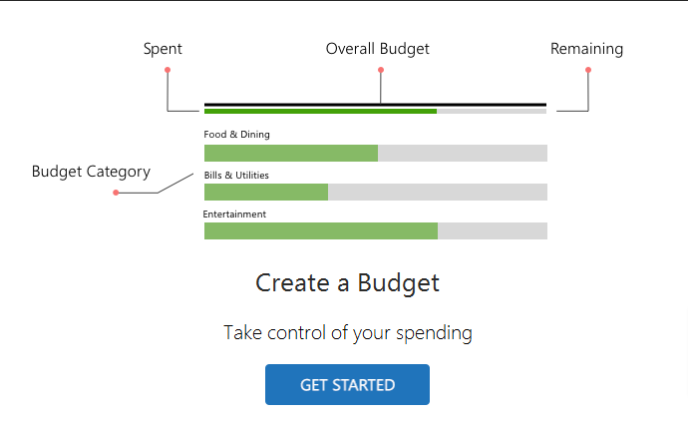
- Enter a name for your budget and click OK.
- Quicken will automatically create a budget for your recurring personal expense categories.
- Check your overall spending status in the Budget Your Spending section on the Home tab.
- Customize your budget by selecting amounts and categories on the Planning tab.
10. Use the Home Tab
The Home tab serves as a dashboard for monitoring your finances and managing your bills effectively.
Quicken offers the flexibility to personalize the default Main View and incorporate additional views. Just select Customize and input your preferences.
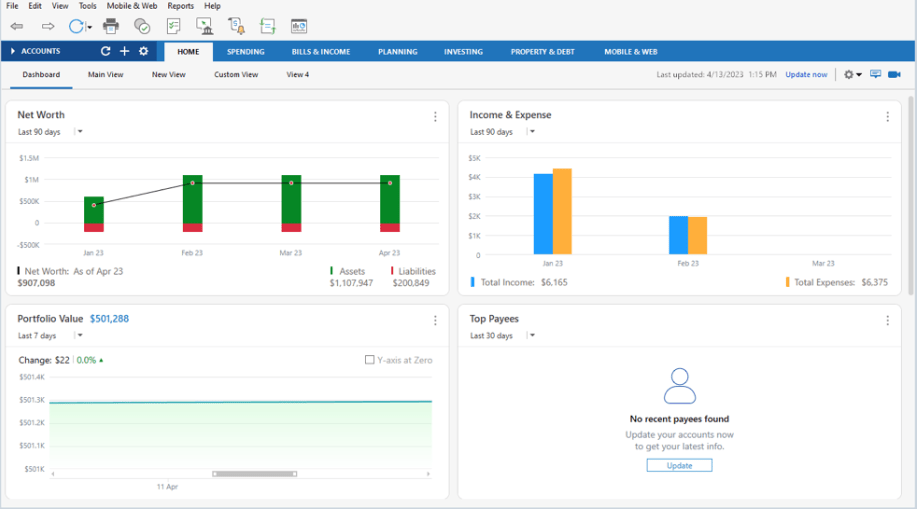
Once you’ve added your accounts, categorize your transactions, and set up your bills and budget, you can conveniently monitor all these aspects at a glance on the home tab. This provides you with a quick overview of your financial status.
11. Use Quicken on your Phone, Tablet, or the Web
Quicken on the Web and the Quicken Mobile App (available on iPhone®, iPad®, and Android™) sync seamlessly with your desktop data, making it effortless to manage your finances while you’re on the move. You can also customize alerts and notifications to stay informed about your account balances, fees, and spending habits.
Here’s how to begin:
For Quicken Desktop:
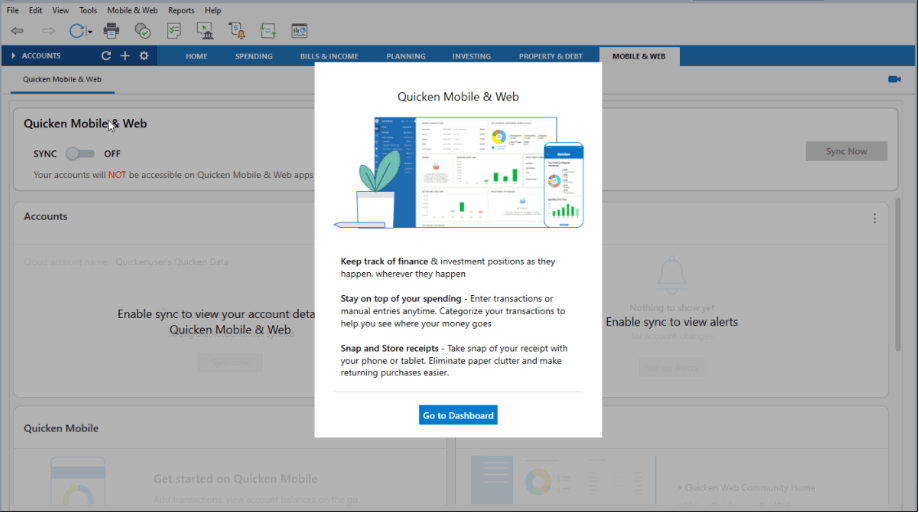
Choose the checking, savings, credit, investment, or cash accounts you want to view on your Quicken mobile app.
Also Read:- How to Move Quicken Data File From One Computer to Another?
Getting Started with Quicken for Mac
1. Installing the App
When you insert the CD or double-click the downloaded file, you’ll encounter the Install Quicken screen.
CD
Follow the instructions and drag Quicken to the Applications folder.
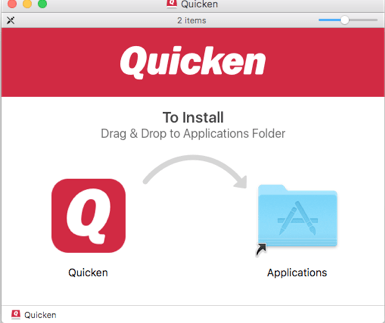
Download (DMG File)
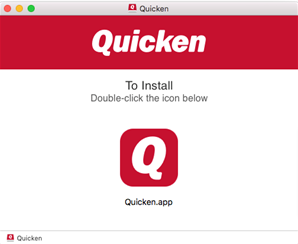
Double-click the Quicken icon to install it. After installation, open Quicken from your Applications folder. It will automatically download and update to the latest version.
2. Activate your Quicken Membership
a. Purchases from Quicken.com
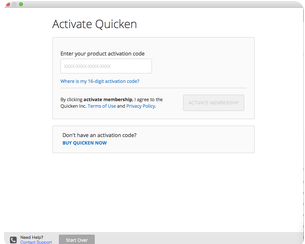
When you buy a Quicken subscription on Quicken.com, create a new Quicken ID or use your existing one. This Quicken ID is linked to your subscription, and you’ll use it to activate Quicken.
Once you sign in with your Quicken ID, your membership becomes activated.
b. Buying from a Retailer (excluding Quicken.com) – either a Boxed Copy or a Download
- Select Download for Mac to initiate the installation process.
- Once installed, sign in or create your Quicken ID to set up your profile.
- Follow the on-screen instructions to enter your 16-digit activation code when prompted.
3. Upgrading from Quicken for Mac 2015, 2016, or 2017
If you recently upgraded to the latest Quicken release from a 2015, 2016, or 2017 version, Quicken will automatically detect and convert your existing Quicken file.
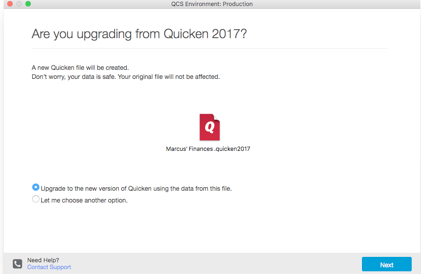
Choose Upgrade to the new version of Quicken using this file’s data and click Next to begin using the file.
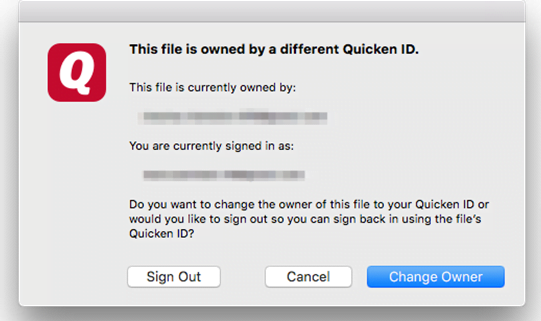
Note: If the Quicken ID linked to your current file differs from the Quicken ID you just registered for your Quicken membership, you’ll be prompted to Open and Change the Owner of the file.
If you proceed, you’ll need to reactivate your online banking accounts (your online banking passwords will be removed for security reasons).
Also Read:- Resolve Quicken Won’t Open After Updating to the Latest Version
4. New User or Upgrading from Quicken for Windows, Quicken for Mac 2007, or from a different Personal Finance Product
Once you’ve signed in or activated your membership, you’ll encounter a screen that prompts you for your next action.
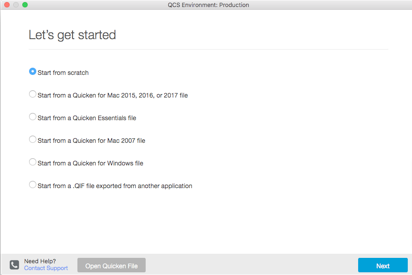
a. Start from a Quicken for Mac 2018 and a Newer File
- Opening a Quicken for Mac 2018 or newer file doesn’t necessitate any file conversion process.
- If the file doesn’t open automatically, simply click on the Open Quicken File button located on the screen’s bottom.
- Locate your file and proceed to open it.
b. Start from Scratch
- Opt for Start from scratch.
- Select Sync your data to the cloud to enable the Quicken mobile app. Once chosen, click Next.
- Following these steps, you’ll be prompted to add an account. Quicken will automatically download transactions from your bank and other financial accounts. It’s advisable to add at least one checking account and all your credit cards.
- Afterward, you’ll be directed to the Home tab, where Quicken will recommend other benefits.
c. Start from a Quicken for Mac 2015, 2016, or 2017 file
- Select Start from a Quicken for Mac 2015, 2016, or 2017 file.
- Pick a file to open.
- Choose to sync your data to the cloud for use with the Quicken mobile app.
- Proceed with your choice and click Next.
- Following these steps, you will be prompted to add an account. Quicken will automatically download transactions from your bank and other financial accounts. It’s recommended to include at least a checking account and all your credit cards.
- Next, you’ll be directed to the Home tab, where Quicken will highlight additional benefits.
d. Start from a Quicken Essentials File
- Choose to Start from a Quicken Essentials File.
- Select the Quicken Essentials file you wish to open.
- Opt to sync your data to the cloud with the Quicken mobile app.
- Proceed with your choice and click Next.
- Following these steps, you’ll need to reconnect your accounts. Click on account settings to determine which accounts need reconnection.
e. Start from a Quicken for Mac 2007 file
- Opt for Begin from a Quicken for Mac 2007 File.
- Select the Quicken Mac 2007 file you want to open.
- Select sync your data to the cloud with the Quicken mobile app. Proceed with your choice and click Next.
- Following these steps, you’ll be prompted to reconnect your accounts. Simply follow the instructions.
f. Start from a Quicken Windows File
- Choose “Begin from a Quicken Windows File.”
- Select the Quicken Windows file you wish to convert.
- Opt to sync your data to the cloud for use with the Quicken mobile app.
- Proceed with your choice and click Next.
- Following these steps, you’ll be prompted to reconnect your accounts. Simply follow the instructions.
g. Begin from a .QIF File Exported from Another App
Disclaimer
Quicken relies on the data exported from other personal finance apps, like what’s provided in the .QIF file. However, because we can’t control this data export, our import process depends on the quality of the exported data.
To ensure a smooth transition to Quicken, we’ve invested significant effort into addressing issues related to missing or incorrect data from other apps. Despite our efforts, we’ve observed gaps or missing data, especially with investment transactions, in these exported .QIF files. Consequently, some data cleanup may be necessary after importing your data into Quicken.
Note: Quicken supports importing data from apps like Banktivity and Moneydance, we haven’t tested importing data from other personal finance apps into Quicken for Mac. If you’re using Banktivity or Moneydance, you can export your data into a .QIF file and then import it into Quicken for Mac.
Export Data from Banktivity to a .QIF File
- Open Moneydance, then go to File > Export.
- Choose QIF as the format and select All Dates.
- Save the QIF file you’ve created and close Moneydance.
Import and Export .QIF File into Quicken for Mac 2017
- Launch Quicken for Mac.
- Go to File > New to create a new data file. The Let’s Get Started window will appear.
- Choose Start from a . QIF file exported from another application.
- Click Next. The Import data from another application window will appear.
- Follow the on-screen instructions to import the .QIF file into Quicken.
- Click sync your data to the cloud for use with the Quicken mobile app. Proceed with your choice and click Next.
- Afterward, you’ll need to reconnect your accounts. Click on account settings to determine which accounts need reconnection.
Also Read:- How to Fix Quicken Launcher Has Stopped Working?
How to Uninstall Quicken for Windows?
Note: If you’re installing Quicken, you don’t need to uninstall your old version. The new version installation will handle that automatically.
When you remove Quicken, your data file stays where it is. But it’s a good idea to back up your Quicken data file to a safe location before you uninstall Quicken.
Windows 11
- Click the Start button and choose Settings.
- Then, select Apps, followed by Installed Apps.
- Find Quicken in the list, click the three dots menu, and choose Uninstall.
- Confirm by clicking Uninstall again and follow the prompts until the program is removed.
Windows 10
- Click the Start button and select the Control Panel. In Windows 10, you can find the Control Panel in the Windows System folder within the Start menu.
- Go to Programs and choose Uninstall a Program.
- Locate Quicken in the list of programs, which is sorted alphabetically. Select it by clicking once.
- Then, click Uninstall at the top of the list and follow the prompts until the program is successfully removed.
Windows 8
- Hit the Start button and Control Panel.
- Go to Programs and click on the link labeled Uninstall a program.
- From the list of programs, select your Quicken version and click the Uninstall/Change button.
- If prompted for your Administrator password, provide it, and then follow the on-screen instructions to complete the uninstallation process for Quicken.
How Uninstall Quicken for MAC?
- Find Quicken in your Applications folder.
- Drag the Quicken icon to the Trash.
- When Quicken is placed in the Trash folder, the uninstallation process is finished.
Conclusion
Setting up Quicken on Windows or Mac involves following specific steps for each system while uninstalling it also requires different processes. Doing this correctly ensures your finances are well managed and keeps your computer clutter-free. Just follow the above-mentioned steps for your operating system, and you’ll be all set with Quicken or can remove it hassle-free when needed. If you require assistance with this, please reach out to Quicken Support at our toll-free number: +1-855-875-1223.
Frequently Asked Questions
Quicken can be used with Mac or Windows operating systems, but not both at the same time. The version that works with your current operating system must be selected. On the other hand, you can install Quicken on both a Mac and a Windows computer if you have a multi-platform license, but you will need to buy the relevant license for each platform.
Certainly, you have the option to install Quicken on a second computer and then share the data file between the two.
It is possible to convert Quicken from a PC to a Mac by backing up your data and setting up the Mac version on your Mac.
Yes, Quicken offers syncing capabilities across devices, allowing you to access your financial data from different platforms such as Windows, Mac, iOS, and Android.
Quicken for Mac can import a data file from Quicken for Windows and create a new data file for Quicken on Mac. While transferring back and forth isn’t practical due to significant differences in the data files, moving from Windows to Mac is feasible in a one-way direction.
1. Go to Quicken’s official website.
2. Go to the “Get Quicken” or “Downloads” area.
3. Choose the Quicken version that works best for your operating system (Windows 10 or Windows 11).
4. To begin the download procedure, click the download link.
5. Quicken will download and install on your computer if you follow the on-screen directions.
6. After installation, you may open Quicken and continue configuring it to fit your requirements and preferences.
1. Uninstall the current version.
2. Download and install the latest version.
3. Restore your data if needed.
4. Configure preferences.
5. Check for updates and install them
1. Install Quicken.
2. To install Quicken’s Subscription Release, just double-click the icon that shows up in the install prompt.
3. Enter your Mac admin credentials if prompted.
4. Launch Quicken by double-clicking its icon in the Applications folder.
5. For retail purchases, use the activation code found in the box or email.
6. For online purchases, use your Quicken ID (email address) and password.
You can convert your current data file to Quicken for Mac-compatible files if you’ve managed your finances using other versions of Quicken or other programs (and in some situations, vice versa).
A cloud storage service such as Dropbox or OneDrive can be used to store your data file backup and be used as a means of transferring it between the two computers. Afterward, you can use Quicken to restore the backup data file to the hard disk of your other computer.

