Quicken Cloud syncs your financial data across devices, ensuring seamless access wherever you are. In some cases, you may need to reset or delete your Quicken Cloud data to fix syncing issues, remove outdated information, or start over. Resetting or deleting data in Quicken Cloud is more complicated than resetting or deleting data in Quicken Desktop. It’s crucial to follow the right steps carefully to avoid losing important financial records if done incorrectly.
In this blog, we’ll walk you through the exact process of resetting and deleting Quicken Cloud data, key features of Quicken, and provide troubleshooting tips to ensure a smooth experience. You can regain control of your Quicken data by following the steps mentioned in this blog, if you’re experiencing duplicate transactions, incorrect balances, or other cloud-syncing problems. Let’s begin!
Quicken Cloud Data: An Overview
Quicken Cloud syncs financial data from Quicken desktop and mobile applications. It gives you access to your transactions, account balances, and budgets from anywhere. In contrast, Quicken Cloud does not back up desktop data; instead, it synchronizes information between devices.
Key Features of Quicken Cloud
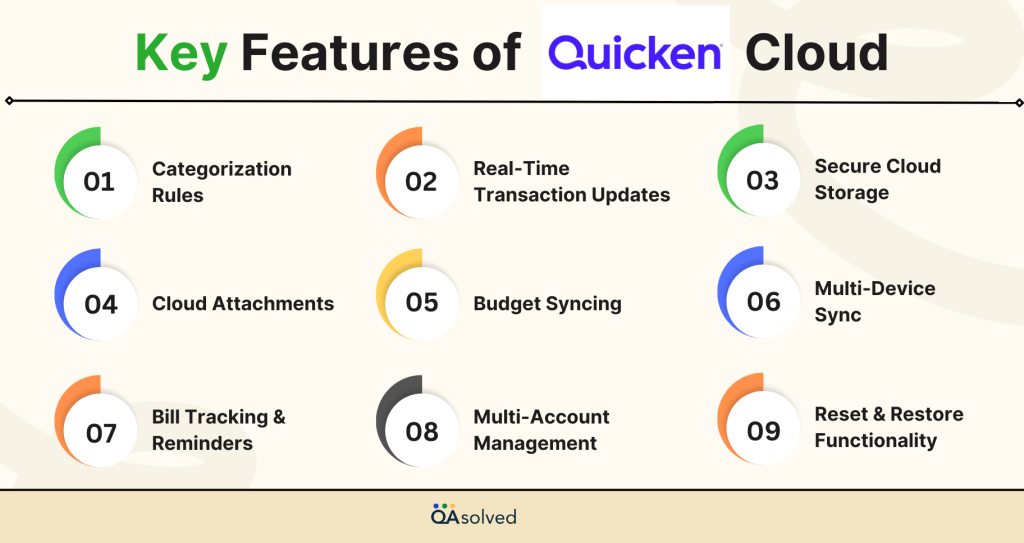
Quicken Cloud syncs data across devices and enables you to access your financial information from anywhere, anytime. In a nutshell, it offers the following features:

- Multi-Device Sync – Synchronizes Quicken desktop data with Quicken Mobile and Web, ensuring seamless access.
- Real-Time Transaction Updates – You can check your account balances and recent transactions on your mobile device or web browser.
- Secure Cloud Storage – Encrypts your financial data and uses Quicken’s security protocols to ensure security.
- Bill Tracking & Reminders – This helps you stay on top of upcoming bills and due dates, which will make managing your payments easier.
- Budget Syncing – Tracks your spending across your devices, so you can stay on top of your financial goals at any time.
- Categorization & Renaming Rules – Keeps your financial records organized by categorizing your transactions and applying renaming rules.
- Cloud Attachments – Allows receipts, invoices, and other financial documents to be uploaded and accessed directly from the cloud.
- Multi-Account Management – Integrates information from multiple bank accounts, credit cards, and investments.
- Reset & Restore Functionality – Ensures accurate synchronization by allowing you to reset cloud data without permanently losing information.
The Quicken Cloud lets you manage your finances efficiently from anywhere, so you’re always in control.
Also Read:- How to Fix Quicken Won’t Download or Update Bank Transactions?
Reasons to Reset or Delete Quicken Cloud Data
Quicken Cloud is mainly a syncing tool, so you cannot directly manage or delete individual records. Any data issues must instead be resolved by resetting the data through Quicken’s desktop application.

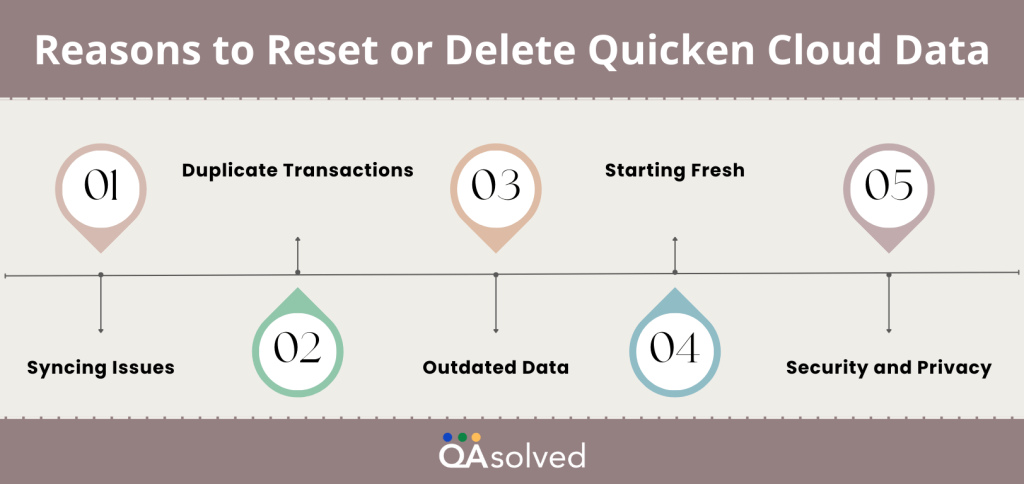
Several reasons may require you to reset or remove Quicken Cloud data:
- Syncing Issues: Resetting can help if Quicken desktop transactions are not syncing with the cloud.
- Duplicate Transactions: Synchronization errors are sometimes responsible for duplicate entry errors, which cause financial records to be inaccurate.
- Outdated or Corrupted Data: A reset ensures that you work with accurate financial data if Quicken Cloud contains old or corrupted data.
- Starting Fresh: To start with a new, Quicken file without retaining previous cloud data, you must delete the old file.
- Security and Privacy: Deleting your data from Quicken Cloud ensures that your financial information is no longer stored.
How to Reset Quicken Cloud Data?
The Quicken Cloud data reset allows you to start fresh without losing your local Quicken desktop data by clearing out all existing synced data.
Reset all my data on the Quicken Cloud
The data in your Quicken Cloud may need to be reset once you have set up Quicken on your desktop.
Cloud data resets remove existing cloud data associated with your current file and immediately syncs it again for the same period. Regardless, your cloud data is not permanently erased. The following information is deleted and then restored on the Quicken Cloud:
- Synced accounts prior to the reset
- Transactions from these accounts within the last two years of your cloud registration
- Previously uploaded cloud attachments
- Synced budgets
- Renaming rules, categories, tags, and alert settings used before the reset
Steps to Reset Quicken Cloud Data
- Go to the Mobile & Alerts tab.
- To open the Preferences dialog, click Edit Profile.
- Depending on your setup, you may be prompted to enter your Password Vault password or Quicken ID password.
- Select Mobile & Web on the left side of the screen.
- Under Quicken Mobile & Web, click Reset your cloud data.
- Click Reset to confirm your decision to reset your cloud data.
How to Edit or Delete Quicken Cloud Data?
When you delete Quicken Cloud data, all records are permanently removed, unlike resetting, which clears data while maintaining your cloud account.
- Go to Edit > Preferences > Quicken ID & Cloud Accounts.
- Edit the dataset name, make any necessary changes, and click OK.
- To delete a dataset, click Cloud accounts associated with this Quicken ID (visible only if multiple datasets exist).
- Click Delete on the dataset you wish to remove.
Note: The currently open dataset cannot be deleted.
Troubleshooting Common Issues
Here are some solutions for problems you may encounter when resetting or deleting Quicken Cloud data:
Syncing Issues Persist After Reset
- Install the latest version of Quicken.
- Sign out and back into your Quicken account.
- Make sure your internet connection is working.
Unable to Delete Cloud Data
- For assistance with Quicken deletion, contact us.
- While attempting to delete, ensure that no devices are actively syncing with the cloud.
Lost Transactions After Reset
- Ensure transactions are still intact in your Quicken desktop file.
- Back up your data locally if necessary.
Conclusion
Resetting or deleting your Quicken Cloud data can be helpful when troubleshooting sync issues, starting fresh, or aligning your financial data across devices. Resetting cloud data removes existing synced information, but it doesn’t permanently delete it, since the data is immediately restored from your current file. Therefore, you can reset without having to worry about losing your financial history, accounts, transactions, or preferences.
Financial data can be synced across devices with Quicken Cloud, but sometimes issues arise that require resetting or deleting cloud data. Whether you’re troubleshooting sync problems, removing duplicates, or starting from scratch, following the correct steps ensures success. If there are any discrepancies in your desktop data, ensure that it is accurate before syncing again.
Our Quicken experts are here to assist you if you experience persistent issues or need additional assistance with Quicken Cloud data.
Frequently Asked Questions
1. Create a backup before making any changes.
2. Go to File > New Quicken File to start fresh.
3. Open the account, select transactions, and delete them manually.
4. Navigate to File > Year-End Copy to archive old transactions while keeping recent ones.
5. Go to Edit > Preferences > Quicken ID & Cloud Accounts, then delete old datasets.
6. For a complete reset, uninstall Quicken and start with a new installation.
The old Quicken backup files can be deleted if no longer needed, but the recent backups should be kept for security reasons.
Manage backups regularly to keep storage free and ensure you have a recovery option in case of disaster.
Verify that you have saved the latest working backup before deleting.
Quicken data is primarily stored on your computer, but some data syncs online for access across devices if you use Quicken Cloud.
It is important to note that Quicken Cloud does not provide a full backup – it only syncs selected data.
Maintain regular backups on an external drive or in the cloud to ensure complete security.
1. Open Quicken and go to the Edit menu.
2. Select Preferences from the dropdown.
3. In the left pane, choose Quicken ID & Cloud Accounts.
4. Adjust the desired settings in the right pane.
5. To update your Quicken profile, click Update Profile to modify details like your name.
6. Click OK to save the changes.
Archiving old Quicken data is a good practice to keep your financial records organized while improving software performance.
You can archive past transactions with the Year-End Copy feature while keeping recent data accessible.
As a result, you can keep your financial history clutter-free without permanently deleting it.


