

A business isn’t just about selling goods or providing services, it’s also about keeping your finances in order, especially when money keeps flowing in and out. Staying on top of your bank transactions is crucial to making smart financial decisions, whether they are customer payments, vendor bills, or day-to-day expenses.This is where QuickBooks Desktop plays its part exceptionally well. In order to minimize the threat of costly errors, it is important for a user to add and match bank feed transactions in QuickBooks Desktop.
QuickBooks Desktop’s bank feeds feature allows you to connect your bank accounts and have transactions flow directly into the software. No more downloading statements or manually entering payments! You can then match those bank transactions with existing records or add new ones as needed. It’s simple, smart, and prevents unnecessary errors.
If you’re also having trouble adding or matching bank feed transactions in QuickBooks Desktop, then don’t worry because we’ve got you covered. In this article, we’ll discuss how to use bank feeds in QuickBooks Desktop for Windows. Whether you’re just getting started or looking to fine-tune your workflow, this article will guide you every step of the way. It’s time to get started!
Steps to Add and Match Bank Feed Transactions in QuickBooks Desktop
Managing your finances efficiently is easier with the bank Feeds feature in QuickBooks Desktop. It allows you to connect your bank accounts and automatically download transactions, saving time and reducing manual data entry. Following the right steps to add and match transactions streamlines your reconciliation process and keeps your accounting error-free.
Step 1: Download Transactions to QuickBooks
To successfully download the bank feed transactions in QuickBooks Desktop, follow the below given steps:
- Select Banking from the menu.
- To view categorized transactions, hover over Bank Feeds and select Bank Feeds Center.
- Select the desired bank and click “Sync this Bank.”
Step 2: Review and Match the Bank Feed Transactions
Following your bank statement download, match what you’ve already entered in QuickBooks with the transactions on your bank statement. It helps you identify which transactions have been cleared by your bank and which ones are still pending. According to your bank data and your records, QuickBooks organizes these into three categories.
To review, follow these steps:
- Select Banking from the menu.
- In the Bank Feeds Center, choose Bank Feeds.
- Start by matching the transactions listed in each category.
You can also match transactions for the bank feeds mode you use:
- If you’re using Express Mode
- If you’re in Classic Mode
- If you prefer Advanced Mode
1. Express Mode
QuickBooks automatically compares downloaded bank feed transactions with existing entries in your linked account. A new transaction will be created if no match is found. It is always a good idea to review the matches before adding them to your register to ensure accuracy.
QuickBooks categorizes matches as follows:
- Unmatched (Needs Your Review): Your QuickBooks account does not match the downloaded transaction.
- Renamed (Changed by Rules): No match was found, but a renaming rule created a new transaction that could be added.
- Matched (Auto): QuickBooks found a match between your bank transaction and an existing account record.
A check mark appears next to matched transactions. Use the Batch Actions or Actions dropdown to select Add/Approve or Approve if the match appears correct. Select Not a Match if the match doesn’t look right; this will change the status back to Unmatched so you can review or edit it.
2. Classic Mode
There are different types of match categories in Classic Mode in QuickBooks:
A. Matching Downloaded Transactions:
When a transaction from your bank feed aligns with an existing entry in QuickBooks, it’s considered a match.
- If the match looks correct, no action is needed! QuickBooks will handle it for you.
- If the match doesn’t seem right, you can manually unmatch the transaction to review or correct it.
B. Unmatched Transactions:
Sometimes, transactions from your bank feed don’t match anything in QuickBooks. This can happen for several reasons:
- The transaction hasn’t been recorded in QuickBooks yet. Once entered, it should automatically match.
- There may be a typo or it might be assigned to the wrong account in QuickBooks. Fixing the details should resolve the mismatch.
- If the payee name differs, you can create an alias in the bank feed to match the name used in QuickBooks.
- You also have the option to manually match transactions if needed.
- Occasionally, the bank may have made an error, and the transaction shown may be incorrect.
Once all transactions are either matched or added, the Items Received section will clear the statement from the Bank Feeds Center.
3. Advanced Mode
In advanced mode, there are three ways to easily match bank feed transactions in QuickBooks Desktop. Choose your option and follow the steps for the same:
A. Recognized Transactions:
Recognized tab transactions display a Match Status such as:
- Auto-Matched: QuickBooks has found a transaction that matches one in your records directly.
- Rules Applied: Matches are made based on your rules. You can review the rule that was used.
- Auto-Recognized Rule: The bank description or downloaded name exactly matched the vendor name assigned to the account.
Choose an action from the action column for each transaction:
- Approve – Confirms the match and adds the transaction to your register.
- View Details – Displays additional transaction information.
- Not a Match – The transaction is marked as unmatched. The item will move back to the “Need your review” section if no alternative matches are available.
Batch Actions allow you to match multiple transactions at once. In QuickBooks, you can view more details about a particular transaction by clicking on it.
B. Partially Matched Transactions:
There may be multiple entries in your account corresponding to these transactions. From a list of existing transactions, QuickBooks will ask you to select the most accurate match. Click on a transaction in the Partially Recognized tab to view QuickBooks’ suggested matches. Then click Confirm match to confirm the match. You can also:
- Ignore: Deletes the transaction from your list. In the Batch Actions dropdown, select multiple transactions and choose Ignore transactions.
- Add More Details: Allows you to create a new transaction instead of selecting an existing one.
- Match to Other Transactions: Allows you to select a transaction manually.
C. Unrecognized transactions:
The transactions don’t match anything in your records and don’t meet any rule criteria. Select an unrecognized transaction and update its details or choose from the following options:
- Add: Adds it to your register without additional details or splits.
- Add More Details: Use this if you want to split the transaction between multiple accounts or customer jobs.
- Match to Existing Transactions: Link it manually to an existing transaction.
- Ignore: Deletes the transaction.
Use Batch Actions to apply updates to multiple items at once, such as Name, Class, Account, Memo, or Customer: Job.
How to Match Transactions Manually?
In some cases, QuickBooks may not automatically link an electronic statement transaction with your records. When this happens, you can manually match it to an existing open or posted transaction.
1. In Advanced Mode
The Unrecognized tab lets you manually match transactions with those already recorded.
- Select Match to existing transactions from the Action column dropdown.
- Locate the corresponding transaction, select it, and then click Register.
- If the amounts do not align, click Resolve to split entries and balance the differences. For deposits and payments, you can also add resolving split entries within an existing transaction.
- Adjust the To Pay column to reflect full or partial payment when matching a money-out transaction to a bill.
- To finish adding the transaction to your books, click Save and add to register.
Note: You cannot add split entries to transactions that have already been posted or linked to your bank, such as:
- Open Bills and Bill Payments
- Multiple posted transactions
- Transfers
- General Journal Entries
- Sales Tax Payments
- Paychecks
- Liability Checks
- Sales Receipts or Bill Payments directly deposited to the bank (not in Undeposited Funds)
2. In Classic/Express Mode
- Go to Banking, then select Bank Feeds, followed by Bank Feeds Center.
- Select the correct bank account from the Financial Institution dropdown in the Match Transactions window.
- Click View to download and view the electronic statement.
- Check the Show Register checkbox in the Match Transactions window.
- Find and select the corresponding transaction in the register, making sure the amounts are the same as on the statement.
- To finish, click Match.
There you have it! Follow these steps to add and match bank feed transactions in QuickBooks Desktop to ensure your books remain accurate. By regularly managing your bank feeds, you will not only save time but will also gain a better understanding of your financial situation.
If everything is matched correctly, your reconciliations will run smoothly, your reporting will be more accurate, and you will be able to make more confident decisions.
Also Read: How to Fix QuickBooks Bank Feeds Not Working Error?
Benefits of Using Bank Feeds in QuickBooks Desktop
Maintaining daily financial transactions can be time-consuming and prone to errors, especially when done manually. QuickBooks Desktop offers a feature called bank feeds that automates and simplifies this process. It’s easy and convenient to manage your bank transactions with bank feeds, whether you’re a small business owner or a bookkeeper. Here are some benefits one can avail after adding and match bank feed transactions in QuickBooks Desktop:
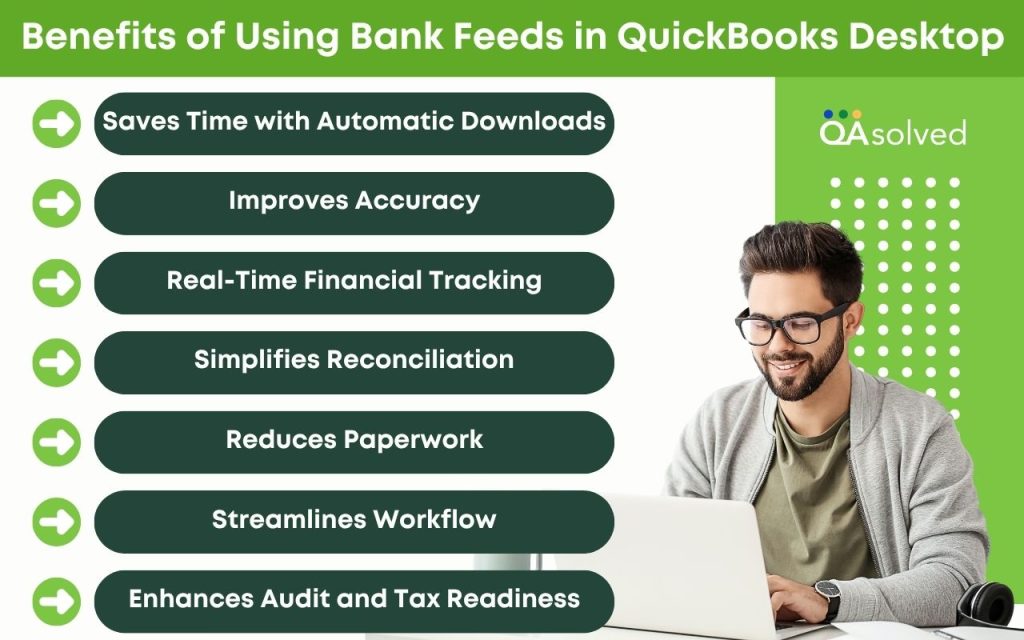
1. Saves Time with Automatic Downloads
Bank feeds automatically pull transactions from your connected accounts, eliminating the need to manually enter them. Using this automation, you can focus on running your business rather than entering data.
2. Improves Accuracy
You can eliminate errors and duplicate entries by matching your bank transactions with QuickBooks records. This ensures that your financial data is accurate and up-to-date at all times.
3. Real-Time Financial Tracking
The bank can provide you with daily or frequent updates on your cash flow, so that you can keep track of it in real time. By understanding where your money is going, you can make better decisions.
4. Simplifies Reconciliation
Reconciling your accounts becomes easier and faster when your bank transactions are already imported. Early detection and correction of discrepancies is easier.
5. Reduces Paperwork
QuickBooks stores all bank statement information digitally, eliminating the need for paper statements. By going paperless, you can keep your records organized and accessible.
6. Streamlines Workflow
QuickBooks makes it easy to review, match, or add transactions. With this intuitive workflow, you can reduce back-and-forth and simplify your day-to-day accounting tasks.
7. Enhances Audit and Tax Readiness
An audit or tax filing can be made easier when your transactions are up-to-date, classified, and well-documented. Financial and legal standards are met through the use of QuickBooks.
When it comes to simplifying your accounting, bank feeds in QuickBooks Desktop are a game changer. Saving time, improving accuracy, and staying tax-ready are just a few of the benefits. Bank feeds can help you streamline your bookkeeping and gain better control over your finances. You can easily change bank feed mode in QuickBooks Desktop to manage and display your transactions in accordance with your workflow preferences.
Conclusion
Effectively managing bank feed transactions in QuickBooks Desktop is essential for maintaining accurate financial records and streamlining your reconciliation process. Whether you’re downloading transactions using Direct Connect or Web Connect, QuickBooks offers a user-friendly interface to help you stay on top of your banking activity. By learning how to categorize, match, or exclude transactions, you can avoid duplicates, reduce errors, and ensure that your books reflect real-time financial data.
Regularly reviewing your bank feeds, understanding transaction statuses, and taking timely actions not only save time but also build confidence in your financial reporting. With the right approach, QuickBooks Desktop can be a powerful tool to help you manage cash flow and stay financially organized.
If you follow the steps outlined in this guide, managing your bank feeds will become a smoother, more reliable part of your workflow.
Frequently Asked Questions
Here’s how you can reconcile bank feed transactions in QB Desktop:
1. Launch QuickBooks Desktop.
2. Select Reconcile from the Banking menu.
3. Choose the bank account you want to reconcile.
4. Enter your bank statement’s statement date and ending balance.
5. Hit Continue.
6. Compare the transactions on your statement with those in QuickBooks.
7. The difference at the bottom should be $0.00.
8. If everything matches, click Reconcile Now.
Bank feeds can be added to QuickBooks Desktop for the following types of accounts:
1. Checking Accounts – Typically used for day-to-day business transactions.
2. Savings Accounts – Used to store funds and track interest or savings.
3. Credit Card Accounts – Allows business credit card payments to be tracked.
4. Money Market Accounts – If your bank allows online access, they can be linked.
5. Loan Accounts – Some types can be connected to monitor payments (depending on your financial institution).
The categorize option in QuickBooks Desktop’s bank feeds is used when a downloaded transaction doesn’t match any existing entry in your books. Instead of matching, you’re telling QuickBooks how to record this transaction for the first time. This is helpful when:
1. The transaction is new and hasn’t been manually entered in QuickBooks.
2. It’s a recurring expense or income (e.g., utilities, subscriptions, or deposits) you haven’t recorded yet.
3. You want to assign the transaction to a specific account category (e.g., Office Supplies, Rent, or Sales Income).
4. The transaction is legitimate but needs to be added rather than matched.
Using Categorize ensures transactions are recorded accurately and assigned to the correct chart of accounts, helping maintain clean financial records.
Here are the steps to delete bank feed transactions in QuickBooks Desktop, based on whether they are added to the register or still pending in the Bank Feeds Center:
If Transactions Are Still in the Bank Feeds Center (Not Yet Added):
1. Go to the Banking menu.
2. Select Bank Feeds, then click Bank Feeds Center.
3. Choose the appropriate bank account.
4. Under the Transaction List, find the transaction(s) you want to delete.
5. Right-click on the transaction and select Ignore.
– This removes the transaction from the list without adding it to QuickBooks.
6. Confirm the action when prompted.
If Transactions Have Already Been Added to the Register:
1. Go to the Banking menu.
2. Select Use Register (or press Ctrl + R).
3. Choose the bank account and click OK.
4. In the register, locate the transaction you want to delete.
5. Select the transaction, then click Edit > Delete Check/Deposit, or right-click and choose Delete.
6. Confirm deletion when prompted.
