
Moving from QuickBooks Desktop to QuickBooks Online can unlock several operational benefits for your business such as anytime, anywhere access, real-time collaboration with your accountant or team, automated backups, and a more modern user experience. However, one area that requires special attention during this transition is inventory management. Unlike basic financial data such as customer lists, vendors, or charts of accounts, inventory records are more complex. They include item names, SKUs, quantities on hand, valuations, and accounting methods like FIFO (First In, First Out). It’s important to note that FIFO is only supported by QuickBooks Online Plus and Advanced, which makes selecting the right plan a crucial part of the migration.
QuickBooks Online also handles inventory differently than QuickBooks Desktop, especially when it comes to tracking inventory cost, calculating quantities, and applying valuation methods. These differences mean that blindly importing your inventory list could result in discrepancies, incorrect stock levels, or valuation errors. To avoid such pitfalls, businesses must prepare their inventory lists meticulously, understand the limitations of the migration tool, and verify post-migration data carefully. In some cases, manual adjustments or third-party tools may be required to ensure accuracy.
In this blog, we’ll help you understand the entire process of moving your inventory from QB Desktop to QB Online along with its benefits and a bunch of prerequisites as well. So, let’s get started.
Benefits of Moving Inventory from QuickBooks Desktop to Online
Migrating your inventory to QuickBooks Online offers more than just convenience; it enhances the way you manage, track, and analyze your stock across locations, users, and devices. Below are some of the key benefits:
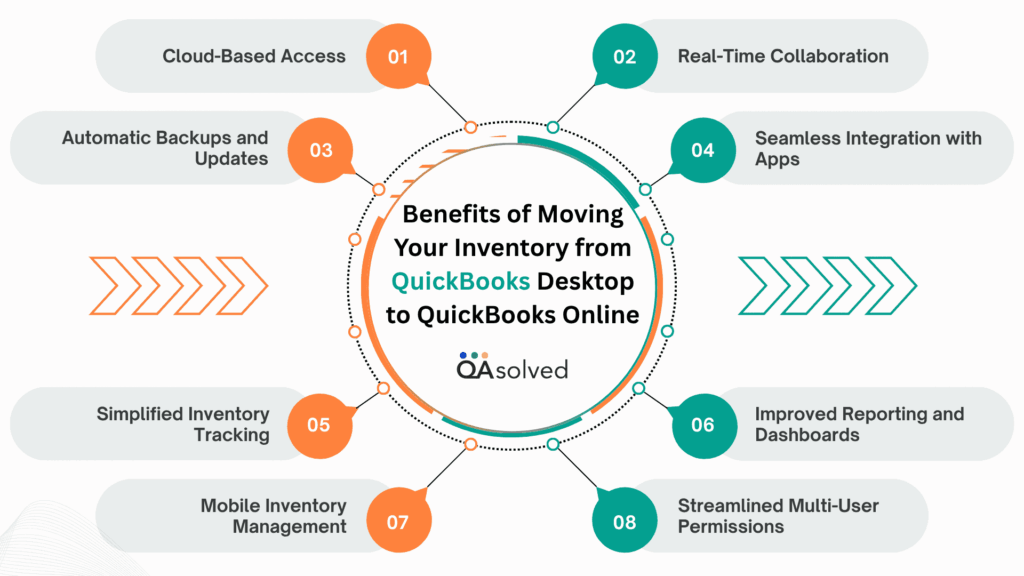
1. Cloud-Based Access
QuickBooks Online allows you to access your inventory data from any device with an internet connection. Whether you’re on the shop floor, working remotely, or at a trade show, your stock levels and product details are always available in real time.
2. Real-Time Collaboration
Multiple team members, including accountants and inventory managers, can work simultaneously within QuickBooks Online without the need for local backups or file transfers. This improves workflow efficiency and reduces delays in inventory-related decisions.
3. Automatic Backups and Updates
With QuickBooks Online, your inventory records are automatically backed up and protected. You also get access to the latest features and security updates without the hassle of manual installations.
4. Seamless Integration with Apps
QuickBooks Online integrates with a wide range of third-party inventory and e-commerce applications. This makes it easier to sync inventory across sales channels like Shopify, Amazon, or Square and manage everything from a single platform.
5. Simplified Inventory Tracking
Using QuickBooks Online Plus or Advanced, you can easily track inventory in and out, get low-stock alerts, and view profitability by item. The FIFO valuation method also provides better financial insights compared to the average cost method used in Desktop.
6. Improved Reporting and Dashboards
QuickBooks Online offers enhanced reporting tools and customizable dashboards that give you deeper visibility into your inventory performance. You can monitor item profitability, identify fast-moving or slow-moving stock, and make informed purchasing decisions based on real-time insights.
7. Mobile Inventory Management
With the QuickBooks Online mobile app, you can check inventory levels, create invoices, and even make sales on the go. This flexibility is especially valuable for businesses with remote teams, field sales, or warehouse operations.
8. Streamlined Multi-User Permissions
QuickBooks Online gives you better control over user access. You can assign roles to team members, limit their visibility to inventory-only functions, and ensure sensitive financial data is protected while still allowing inventory tasks to be managed effectively.
So, these are the benefits of moving your inventory from QuickBooks Desktop to QBO. Now, let’s take a look at the prerequisites and steps to migrate your inventory from QuickBooks Desktop to QuickBooks Online.
Inventory Migration: What to Do Before the Move?
Before transferring your inventory from QuickBooks Desktop to QuickBooks Online, it’s important to prepare properly to avoid data discrepancies or loss. Here are the key steps you should take:
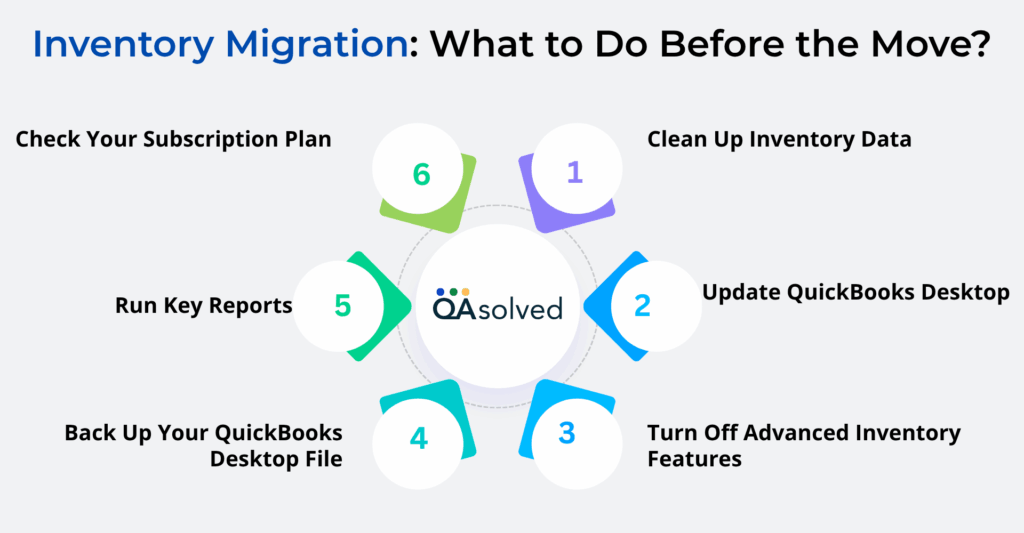
1. Check Your Subscription Plan
Inventory tracking in QuickBooks Online is only available in the Plus and Advanced plans. Make sure you’re subscribed to one of these before starting the migration.
2. Clean Up Inventory Data
Review your item list and remove or mark inactive any discontinued products. Ensure item names, SKUs, quantities, and values are accurate and up to date.
3. Back Up Your QuickBooks Desktop File
Create a backup of your QuickBooks Desktop company file. This gives you a safe restore point in case anything goes wrong during the transfer. So, don’t forget to create a backup of your company files.
4. Update QuickBooks Desktop
Ensure you’re using the latest version of QuickBooks Desktop. Outdated software can cause compatibility issues with the migration tool. So, update QuickBooks to the latest release and maximize the capability of your software.
5. Run Key Reports
Generate and save reports like the Inventory Valuation Summary, Sales by Product/Service, and Item List for post-migration comparison.
6. Turn Off Advanced Inventory Features
If you’re using features like lot tracking, serial numbers, or multiple locations in QuickBooks Desktop, disable them before migration, as these aren’t supported in QuickBooks Online by default.
By taking these steps, you can minimize the scope of errors and ensure a smoother, more accurate inventory migration.
Steps to Move Inventory from QuickBooks Desktop to Online
Before You Start:
- Make sure you’re using QuickBooks Online Plus or Advanced (only these support inventory).
- Clean up your inventory list in QuickBooks Desktop.
- Reconcile your inventory and back up your file.
Now, let’s take a look at the steps.
Step 1: Set Your Inventory Start Date
Before starting the migration, you’ll be asked to select a FIFO inventory start date. This date is crucial because once it’s set, it can’t be changed, and you won’t be able to edit any transactions that occurred before it. All inventory transactions from this date forward will follow the FIFO (First In, First Out) valuation method used by QuickBooks Online.
To avoid tax complications or the need to amend past filings, it’s best to choose the first day after your last completed tax filing period. This ensures a clean break and keeps your accounting records in compliance moving forward. Taking a few minutes to decide on the right date now can save you a lot of hassle later.
Here’s an example of FIFO Inventory Calculation:
Let’s say you have a raw material whose cost varies over time. You don’t sell it as-is, but it’s a critical input in creating your final product.
| Purchase Date | Quantity | Cost Per Item | Cost To Business |
| 1st January 2023 | 100 | $0.70 | $0.70 |
| 15th January 2023 | 125 | $0.73 | $91.25 |
| 15th February 2023 | 150 | $0.78 | $117.00 |
| 1st March 2023 | 200 | $0.80 | $160.00 |
| Total | 575 | $438.25 |
In this scenario, we will use 200 units of the inventory item to create the finished product. To value this inventory, we’ll compare the average cost method used in QuickBooks Desktop with the FIFO method used in QuickBooks Online.
| Average Cost | FIFO |
| Calculate the Average: ($70.00 + 91.25 + 117.00 + 160.00) / (100 + 125 + 150 + 200) = $0.76 per item Multiply the average cost by the quantity sold to determine Cost of Goods Sold: $0.76 x 200 items sold = $152 | Calculate Cost of Goods Sold for the first purchase date (1/1/23): $0.70 x 100 items sold = $70 Multiply the remaining 100 items by the cost of the next purchase date (15/1/23): $0.73 x 100 items sold = $73 Add the values of both purchase the date to determine Cost of Goods Sold: $73 + $70 = $143 |
Now, let’s take a look at the next step.
Step 2: Notify The IRS About Your Change in Inventory Costing Method
Switching from Average Cost in QuickBooks Desktop to FIFO in QuickBooks Online is considered an official change in your inventory accounting method. To stay compliant, you’ll need to notify the IRS by filing Form 3115 for the tax year in which the change occurs. This step ensures your inventory reporting remains valid and audit-ready.
The IRS requires that you commit to a consistent inventory valuation method starting from the first year you file a business tax return. When filing Form 3115, be sure to use the FIFO start date selected during your migration process. Consulting a tax professional is highly recommended.
Once you’ve completed all the steps, your inventory will be successfully migrated to QuickBooks Online. Verify that everything is transferred accurately by reviewing your inventory reports. Keeping your business running smoothly is easier with QuickBooks Online’s real-time tracking and streamlined inventory features.
How to Set Up Inventory After Migration from QB Desktop to QB Online?
Once you’ve moved your data to QuickBooks Online, setting up your inventory correctly is a crucial next step. Inventory tracking features are only available in these two plans. If you’re using a lower-tier plan, consider upgrading to unlock full inventory functionality. After migration, any purchases or sales you record can affect your inventory counts. That’s why it’s important to review and configure your inventory settings right away to avoid discrepancies.
In this section, we’ll walk you through a simple four-step process to get your inventory up and running in QuickBooks Online. So, let’s proceed!
Initial Checklist for Inventory Setup
Here are the things that a user should be aware of before setting up their inventory after converting from QuickBooks Desktop to QuickBooks Online. Here are some things that you should know:
- This guide is all about helping you set up your inventory after migration. It doesn’t cover daily selling or tracking tasks within QuickBooks Online.
- If you’re using a third-party inventory app, double-check that it supports the FIFO method used by QuickBooks Online. If it relies on a different costing method, reach out to the app’s support team to ensure it integrates properly.
- Are you still using QuickBooks Desktop 2015 or earlier? If yes, then you’ll need to install a trial version of QuickBooks Desktop 2016 or later before converting your file. Otherwise, your inventory data won’t transfer correctly.
- If you’re switching from QuickBooks Desktop for Mac, here’s a heads-up: your inventory information won’t come along for the ride. You’ll need to manually set up your inventory from scratch once you’re in QuickBooks Online.
Taking note of these details now will save you time and prevent hiccups later on. Now, let’s take a look at the steps.
Step 1: Print Your Inventory Valuation Summary Report
The very first step is to print the inventory valuation summary report to set up everything smoothly. Here are the steps:
- Head over to the Reports section.
- In the search bar, type and select Inventory Valuation Summary.
- Set the Report period to All Dates from the dropdown menu.
- Click Run Report to generate the latest inventory data.
- To keep a hard copy, hit the Print icon and print the report.
Step 2: Print a Balance Sheet Report
The next step is to print the balance sheet report in order to be aware of the exact figures ahead of the changes that you’re about to make. Follow the steps for the same:
- Click and select the Balance Sheet
- Now, click on the dropdown menu and select More actions.
- The third step is to select Print/Save as PDF.
- Finally, click and select Print to successfully fetch your balance sheet report.
Step 3: Set Up Your Products and Services
Once your data is migrated, your inventory items will appear under the Products and Services list in QuickBooks Online. You might notice that each item includes sub-products labeled Inventory Asset and COGS (Cost of Goods Sold). This structure helps QuickBooks maintain accurate tracking of asset values and expenses tied to each item.
Note: To ensure your inventory is accurate, be sure to follow the steps outlined in the next sections for each item as this will help you set up the correct quantity on hand and initial cost.
A. At first, you need to Turn On the Inventory tracking
- Click the Settings (gear icon) and choose Account and settings.
- Go to the Sales tab.
- In the Products and Services section, click the Edit icon.
- Make sure all relevant boxes are checked, especially Track inventory quantity on hand.
- Click Save, then select Done to apply your changes.
B. Now, update the quantity and cost of the items
- Go to Settings and select Products and Services.
- Find the item you want to update, then click Edit in the Action column.
- If the item isn’t already set as inventory, click Change type and select Inventory.
- In the Initial quantity on hand field, enter the exact quantity from your Inventory Valuation report (from QuickBooks Desktop).
- In the As of date field, enter the date that quantity becomes effective.
Note: Once you enter this date, you won’t be able to create any inventory transactions prior to it. - In the Cost field, input the product’s exact cost based on the same report.
- Click Save and Close to update the item.
C. Finally, Delete the Inventory Assets and COGS sub-products
- Click on Settings and navigate to the Products and Services section.
- Now, find the products that you just edited moments ago.
- From the Action column, you need to select the dropdown menu.
- Finally, click on Make Inactive.
Step 4: Offset the Old Inventory Asset Account
After updating your products and services, QuickBooks Online will automatically create a new account called “Inventory Asset-1” as the default. You’ll need to enter an adjustment for this using the Opening Balance Equity account as the offset.
Here are the steps offset an old inventory asset account:
- Click on + New from the left-hand menu.
- Choose Journal Entry from the list.
- On the first line, select your original inventory account, and enter the balance in the Credit column.
- On the second line, pick Opening Balance Equity, and enter the same amount in the Debit column.
- Click Save and Close to complete the adjustment.
So, these are the four steps that can help you to set up inventory after migrating from QuickBooks Desktop to QuickBooks Online. In case you face any trouble while executing the above-mentioned steps, it would be in your best interest to contact our Certified QuickBooks ProAdvisors at toll-free number +1-888-245-6075.
In a Nutshell
Moving your inventory from QuickBooks Desktop to QuickBooks Online might seem like a complex task at first, but with the right planning and clear steps, it becomes a smooth and rewarding transition. This migration isn’t just about transferring numbers; it’s about upgrading your inventory management to a more modern, flexible, and cloud-based system that can better support your business growth. From selecting the correct QuickBooks Online plan (Plus or Advanced) to preparing your data with key reports, such as Inventory Valuation and Balance Sheet, every step plays a crucial role in ensuring accuracy.
Setting your FIFO start date correctly, notifying the IRS about your change in costing method, and properly configuring your Products and Services list will help prevent inventory discrepancies down the road. Plus, the added functionality of QuickBooks Online, from mobile access and real-time updates to integrations with e-commerce platforms and improved reporting, means you’re not just migrating, you’re leveling up.
So, Follow the steps carefully, review your data often, and take advantage of all the features QuickBooks Online offers.
Frequently Asked Questions
Yes, you can transfer your QuickBooks Desktop data to QuickBooks Online. It comes with a built-in migration tool that helps you move your business file, including customers, vendors, and charts of accounts. Custom reports and audit trails, however, may not transfer completely, so you should review your data post-migration and make any necessary adjustments.
– Audit trail
– Custom templates
– Recurring transactions
– Bank reconciliation reports
– Payroll setup and history
– Memorized reports
– Budgets and forecasts
– Fixed Asset Manager data
– LIFO or Average Cost inventory (QBO uses FIFO)
– The file contains fewer than 750,000 targets
– Using QuickBooks Desktop 2018 or newer
– Verify the accuracy of key reports
– Understand that inventory will be moved to FIFO
– Log in only as the admin user
– Make a backup of your company files
– Disable payroll or bank feeds temporarily
– Maintain a stable internet connection
1. Verify it’s under the file size limit and that you’re using QuickBooks 2018 or later.
2. Switch to single-user mode in QuickBooks Desktop.
3. Make sure you save a copy before moving it.
4. Go to Company > Export Company File to QuickBooks Online.
5. Sign in to QuickBooks Online – Simply follow the instructions.
6. Choose all data or just key info.
7. QuickBooks will transfer your data and notify you via email.
8. Review your QuickBooks Online reports to ensure everything is correct.
