Table of Contents
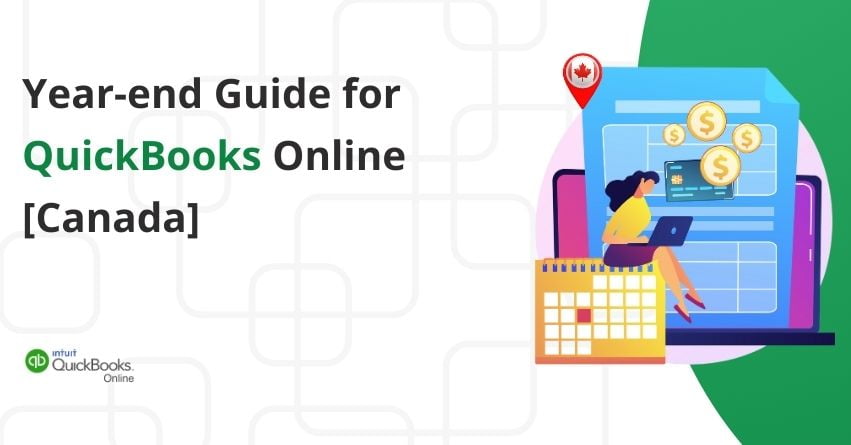
ToggleWelcome to the Fiscal Year-end Guide for QuickBooks Online tailored specifically for users in Canada. As the end of the fiscal year approaches, businesses must navigate the complexities of financial reporting, tax filings, and compliance requirements effectively.
In this article, we’ll explore the key reports you need to run at the end of the fiscal year in QuickBooks Online. These reports will provide you with a comprehensive overview of your finances, allowing you to assess your profitability, track expenses, monitor cash flow, and much more.
So, let’s dive in and explore the key reports you need to run at the end of the year in QuickBooks Online.
| It’s worth noting that the guidelines provided in this article assume a fiscal year from January to December. However, if your fiscal year differs, these tasks should be addressed in the final month of your fiscal calendar. Remember, corporate tax filings typically occur six months following the conclusion of your fiscal year, emphasizing the importance of timely and accurate financial reporting. |
What to do at the end of your fiscal year: At a Glance
| 1. Reconcile all your accounts 2. Run Balance Sheet and Profit & Loss Reports 3. Validate Capital Purchases and Disposals 4. File Sales Tax 5. (Optional) Unfile Sales Tax in QuickBooks Online 6. Close the Books in QuickBooks Online 7. Prepare T4s for your employees |
Run the essential year-end Reports
1. Reconcile all your accounts
Begin by reconciling all of your accounts to finalize the fiscal year’s financial records. Reconciling helps with having the most up-to-date and correct information in your financial reports when you prepare your taxes.
Reconciliation in QuickBooks Online is like balancing your checkbook. It’s a process where you match the transactions in your bank statement with what you’ve recorded in QuickBooks. By comparing these two sets of records, you ensure that everything lines up and that there are no mistakes or missing transactions. The process helps to ensure that important financial reports, like your Balance Sheet, are accurate.
Reconcile an Account in QuickBooks Online
Step 1: Select an account to reconcile
- Access the Gear icon in QuickBooks Online
- Select Reconcile from the dropdown menu.
- Choose the account you’re reconciling.
- If you’re reconciling multiple months, do this one by one, starting with the oldest statement.
Step 2: Start the reconciliation
Ensure all downloaded transactions are matched and categorized correctly if your accounts are linked to online banking.
| Check for any messages regarding previous reconciliations; if found, address them before proceeding. Click on We can help you fix it. |
- Verify that the Beginning balance in QuickBooks matches your statement. If they differ, follow the appropriate steps to reconcile.
- Input the Ending balance and Ending date from your statement, noting that some banks may refer to the ending balance as a new or closing balance.
- Review the Last statement’s ending date, which should precede the current bank statement’s start date.
- When prepared, click Start Reconciling to begin the process.
Step 3: Review and match transactions
- After entering the statement date and ending balance, review and match each transaction with those on your bank or credit card statement in QuickBooks.
- Mark matching transactions as cleared with a checkmark.
- If a transaction is missing from your statement but appears in QuickBooks, don’t mark it.
- Make adjustments if details like the payee are different by selecting the transaction and choosing Edit.
Step 4: Finish the reconciliation
- After reviewing and matching all transactions, QuickBooks calculates the variance between your records and your bank or credit card statement.
- If the difference is zero, your account has been successfully reconciled.
- However, if the difference isn’t zero, you may need to revisit your transactions to identify any discrepancies.
- Upon reaching the end of your transactions, the difference between your statement and QuickBooks should be CA $0.00.
- If it is, click Finish now to conclude the reconciliation process.
- You can also save your progress and finish later if necessary.
Step 5: Review past reconciliations
- Go to Settings and then choose Reconcile.
- Click on History by account.
- Utilize the drop-down menu to choose the account and desired date range.
- Alternatively, print or export your reconciliation reports for sharing purposes.
to resolve your query in no-time.
2. Run Balance Sheet and Profit & Loss Reports
Evaluate your business’s past year performance with key reports like the Balance Sheet and Profit and Loss reports. Generate these reports at the end of the year, ensuring the Transaction Date field covers the entire reporting year. This proactive approach helps in tax preparation and sets the stage for informed financial planning ahead.
Follow the steps to Run a Balance Sheet:
- Access Reports.
- Choose Balance Sheet.
- For a higher-level summary, opt for the Balance Sheet Summary report.
Follow the steps to run the Profit and Loss report:
- Click on Reports in QuickBooks Online.
- Located under the Business Overview section, select the Profit and Loss Detail report.
- Modify the reporting period to a specific month.
- Click on Run report to generate the desired Profit and Loss Detail report.
3. Validate Capital Purchases and Disposals
- Ensure all capital purchases and disposals are properly recorded in your accounting books.
- These transactions include buying assets like equipment, land, or vehicles, which are considered capital purchases, as well as disposing of them, such as selling equipment or writing off a vehicle in an accident.
- It’s important to gather receipts for these transactions for your accountant when preparing your taxes. This ensures accurate reporting and helps you stay compliant with tax regulations.
4. File Sales Tax
It’s important to file sales tax in January no matter if you file your sales tax once a year or more often, like quarterly or monthly. Refer to the schedule given to you by the CRA (Canada Revenue Agency) to know when your specific filing deadline is. Whether you’re a small business owner or a larger enterprise, meeting your sales tax obligations on time helps you avoid penalties and stay compliant with tax regulations.
5. Unfile Sales Tax in QuickBooks Online
In case of any mistakes, you have the option to unfile your taxes. Follow to steps below:
| Note: Accountants and bookkeepers using QuickBooks Online Accountant can easily unfile sales tax returns. |
- Choose Taxes.
- Select Sales Tax.
- Go to the Returns tab.
- Find the sales tax filing you want to unfile.
- In the Action column, open the drop-down menu.
- Choose Undo filing.
- A window will appear asking Are you sure you want to go back?
- Review the information and select Undo filing.
- A notification will show next to your open filing, indicating the date the return was reopened.
6. Close the Books in QuickBooks Online
Closing your books is essential before tax filing to prevent unwanted changes. It locks your accounting data until the closing date, ensuring the accuracy and integrity of financial reports for the previous year.
Step 1: Review your accounts
- Log in to QuickBooks Online as the primary user or company administrator.
- Review your accounts.
- Record any pending invoices, expenses, and payments.
- Ensure your accounts are reconciled until your closing date.
- Check and review your inventory levels.
Step 2: Close your books
- Access Settings and select Accounts and Settings.
- Choose the Advanced tab.
- Click Edit in the Accounting section.
- Click on the Close the Books switch.
- Set a closing date, allowing yourself a deadline. Transactions should not require editing beyond this date.
- If desired, select the option to require a password before making changes to closed books.
- Click Save and then Done to apply the changes.
7. Prepare T4s for your employees
Make sure you give your employees their T4 forms and send them to the CRA by the end of February. Use the articles provided to help you understand how to file T4s, T4A, and T5018 forms, and Relevé-1.
Dates to Remember
As you work through your year-end plan, don’t forget these important dates for your T4 and RL-1 forms.
| January 1, 2024 | T4s and RL-1s can be accessed within QuickBooks Online Payroll. |
| January 4, 2024 | You can electronically file your forms with the Canada Revenue Agency and Revenu Québec through their online platforms. |
| February 29, 2024 | The deadline to export your T4 file from QuickBooks Online Payroll and submit T4s and RL-1s to the CRA and Revenue Quebec is approaching. Additionally, you must provide your employees with a copy of these forms for their records, which they will use for their income tax filings. |
Conclusion
Running specific QuickBooks reports at the end of the year is vital for understanding your business’s finances. These reports give you a clear picture of your company’s performance, helping you make smart decisions and plans. By examining balance sheets, profit and loss statements, and other key reports, you can evaluate profitability, and keep accurate financial records. By reconciling accounts, running balance sheets and profit and loss reports, validating capital purchases, filing sales tax, and closing your books, you ensure accurate financial records and compliance with tax regulations.
Frequently Asked Questions
1. Review the first month of your fiscal year
2. Review customer account balances
3. Clear any outstanding deposits
4. Review vendor account balances
5. Reconcile all accounts
6. Run year-end reports
7. Distribute profits from the business as needed
8. Prepare your tax returns with your accountant
9. Reclassify transactions as needed
10. Close your books
The reports you generate will vary based on the type of tax you’re filing and the specific information needed for your business. However, commonly used reports include Profit and Loss, Balance Sheet, Sales Tax Liability, and Payroll Tax Liability.
1. Profit and Loss Summary.
2. Balance Sheet Summary.
3. Open Sales Orders.
4. Pending Sales.
5. A/R Aging Summary and A/P Aging Summary.
6. Sales by Customer Summary.
7. Sales by Representative Summary.
8. Open Purchase Orders.
9. Expenses by Vendor Summary
10. Outstanding Checks Report
Yes, before filing your taxes, it’s important to close your books for the year to prevent any unwanted changes. Closing your books locks your accounting data, ensuring that no modifications can be made before the closing date. This step is crucial when reviewing the financial data from the previous year.