
Creating and importing a QuickBooks Accountant’s Copy is a crucial process for seamless collaboration between businesses and their accountants. This facilitates efficient sharing of financial data while allowing accountants to make necessary adjustments.
In this article, we will explore the step-by-step procedures to both create and import a QuickBooks Accountant’s Copy, ensuring a smooth and secure exchange of financial information. Understanding these processes is essential for businesses aiming to streamline their financial management in collaboration with their accounting professionals.
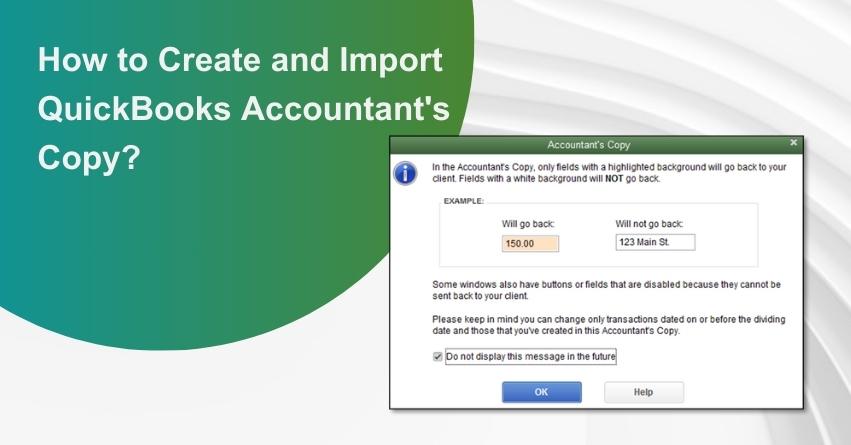
What is a QuickBooks Accountant’s Copy?
Before going ahead with the creation of Accountants copy keep the following things in mind:
- Determine the dividing date before creating the accountant’s copy.
- Transaction entry is limited to the current period (after the dividing date) once the accountant’s copy is generated.
- Your accountant can input transactions on or before the dividing date.
- Be aware of restrictions imposed when the accountant’s copy is active.
- Refrain from removing restrictions before importing the accountant’s changes.
- Once these considerations are addressed, you can confidently move forward with the QuickBooks import accountant’s copy procedure.
How to Generate QuickBooks Accountant’s Copy?
To generate an accountant’s copy, adhere to the steps outlined below:
- Navigate to the “File” option, select “Accountant’s Copy,” then click on “Client Activities” and “Save File.”
- Confirm your intent to create an Accountant’s Copy and proceed by clicking “Next.”
- Choose a dividing date and click “Next.”
- Optionally, modify the file location and filename QuickBooks suggests for the accountant’s copy. Ensure the file extension is .qbx.
- Save the details and provide the accountant’s copy transfer file to your accountant, enabling seamless collaboration.
How to Transfer QuickBooks Accountant’s Copy?
Once you’ve created an accountant’s copy in QuickBooks, determining how to share this file with your accountant is essential. It can be sent via email, on a storage device, or utilizing Intuit web services. Follow these instructions to send the file:
- Navigate to the File menu, choose Accountant’s Copy, and select Client’s Activities.
- Click on Send to Accountant.
- Confirm when prompted and click Next.
- Choose a dividing date and click Next.
- Enter your accountant’s email address and proceed with Next.
- Set a password for secure transfer.
- Provide the password to your accountant for file access.
- Finally, transfer the file to your accountant by selecting Send.
Upon successful transfer, QuickBooks displays “Accountant’s Changes Pending” in the title bar, indicating the status of the accountant’s changes.
Importing Accountant’s Copy in QuickBooks
When your accountant provides the accountant’s change file (.qby), importing it into QuickBooks becomes crucial for seamless collaboration. To accomplish this, ensure you are logged in as the Administrator. Importing an accountant’s copy in QuickBooks can be achieved through the web or from a file, with options to analyze changes and remove restrictions. Here’s a detailed guide:
A. Importing Accountant’s Copy through the Web
- Open QuickBooks, go to the “File” option, and select “Open or Restore Company,” then “Open a Company File.“
- Click “Browse” and choose the company file, then click “Open” and enter your credentials.
- Go to the “File” option again, select “Accountant’s Copy,” and click “Import Accountant’s Changes from the Web.”
- For Premier Accountant edition or Enterprise Solutions, navigate to File> Client Activities> Import Accountant’s Changes from Web.
- Save your current accountant’s copy after importing the changes.
B. Importing Accountant’s Copy through File
- Launch QuickBooks, go to the “File” option, and select “Open or Restore Company,” then “Open a Company File.”
- Click “Browse,” select your company file, click “Open,” and enter login credentials.
- Return to the “File” menu, select “Accountant’s Copy,” and choose “Import Accountant’s Changes from the File.”
- For Premier Accountant edition or Enterprise Solutions, go to File> Client Activities> Import Accountant’s Changes from File.
- Revise your accountant’s copy in .qby file extension and open the file.
C. Analyzing Changes
- Review accountant’s changes by clicking the Plus icon for instructions.
- Select “Save as PDF” or “Print” to create a duplicate copy with amendments.
- Choose “Incorporate Accountant’s Changes” to retrieve your accountant’s copy.
- Click “Ok” and close QuickBooks.
- Click “Ok” to take a backup.
- Select a location to save the file and click “OK.”
- On the “Incorporate Accountant’s Changes” page, evaluate changes and follow prompts to resolve any issues.
- Close the window after reviewing changes.
By following these steps, you ensure a smooth and secure import of your accountant’s copy in QuickBooks, allowing for effective collaboration and financial management.
Factors Contributing to QuickBooks Unable to Create Accountant’s Copy
In QuickBooks, the accountant’s copy is a version of the company file that allows you to make changes to the data seamlessly. When you’re ready to apply changes in the QB Accountant Transfer file, you can easily revert any modifications for smooth data import into the company file. Encountering the “QuickBooks Unable to Create an Accountant’s Copy” error is not uncommon. Before attempting to resolve this issue, it’s crucial to understand the underlying causes. Here are some common issues:
- Your QuickBooks Desktop may need an update.
- The Company Data file could be damaged.
- Slow internet connection or firewall issues may be affecting data upload.
- Using a long dash in MS Word and then copying it into notes can trigger the problem.
- The QBW file exceeds 200MB in size.
- There may be difficulties sending data to the Intuit server.
The QuickBooks error can manifest when attempting to transmit the Accountant’s Copy using the file transfer method. If you’re sending the Accountant’s Copy through the Accountant Copy’s File Transfer Service (ACTF), you might encounter the following cautionary message:
- Error: Problem in sending the file to the Intuit Server
- Warning: There was a problem sending the changes to the accountant’s copy file transfer server. Try again later or save the file and send it via email.
This notification indicates a hiccup in transmitting data to the Intuit Server, prompting the need for troubleshooting. Whether delaying the attempt and retrying later or opting for an alternative method like saving the file for email transmission, addressing this warning promptly is essential for seamless collaboration between QuickBooks users and their accountants.
Frequent QuickBooks Errors that occur during the Creation or Handling of an Accountant’s Copy
Encountering issues in QuickBooks Desktop while working with an Accountant’s copy (.QBX) or a company file (.QBW) can lead to various errors and unexpected outcomes. These may include:
- Error: Unable to proceed, indicated by a significant red “X” when working on the Accountant’s Copy.
- Error: Difficulty in creating an Accountant’s Copy, preventing the intended process.
- Warning: Cautionary message about backing up an Accountant’s Copy, urging attention during the backup process.
- Error: Notification that an Accountant’s Copy already exists, causing potential conflicts.
- Alert: Reconciliation rollback, disrupting the progress of your reconciliation efforts.
- Warning: Advisory notice when opening a QBA file, signaling that it’s an Accountant’s copy of the company’s data.
- Error: “Specified database is invalid” or “Invalid database server command line” when attempting to open an Accountant’s Copy or Portable file.
- Error: Codes 6xxx, and xx indicate issues when converting an Accountant’s Transfer file.
Ways to Address the Challenge of QuickBooks Unable to Create Accountant’s Copy Problem
Solution 1: Confirm Your Company Filename for Special Characters
- The initial step in tackling the challenge of being unable to create an Accountant’s Copy in QuickBooks involves checking your company file name for any special characters.
- It is essential to ensure that there are no commas in both the file name and the company name, specifically for QuickBooks Desktop 2017.
Solution 2: Keep QuickBooks Up to Date for Seamless Operation
It’s crucial to note that the Accountant File Transfer service is compatible only with specific versions of QuickBooks Desktop: 2017 (R14), 2018 (R12), or 2019 (R9), and QuickBooks Desktop Enterprise 17 (R14), 8 (R12), or 19 (R9). If you’re utilizing an older version, attempting to create an accountant copy may fail without a clear explanation due to incompatibility with ACFT.
- Navigate to the Help menu and select “Update QuickBooks Desktop.”
- Locate the “Update Now” tab and ensure to checkmark the box for reset updates.
- Click on “Get Updates” to initiate the download process.
- Once the download is complete, restart your QuickBooks software.
- Follow the on-screen instructions to reinstall the release.
Note: If issues persist after the update, consider restarting your computer before attempting the steps again when encountering problems with sending or receiving Accountant Copy files.
Solution 3: Optimize Company File Size
If your QuickBooks company file surpasses the 200 MB threshold, sending it to the Intuit server may pose challenges. To mitigate this issue, consider the following approaches:
A. Create a Portable Version:
- Generate a portable version of the company file, making it more manageable for transmission.
- Open the company file, then press the F2 key to access the product information window.
- If the file size exceeds 200,000 KB (200 MB), an error may occur. To address this, try the following:
- Create or Restore a QuickBooks portable company file, aiming to reduce the file size.
- Alternatively, manually save and send the QBX/QBY without using the Accountant File Transfer service.
B. For Files Below 200 MB:
- If your company file size is under 200 MB, proceed to explore the next solution.
Solution 4: Employ QuickBooks File Doctor for File Repair
- When faced with a damaged company file, QuickBooks File Doctor can serve as a reliable solution. This tool is a lifeline for many users, adept at resolving various errors, particularly those related to company files and network issues.
- Access this tool either by downloading it from Intuit’s website or through the QuickBooks Tool Hub for a comprehensive resolution of company file damage issues.
Solution 5: Ensure Full Permissions for Smooth Accountant’s Copy Creation
To ensure a seamless creation of an Accountant’s Copy, it’s essential to grant full permissions to the files. Follow these steps:
- Navigate to the folder where QuickBooks is stored and right-click on the file, then select the “Sharing and Security” option.
- In the resulting dialog box, select the “Permission” option.
- Click on “Add Browse” to locate the current QuickBooks data service user.
Note: This may vary with each updated version, so be sure to grant the account change and read permissions before creating the accountant’s copy.
Create an accountant’s copy. Avoid any unusual characters in the file path to ensure a smooth experience.
Solution 6: Steer Clear of Long Dashes in MS Word
When preparing files for client transmission and making necessary changes, adhere to the following guidelines:
- Refrain from using long dashes when inputting text in client notes.
- Open a new Text Editor, such as Notepad.
- Paste the text into the Text Editor, ensuring the exclusion of long dashes.
- Once the text is appropriately edited, send the document file to the client in the form of a QBY file.
Solution 7: Test and Repair Company File for Optimal Performance
Step 1: Test the Company File for Data Damage
- Click on “File” and select “New Company < Express Start or Start Setup.”
- Create a new file and forward the accountant’s copy.
- If no errors occur in the new file, return to the original Company file for repair.
Step 2: Repair the Company File
Fix the Company file using the following methods:
- Utilize the Verify and Rebuild Data tool (File < Utilities < Rebuild data < Verify data).
- Employ the QuickBooks File Doctor Tool from Tool Hub.
- Explore Quick Fix My Program from Tool Hub.
- Rename ND and TLG files in the QuickBooks folder.
Step 3: Restore the Company File Backup
If the errors persist, restore the company file backup:
- Navigate to “File < Open or Restore Company.”
- Click “Restore a Backup Copy” and hit Next.
- Opt for Local Backup, then Next, and select the file to restore along with the location to save it.
- Save the file in the original Company file folder, replacing the damaged Company file.
Limitations of the Current Accountant’s Copy in QuickBooks
Upon creating the accountant’s copy, certain limitations may impact your workflow and collaboration with your accountant. Understanding these restrictions is crucial for effective financial management. Here are the limitations:
1. Transactions
- User actions on transactions are limited to those occurring after the dividing date.
2. Accounts
- Creating a different account is allowed, but sub-accounts cannot be added to the former account.
- Existing or previous accounts can be merged, edited, or removed.
- For fresh accounts, updates or removals are permissible if the accountant possesses a copy.
Lists (excluding Chart of Accounts):
- Editing, sorting, or inactivating list items is permitted.
- Merging or deleting list details is not accessible.
3. Reconciling
- Reconciling the account is feasible when the accountant possesses the accountant’s copy.
- Post the dividing date, reconciliations with transactions in the current period are permanently saved and cannot be altered or deleted.
- To prevent conflicts with accountant-made changes, reconciliations with transactions on or before the dividing date will be unsaved during the import of accountant’s changes.
Having understood the limitations, the next concern is often how to import the accountant’s copy in QuickBooks, a query we will address in the following information.
How to Lift Accountant’s Copy Restrictions in QuickBooks?
Removing the Accountant’s Copy restrictions in QuickBooks Desktop signifies invalidating the initial accountant’s copy. This action is typically taken when an accountant requests another copy or when there’s a need to address data damage in company files. Before proceeding, ensure you’ve backed up your company file. Follow these steps to remove restrictions:
- Navigate to the “File” menu and select “Send Company File.”
- Choose the Accountant’s copy.
- Under client activities, click on “Remove Restrictions.”
- Opt for “Yes, I want to remove Accountant’s copy restrictions” and click “OK.”
Guide on Generating a Local Backup Copy for QuickBooks Desktop Company File
If the accountant’s copy fails, follow these steps to create a backup of your QuickBooks Desktop company file:
- Begin by selecting “File” in QuickBooks.
- Switch to single-user mode by clicking on “Switch to Single User Mode.”
- From the file menu, choose “Backup Company” and select “Create Local Backup.”
- In the Create Backup dialog, opt for “Local Backup.”
- Select “Options” to open the Backup Options dialog.
- Choose “Browse” and designate the location to save the backup copy in the “Tell us where to save the backup copy” field.
- In the online backup section, select “Remind me to backup when I close my company file” to set backup reminder frequency.
- Choose one of the verification options to ensure data integrity and be alerted to any corruption.
- Click “OK.”
- In the Create Backup window, specify whether to back up automatically and select options for automatic backups.
- Click “Finish.”
Conclusion
The challenge of QuickBooks being “Unable to Create Accountant’s Copy” requires attention to file details, compatibility, and permissions. By implementing the suggested solutions, users can overcome this hurdle, ensuring a smooth collaboration with accountants and maintaining integrity.
If you still have queries about the Error “QuickBooks Unable to Create Accountant’s Copy” reach out to experts at toll-free phone number i.e. 1-888-245-6075.
Frequently Asked Questions
The QuickBooks Accountant’s Copy is a specific file type facilitating collaborative work between users and clients on their respective files.
1. First, navigate to the “File” menu and select “Send Company File.”
2. Next, click on “Accountant’s Copy,” then “View/Export Changes for Client.”
3. Finally, save the file.
To eliminate Accountant’s Copy restrictions in QuickBooks:
1. Navigate to the File menu and choose Send Company File.
2. Opt for Accountant’s Copy and then go to Client Activities.
3. Click on Remove Restrictions.
4. Choose Yes, I want to remove the Accountant’s Copy restrictions, and then click OK.
The inability to create an accountant’s copy in QuickBooks could be due to several reasons. Firstly, ensure QuickBooks Desktop is up to date. Additionally, using a long dash in MS Word for notes might trigger this issue. A long dash is created in Word by entering two single dashes between hyphenated words, potentially causing compatibility issues.
To restore an accountant’s copy in QuickBooks:
1. Click on the “File” menu.
2. Hover over “Accountant’s Copy” and select “Import Accountant’s Changes from File.”
3. If using Enterprise Solutions or Premier Accountant edition, click on the “File” menu, hover over “Client Activities,” and choose “Import Accountant’s Changes from File.”
