
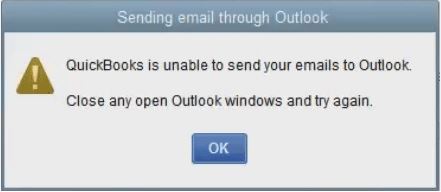
Encountering an issue where QuickBooks is unable to send your email to Outlook can be a bit frustrating, but don’t worry—we’re here to help you navigate through it. In this situation, you might find yourself wanting a smooth connection between QuickBooks and Outlook, and we’ll explore some steps to troubleshoot and resolve this hiccup. The error message shows up in the form “QuickBooks unable to send your email to Outlook.”
Let’s dive into the solution to ensure you can seamlessly manage your emails without any disruptions.
Factors Contributing to the Error “QuickBooks Unable to Send Your Email to Outlook“
Here are some potential reasons why QuickBooks might be having trouble sending your emails to Outlook
- Incorrect Email Preferences: If your email preferences are not set up correctly in QuickBooks, it could result in this error.
- Damaged MAPI32.dll File: The MAPI32.dll file, essential for communication between QuickBooks and Outlook, might be damaged, causing the issue.
- Non-Administrator Access: Running QuickBooks without administrator privileges could lead to difficulties in sending emails via Outlook.
- Internet Explorer Settings: Incorrect settings in Internet Explorer may trigger the QuickBooks error when trying to send emails through Outlook.
Addressing these factors should help resolve the issue, ensuring a smoother experience with QuickBooks and Outlook integration.
Considerations to Keep in Mind before Fixing “QuickBooks is Unable to Send Your Email to Outlook“
- Secure Your Data: Create a local backup to ensure that all your essential information is protected. This step acts as a safety net, allowing you to easily restore data if needed.
- Verify Compatibility: Check whether your Outlook software aligns with the system requirements specified for your QuickBooks version. Compatibility is key for a seamless interaction between the two platforms.
- Inspect Antivirus and Firewall Settings: Take a look at your antivirus and firewall configurations. Ensure that QuickBooks has the necessary access permissions. Sometimes, security measures can unintentionally impede QuickBooks, so confirming access settings is crucial for smooth functioning.
Also Read:- 5 Ways to Fix QuickBooks Gmail Not Working Problem
Steps to Fix the Error “QuickBooks Unable To Send Your Email To Outlook”
Procedure 1: Execute QuickBooks with Administrator Privileges
Inadequate administrative privileges could be the culprit behind the QuickBooks error preventing the sending of emails to Outlook. To ensure you have the necessary admin rights for smooth email transactions in QuickBooks, take the following steps:
- Right-click on the QuickBooks Desktop icon and select Properties.
- Navigate to the Compatibility tab.
- Ensure the software runs with administrator privileges by selecting the corresponding option.
- Click on “Show Settings for All Users” to cover all user settings.
- Apply the changes, then click OK to complete the process.
These simple steps will help ensure that QuickBooks has the required administrative access, potentially resolving issues with email communication to Outlook.
Procedure 2: Adjust QuickBooks Email Preferences
To address this error, adjusting your email preferences in QuickBooks can be a solution. Follow these steps:
- Open QuickBooks.
- Navigate to Preferences in the Edit menu.
- If you’re using Microsoft Exchange Server with M.S. Outlook, ensure Outlook is open and logged in.
- Then, select “Send Forms” and go to the My Preferences tab.
- Set Outlook as the default email program and click Ok.
Test sending an email. If the error persists, follow these additional steps:
- Choose Edit and then select Preferences.
- Select the Send Forms option.
- In the My Preferences tab, opt for QuickBooks Email or Webmail and click Ok to turn off this preference.
- Return to the My Preferences tab, select Outlook, and click Ok.
- Close all background programs.
- Restart QuickBooks and attempt to send a test email. If the error continues, proceed to the next method.
These steps aim to resolve the error by adjusting email preferences and ensuring the correct settings for a seamless email experience in QuickBooks.
Procedure 3: Modify Email Preferences in Internet Explorer
Here’s how you can adjust your email preferences in Internet Explorer to resolve the issue:
- Close the QuickBooks program.
- Open Internet Explorer (I.E.).
- Navigate to Tools, then select Settings.
- Click on Internet Options.
- In the Programs tab, choose Set Programs.
- Set your default program, and select your email provider.
- Click Apply, then hit Ok.
- Close Internet Explorer and reopen QuickBooks.
- Send a test email through QuickBooks to ensure that the error related to QuickBooks not sending emails to Outlook has been resolved.
These steps aim to adjust Internet Explorer settings to enhance the compatibility between QuickBooks and Outlook for smoother email transactions.
Procedure 4: Fixing the “MAPI32.dll” File
A problematic MAPI32.dll file can be a culprit behind the QuickBooks error encountered during email sending. To address this, follow these steps:
1. Run a Diagnostic Test
- Reboot your system to initiate the diagnostic process.
- Access Microsoft Word and create a new document.
- Navigate to the File menu and select “Send.”
- Choose “Email as PDF Attachment.”
2. Repair the MAPI32.dll File
- Close all running programs, including QuickBooks.
- Click on the Windows Start button.
- Open File Explorer by typing “File Explorer” into the search box.
- Locate the System32 folder in the C Drive.
- Search for the Fixmapi.exe file in the System32 folder.
- Follow on-screen directions to execute the repair.
- Restart your computer once the fix is complete.
3. Rename MAPI32.dll (Advanced Step)
Note: Consider this step only if the issue persists after troubleshooting MAPI32.dll.
- Begin by closing all currently running programs.
- Use File Explorer to navigate to ‘C:\Program Files (x86)\Common Files\System\MSMAPI\1033’.
- Rename ‘MAPI32.dll’ to ‘MAPI32.dll.OLD’.
- After restarting your PC, run ‘Fixmapi.exe’ again.
- Once ‘Fixmapi.exe’ completes its process, restart your computer once more.
By performing these steps, you aim to diagnose and repair any issues associated with the MAPI32.dll file, ensuring smoother email functionality in QuickBooks.
Procedure 5: Perform a Fresh Installation of QuickBooks
To address the persistent email-related error in QuickBooks, consider opting for a clean installation of the program. Follow these steps for a fresh start:
- Access the Control Panel from the Start menu.
- Navigate to “Programs and Features.”
- Click on QuickBooks and then select the “Uninstall/Change” button.
- After the uninstallation process is complete, rename the QuickBooks folder, and proceed to reinstall QuickBooks. Ensure you have your original product keys for activation.
- After reinstalling, attempt to send a test email through QuickBooks to verify if the error has been resolved.
By following these steps, you initiate a clean installation, which often proves effective in resolving lingering issues and ensuring optimal performance of QuickBooks.
Also Read:- How to Setup Email in QuickBooks Desktop?
Procedure 6: Attempt to Repair Outlook
- Navigate to the Control Panel on your Windows system.
- Select the “Programs” option.
- Click on “Programs” once again or choose “Uninstall a program.”
- A list of installed applications will appear on your screen.
- Locate and select the Microsoft Outlook program.
- Click on the “Uninstall/Change” option.
- In the uninstall wizard, opt for the “Repair” option.
- Follow the steps provided to repair your MS Outlook program.
- Ensure you complete the process to successfully repair Outlook.
- Once done, try sending an email from QuickBooks to Outlook to check if the issue has been resolved.
Procedure 7: Addressing Missing Primary Interop Assembly
If you installed QuickBooks before Microsoft Office, you might encounter an issue with the missing Primary Interop Assembly. Follow these steps to check and resolve:
- Examine your system to ensure the Primary Interop Assembly is installed. Check the directory: C:\Program Files (x86)\Intuit\Statement Writer 20XX
Note: XX represents your QuickBooks version
- If the directory is present, run the vstor.exe file to install the missing assembly.
This action ensures that the necessary assembly is in place, potentially resolving issues related to its absence and improving compatibility between QuickBooks and Microsoft Office.
Procedure 8: Ensure QuickBooks Compatibility with Your Microsoft Outlook Version
To resolve compatibility issues, confirm that your QuickBooks version aligns with the requirements of your Microsoft Outlook version. Follow these steps:
- Check the system requirements specified for your QuickBooks version. If you’re using the latest version, such as QuickBooks 2021, verify its compatibility with the Microsoft Outlook version required for your accounting software.
- If the versions don’t match, update your Microsoft product accordingly to meet the compatibility criteria.
This step ensures that both QuickBooks and Microsoft Outlook are in sync, potentially resolving any compatibility-related obstacles and enhancing the seamless integration of these essential tools.
Procedure 9: Update Your Microsoft Outlook Program
Follow these steps to update your Microsoft Outlook program, resolving potential issues:
- Click on the File menu in Microsoft Outlook.
- Choose the Account option.
- Navigate to Product Information.
- Select Update Options.
- Click on Update Now to initiate the update.
- You will be notified once the update is complete.
- Attempt to send emails using QuickBooks after the update.
Also Read:- Resolving QuickBooks Com Error Crash while Mailing Invoices
Conclusion
If you’re facing the challenge of QuickBooks being unable to send your emails to Outlook, worry not. We’ve discussed some steps to troubleshoot and overcome this hurdle. Remember, technology glitches happen, but with a little bit of patience and the right guidance, you can navigate through them. By following the suggested solutions, you’ll hopefully find yourself back on track, seamlessly managing your emails through QuickBooks and Outlook without any disruptions.
If the issue persists, don’t hesitate to seek further QuickBooks assistance, from our experts at our Toll-free Phone Number i.e. +1-855-875-1223 ensuring you can make the most of these essential tools for your business.
Frequently Asked Questions
Configure Outlook for QuickBooks:
1. Reach out to your internet or email provider for the necessary information: Username, Password, Incoming email server address, and Incoming email server type.
2. Adjust Outlook settings.
3. Navigate to the QuickBooks Edit menu.
4. Choose Preferences and then Send Forms.
5. Select Outlook and click OK.
If your QuickBooks Desktop version requires a supported Microsoft Outlook version and you find that your current version is not compatible, the solution is to either upgrade your existing Microsoft Outlook or switch to a supported version. Additionally, ensure that your profile is set up correctly in Microsoft Outlook, as an incorrect or incomplete setup might also contribute to the issue. These steps will help maintain seamless integration between QuickBooks Desktop and Microsoft Outlook.
Absolutely! To ensure smooth functionality between QuickBooks and Outlook, it’s crucial to configure specific settings in Outlook. Here’s a breakdown:
1. Correct Outlook Profile Setup: Ensure that the Outlook profile is accurately set up and configured.
2. Proper Email Account Configuration: The email account associated with Outlook should be configured correctly to avoid any conflicts.
3. Default Email Settings Configuration: Set the default email settings in QuickBooks to align with Outlook for seamless communication.
4. Security Settings Check: Verify the security settings within Outlook to confirm they are not obstructing QuickBooks from sending emails.
To update your customer-facing or outgoing email address, follow these steps:
1. Click on Settings, then go to Company Settings.
2. The Company tab will be automatically selected. Click on Edit next to the Contact Info section.
3. Input your company’s email address in the Company email field.
4. Click Save and then Done to ensure your changes are saved.
Customize Your Email Preferences in QuickBooks
1. In QuickBooks, navigate to the Edit menu and choose Preferences.
2. If you’re using Microsoft Outlook with Microsoft Exchange Server, ensure Outlook is open and log in before proceeding.
3. Select Send Forms from the menu.
4. Choose Outlook as your preferred email option.
5. Click OK to save your preferences.
These steps allow you to tailor your email settings in QuickBooks, ensuring seamless integration with Outlook for sending forms and documents.
1. Make sure that your QuickBooks email preferences are verified.
2. Ensure QuickBooks is running in admin mode.
3. Address any issues with the corrupted MAPI32.
4. Adjust Firewall and Antivirus settings accordingly.
5. Employ the Microsoft Support and Recovery Assistant for downloading and troubleshooting.
6. Utilize Webmail for sending emails directly from QuickBooks.
7. Consider a clean reinstall of QuickBooks using the Clean Install Tool.
8. Start Outlook in safe mode.
9. Repair Outlook data files if encountering problems.
10. Manage QuickBooks Outlook add-ins within Microsoft 365.
