
Bank reconciliation is a crucial financial management process that helps ensure the accuracy of your financial records in QuickBooks Online. By reconciling your bank statements with your QuickBooks records, you can identify and resolve any discrepancies, ensuring that your financial data is up-to-date and error-free.
The bank reconciliation process involves comparing the transactions recorded in your QuickBooks Online account with the transactions reported by your bank. This not only helps in detecting potential errors but also ensures that all financial activities, such as deposits, withdrawals, and transfers, are accurately reflected in both systems.
In this guide, we’ll walk through the steps of performing bank reconciliation in QuickBooks Online, providing you with a comprehensive understanding of the process to maintain the integrity of your financial data and make informed business decisions.
Overview: Reconcile Bank Account in QuickBooks Online
QuickBooks Bank Reconciliation is a vital financial process that ensures the alignment of recorded transactions in QuickBooks with those in your bank statement. This method helps identify and rectify discrepancies, guaranteeing accurate financial data representation. Regular reconciliation enhances precision, detects potential errors or fraud, and provides a reliable basis for financial decision-making.
Reasons to Reconcile Bank Account in QuickBooks Online
Reconciling accounts in QuickBooks Online is crucial for several reasons:
- Accuracy: Ensures that the financial data in QuickBooks matches the actual transactions in your bank statements, maintaining precision and reliability.
- Fraud Detection: Helps identify unauthorized transactions or potential fraudulent activity by comparing records with bank statements.
- Financial Reporting: Provides a clear and accurate picture of your business’s financial health, aiding in informed decision-making.
- Compliance: Supports compliance with accounting standards and regulations by maintaining accurate and up-to-date financial records.
- Error Prevention: Detects and rectifies discrepancies promptly, preventing the propagation of errors in financial reporting.
- Decision-Making Confidence: Enables business owners and managers to make confident decisions based on accurate and reconciled financial data.
Benefits of Conducting Bank Reconciliation in QuickBooks Online
QuickBooks offers valuable bank reconciliation features to streamline and enhance your financial management:
- Automatic Syncing: QuickBooks effortlessly syncs with one or multiple bank accounts, ensuring real-time updates and reducing manual data entry.
- Smart Categorization: It intelligently organizes your records into sections based on your preferences, saving time and providing a structured overview.
- Transaction Management: QuickBooks allows you to mark and hide incomplete transactions, maintaining accuracy and clarity in your financial records.
- Transaction Ignoring: It automatically excludes uncleared transactions, preventing them from impacting your reconciled bank balances.
- Transaction Matching: The feature efficiently matches your recorded transactions with those on your bank statement, streamlining the reconciliation process for enhanced accuracy.
Steps to Reconcile Bank Account in QuickBooks Online
Step 1: Review Your Opening Balance
If it’s your first time reconciling, check that your opening balance matches your real-life bank account.
A Quick Tip: Linking your bank and credit cards to online banking can automate this process for you.
Step 2: Begin Reconciliation
Once armed with your monthly bank or credit card statement, start reconciling. Take it one statement at a time, beginning with the oldest. Ensure all transactions from online banking are matched and categorized correctly.
- Ensure proper matching and categorization of all downloaded transactions if your accounts are linked to online banking.
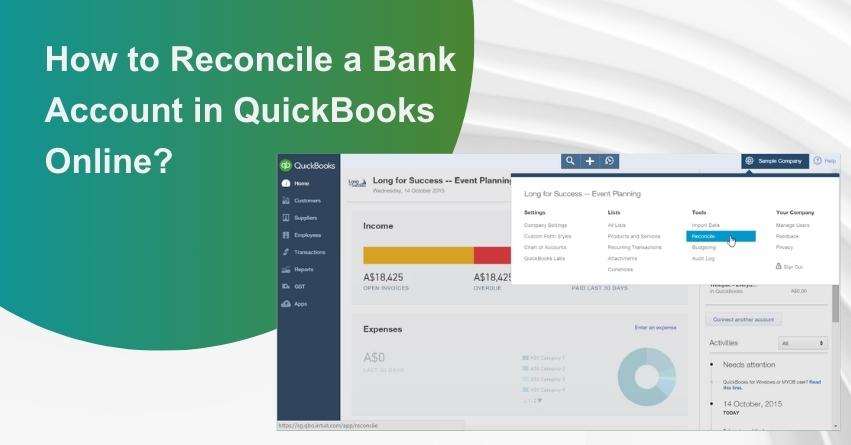
- Navigate to Settings and select Reconcile.
- If it’s your first reconciliation, click on Get Started.
- Choose the Account to reconcile from the Account dropdown.
- Confirm that the selected account matches the one on your statement.
Important Note: If you encounter a message regarding a previous reconciliation, choose the option “We can help you fix it.” It’s crucial to address this before proceeding with the current reconciliation process. - Review the Beginning balance to ensure alignment with your statement; resolve any disparities if identified.
- Enter the Ending balance and Ending date from your statement, noting that some banks refer to it as a “new balance” or a “closing balance.”
- Check the Last statement ending date, representing the end date of your previous reconciliation; your current bank statement should commence the day after.
- When prepared, click on Start Reconciling to initiate the reconciliation process.
Step 3: Compare with QuickBooks
Now, compare each statement transaction with QuickBooks entries. Ensure dates and transactions align accurately. Follow specific steps based on whether your accounts are connected to online banking or not.
1. Reconciliation of accounts linked to online banking
- Begin reconciliation with the first transaction on your statement.
- Locate the corresponding transaction in the QuickBooks Reconciliation window.
- Compare the two transactions; mark matching transactions with a checkmark in QuickBooks.
- Transactions added or matched from online banking are pre-selected for efficiency.
- If a transaction is absent from your statement but appears in QuickBooks, avoid marking it.
- Thoroughly compare each statement transaction with QuickBooks entries.
Note: If you identify a matching discrepancy (e.g., minor payee differences), select the transaction in QuickBooks, expand the view, and Edit as needed. - Aim for a $0.00 difference between your statement and QuickBooks; if achieved, select Finish now.
2. Reconciliation of accounts that aren’t linked to online banking
- Initiate reconciliation by addressing the first transaction on your statement.
- Locate the corresponding transaction in the QuickBooks Reconciliation window.
- Compare the two transactions; denote matching ones with a checkmark in QuickBooks to signify reconciliation.
- If a transaction appears in QuickBooks but is absent from your statement, refrain from marking it.
- Scrutinize each statement transaction against QuickBooks entries.
Note: For minor mismatches (e.g., payee details), confidently select the transaction in QuickBooks, expand the view, and edit to align with your statement. - Aim for a $0.00 difference between your statement and QuickBooks; upon achieving this, select Finish now.
Next Steps: Review Past Reconciliations
Run a reconciliation report to assess your progress.
- Head to Settings,
- Then select Reconcile,
- Now choose History by account.
- Print or export reports for sharing.
Edit Completed Reconciliations
While you can make changes to past reconciliations, exercise caution as it may impact account balances.
Review previous reconciliation reports and follow guidelines for unreconciling transactions or seek advice from your accountant for more complex adjustments.
Reconciliation Report
Once you’ve completed the QuickBooks Bank Reconciliation, the system generates a handy report for you. This report isn’t just a summary; it’s your key to understanding your business finances. It breaks down the month, showing where you started and where you ended. Plus, it neatly lists the transactions that are all sorted – what’s cleared and what’s still pending, giving you a comprehensive view of your financial landscape.
How to Access the Reconciliation Report?
To access your reconciliation report, follow these straightforward steps:
- Navigate to the ‘Reports’ section on the left side panel.
- In the search bar, type and select ‘Reconciliation Report.’
- Choose the specific account for which you want the reconciliation report.
- Use the drop-down menu to select the desired period.
- Voila! Your reconciliation report is now visible, providing a clear overview of your account’s status.
Reconciliation Discrepancies
When the amount difference between QuickBooks Online and the bank statement isn’t zero, several reasons might account for it. Discrepancies could stem from alterations or deletions of previously reconciled files, the addition of new files, or variances in the opening account balance.
Factors contributing to discrepancies include unaccounted bank charges, uncleared checks in QuickBooks, and forgetting to input bank-posted transactions into QuickBooks. Timely recording of transactions in QuickBooks helps prevent such issues, ensuring a more accurate reconciliation process and avoiding potential roadblocks.
Conclusion
In conclusion, performing bank reconciliation in QuickBooks Online is a fundamental practice for maintaining accurate financial records. This process not only ensures the alignment of your QuickBooks transactions with those in your bank statement but also helps detect discrepancies, avoid errors, and provides a clear understanding of your business’s financial health. By following the steps outlined in the reconciliation process, you can confidently manage your financial data, make informed decisions, and foster the overall success of your business.
If you have any more queries reach out to team of QuickBooks Online experts at +1-888-245-6075.
Frequently Asked Questions
1. Navigate to Reports.
2. In the Find report by name search bar, enter “Reconciliation Report.”
3. Choose Reconciliation Reports from the search results.
4. Pick the specific Account for the reconciliation report.
5. Use the Report period drop-down arrow to select the reconcile period.
6. Click View Report to access the desired reconciliation report.
1. Access the Reconcile feature from the Gear icon menu.
2. Select the account you wish to reconcile and click on Reconcile Now.
3. Input the ending balance and the ending date of your bank statement period.
4. Mark off transactions present in both your bank statement and QuickBooks.
1. Input an adjusting entry.
2. Navigate to Transactions and then Reconcile.
3. Proceed to reconcile your account.
4. After a thorough error review, click Start reconciling.
5. From the dropdown, choose Finish now.
6. Select Done to complete the process.
Ensure the reconciled transactions align with your statement. After reviewing all the information in this article, aim for a zero difference. If the difference persists, consider unreconciling all transactions and starting the process afresh.
They’re sorted by statement dates.
1. Access the Reports menu.
2. Hover over Banking and choose Reconciliation Discrepancy.
3. Select the relevant account and click OK.
4. Examine the report for discrepancies.
5. Engage in a conversation with the person responsible for the change, as there might be a valid reason for it.
